Tuesday, 31 October 2017

Sin City Stamps Occult In a Box: A Spooky Altered Matchbox

Hi all

I have a spooky make to share using Sin City Stamps. We also have a  fan group https://www.facebook.com/groups/sincitystampsfangroup/

Large matchbox
White card
Black ink
Crackle paint
Orange paint
Purple paint
Walnut stain or a tea bag


Cover a MDF matchbox with gesso before painting with orange chalky  finish paint.
Add crackle paint and then paint over with orange paint.


Stamp the center  and sides of the box with the filigree stamp from the Skeletons Halloween Set.

Stamp out the bottles and wildflowers onto white card. Coliur bottles with walnut stain or a cold tea bag. Trim the tenticles off the wildflowers and glue behind the bottles.


Paint inside orage and the draw in purple. Glue a pumpkin bead on the front.


Fill draw with spooky things.

The ouija board is a dolls house miniture. The tarot cards can be printed off here and the rest of the bits are made from beads.


Thank you for visiting.


Monday, 30 October 2017

Artful Days October Goodie Box Projects

Hi all

The nights are drawing in and there is a chill in the air as we approach winter. Everything is a beautiful rust and orange colour and Halloween is almost here. So the blog will be full on Christmas from November until the 24th December. I am closing the season with these projects i created for the Artful Days Goodie Box and I will link all the tutorials under the main photos.

Here is a link to the  shop and blog http://artfuldaysj.blogspot.co.uk/


My first project is a layered mixed media card 


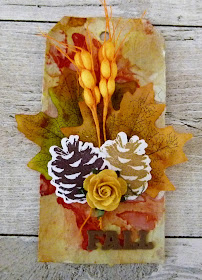
My fall tag instructions are here 


My Shaker card tutorial is here


I will  be back with the December box which will be revealed on the 25th November.

Thank you for visiting and have a haunting Halloween 


Saturday, 28 October 2017

Rick St Dennis 31 Days of Halloween Googly Eyed Shadow Man Tag

Hello crafty friends

Halloween is approaching and i am back with another spooky make using the new exclusive Shadow Man image. Released today as part of the 31 Days of Halloween blog hop which starts here

Terra
Black Dragon
Susan
LeighSBDesigns
Lyneen
Stampendous Stamps
Lost Coast Designs/Carmen's Veranda
Tee
Alison
Sarah
Nan
Airless Chambers
Jessica
Kat
Shell


I started off by inking a blank tag with Distress Oxides and stamping over the background using the grunge backgrounds stamp set.


I tgen coloured in this chaming chap using Distress Oxides and a water pen. I then stuck on some googly eyes to bring him to life.


I finished off the tag by adding a sentiment and charm.

Thank you for visiting

Cherish the Memory Classic Christmas

Hi all

Here are a few cards i made up using the Classic Christmas Card Kits available  at Cherish the Memory.

https://www.etsy.com/uk/listing/542527344/classic-christmas-die-cut-block-for-card?ref=shop_home_active_6


This one has a traditional Nordic feel to it


I used A6 card blanks which the base papers fit really well and made up the topper following the instructions.


These all come with different pieces so you can really customise each card if you wanted to .


Thank you for visiting


Thursday, 26 October 2017

How To Create Horrific Halloween Decor with Brusho


Hello crafty friends
I am back with a Halloween make  that has a creepy weird vibe to it. I wanted to create something i could use as a decoration so i altered this mdf birdhouse. 


I started off by painting every piece with gesso and then a mix of orange and red acrylic paints. I blended the colours together  and left it to dry.


I then assembled it and dyed white paper flowers with Brusho Crystal Powders. I added a little of the brusho powder to the center of the flower and spritzed with water until it had spread out across the flowers.


I then added the faux spider web across the top and front because i wanted to make it look more haunted. 


I then glued glass eye cabochons and skull beads to the flower centers because you can never have too many creepy embellishments in your collection.  I finished off the project by placing  a set of battery powered lights  inside the bird house. You can pick them up in the local pound shops.


If you haven't run for the hills already, Thank you for visiting.


Monday, 23 October 2017

How To Create A Wonderfully Wicked Greeting Card

Hi all

It's never too early for Halloween and we have plenty of stamps for this occasion over at Sin City Stamps so come along and check out the frightfully good creations the team will be sharing this month.

Products used

Halloween themed 12 x 12 paper
White Card Stock
Black ink pad
Sentiment cutting die


Take a 5 x 7 card and cover with patterned paper.
Cut out a 4 x 6 rectangle out of patterned paper and adhere to center of card.
Stamp a few cobwebs onto the corners of the inner layer and add a couple of spiders.


Stamp out the skeleton onto white card and cut it out. 
Adhere to bottom corner of the card using 3D foam tape.
Stamp out the Spooky stamp and add to bottom of the card.


Stamp out the skull key onto card and cut it out before adding to the card.
Finish card off by adding a sentiment.


Thank you for visiting


Sunday, 22 October 2017

Colourcraft Heart With Tyvck Flowers

Hi all

I am on the blog today with a Winter themed wall hanging. I used Tyvek paper to create embellishments.


 Take a mdf heart and paint with gesso before painting it with Copper Aztec Metallics Lustre paint and leave to dry.


Paint over the heart with crackle medium and leave it to set before painting over the top with white acrylic paint.


Cover surface with Aztec Metallic Lustre White Pearl  paint to add a icy shimmer.


To create the flowers i.used a die cut to cut out circles from the Tyvek paper. I tried it with cog dies and achieved a more textured look.


Paint the circles with Aztec Metallic Luster or fabric paints.


Punch a hole through the centers and use a  heat gun to crinkle up the Tyvek to create the flowers.


Finish of by adding flowers and foilage around the Tyvek flowers and add lace to the top of the heart so it can be hung up.

Thank you for visiting

Saturday, 21 October 2017

Artful Days October Goodie Box Reveal Mixed Media Card


Hi all
Here is my last project for the October box on the team blog this evening.


Thank you for visiting

Tuesday, 17 October 2017

How To Create A Dazzling Christmas Decoration


Hi all

I am back with a quick Christmas make showing how Best Glue Ever can be used to create fesive decore.


Start off by taking the letters and painting some red and adding decoupage paper to the rest of the letters.


Leave it to dry and then use Best Glue ever to cover the letters with gems and pearls. Best Glue Ever sets tacky so really small embellishments stay stuck and do not drop off once the glue starts to dry.


Once everything has set. Use Best Glue Ever to glue the letters together to form one word. This glue is great for wood as once it sets it sticks tight.


Thank you for visiting


Monday, 16 October 2017

Swedish House Crafts: Families Are Like Nuts

Hi all

I have a fun card to share with you using Gummiapan stamps and dies. I'll tell you how to make it in easy few steps.


Cover a 6x6 card with patterned paper and cut out two integrated rectangles diecuts. 


Cut out another layer using the Old Paper dies. Cut out another piece using the smaller die and stick them together. Cut out a doodle circle from white card and stick to centre if the card and then stamp out a sentiment on to card and colour it in. Cut out sentiment and stick to center of the circle.


Decorate with ribbon flowers.

Thanks for having a look at my post.


I used these products in this project