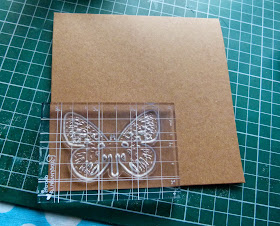
Today I am going to teach you the basics of using heat embossing on your projects.
First of all you can heat emboss on anything that will hold high temperatures such as wood, acetate and card. if you are not sure if you can heat emboss on something then test a small area of the material first.
lets look at some of the equipment you will need.
To heat emboss you will need a heat tool not a hairdryer as the force of the air coming out of the hairdryer will blow the power off the project and not infuse the embossing powder, also a hairdryer does not concentrate the heat in one area which leaves an uneven effect,trust me I tried doing it the DIY way then had to buy a heat tool which you can buy from around £15.
You will need to use a ink to hold the powder on to the project, use pigment inks as these are sticky and slow drying. If you use a normal ink pad then the powder will only stick to part of the image or dry before you can heat the powder. You can use any coloured pigment ink or use a clear embossing ink which is invisible until you pour the powder over it.
Then there is the main product, the embossing powders of which there are many different colours and brands and it's up to you to find ones you like. In this tutorial I have used the Papermania embossing powders.
If you use a tray such as the Anita's clear away tray, then you can capture any spilled powder and pour it back into the tub. You can use a piece of folded up card but eventually this gets messy as powder and ink will stick to it. A selection of different sized acrylic stamping blocks will allow you to use a block that fits your stamp correctly and this allows you to apply a even amount of pressure on the stamp.
Now on to your first technique which is very basic.
1) Take your stamp and ink it with clear embossing ink. You can't see this ink so you need to dab it all over the stamp to make sure you have covered it completely.
2) Place your stamp into position and hold the block still with one hand and apply pressure by pressing down all over the stamp with the other. By using this method you stop the block from rocking and causing the image to smudge.
3) Place the project over a tray and pour the embossing powder over the stamped area. You should see your image appear as the powder is poured off it.
4) Give it a firm tap against the base of the tray to remove any excess powder.
5) Place the project onto a flat surface that is heatproof and then heat the powder with a heat tool. As you move the heat gun over the powder It should change colour and turn shiny.
6 ) You can leave the embossed image as it is or you can spritz it with spritzing ink and then dab off the excess ink with a paper towel.
Thank you for visiting and please leave a comment if this tutorial was helpful or if you have any questions


Nice tutorial Katie. Thanks for sharing.
ReplyDeleteA very helpful tutorial Katie. Love the end project too x
ReplyDeleteGreat tutorial hun xxx
ReplyDelete