Followers

Monday, 31 August 2015

Docrafts team blog hop: Matchbox Madness


The Docrafts Project Design Team are back with another team hop and this month we challenged each other to make a match box shrine. So here is mine which i made using the Nature's Gallery range.


I started with a template that i had printed onto card and covered both sides with patterned paper and scored the lines on both sides so i can fold the flaps.


I used adhesive lace on the edges of the box and then made a bow with jute twine and glued it down. The flower is made from the mulberry flowers from Papermania and i spritzed them with Artiste Cardinal Red ink.


I used the die-cuts from the Nature's Gallery Ultimate decoupage kit.


Thank you for visiting and please pop over to the other blogs for more inspiration.


Sunday, 30 August 2015

Make it Monday 43: Snapshot

                                                                           Hi all

I am playing along with The Memory Nest again and this time i have dug out my Dear Lizzy papers. I am trying out for her design team i can dream right? If you would like to join the challenge here is the link http://thememorynest.blogspot.co.uk/2015/07/make-it-monday-no-43.html


I love this sketch because it uses more then one photo on the layout which i am not very good at doing. I  made this page as a summery of my holiday from May and covered the highlights. I will do a similar page for September but i think it will have to be a double.


I love the photo frame from Trimcraft and i use them on everything.


Top tip: If you run out of letters fill the blank with an embellishment instead

Thank you for popping in xx

That Craft Place Anything Goes August 2nd Challenge


Hi all

i am back with another DT project for That Craft Place Challenge Blog. If you would like to join our mixed media challenge then link up your blog to http://thatcraftplaceblog.blogspot.co.uk/ for a chance to win some goodies.


I have a layout to share this month and i will start off with a bit about how to build the background. 

I started by using the mini squares stencil mask and then painted over it with DecoArt Crackle paint.

 Once dry  i took  three spritzing inks: Artiste Cardinal Red, DecoArt Purple Mister, DecoArt Magenta Mister and spritzed them on to the page. I then spritzed water over them and let the colours run into each other and added even more ink and let it run down the page. I finished off the background by using texture stamps and stamping them arounfdthe page randomly.


I used a wooden frame from the That Craft Place shop and painted it with crackle paint before spritzing with inks. To stop the page bubbling up spritz water onto the front and back of the page as you dry it with a heat gun.


I used a photo of my Nan and Grandad


I spritzed white paper flowers with misters


I added lace and textile in between  the paper layers to add texture and painted the MDF word to use as a title.

Thank you for visiting and the shop links are bellow


That Craft Place Natter &Chatter That Craft Place Etsy Shop blog

Saturday, 29 August 2015

Docrafts Christmas 2015 Create Christmas: Altered tree ornaments

Hi all 

I am back with more Christmas creations and this time i am using the wooden ornaments from the Docrafts Create Christmas range.


I painted them all with Blanc Acrylic paint. I used gold spritzing ink on the tree and decorated it with a bow made of lace trim, I also spritzed the bow with Ocean Blue and Gold Spritzing inks


I used the Papermania basics paper flowers and added colour to them with Spritzing inks.


I added white glitter to the base of the snowflake and spritzed with gold ink to hold it in place.


I added mini bells and gold berries to the bow and inked the edges of the Gingerbread man with gold ink.


Thank you for visiting and you can find a tutorial for these projects here

Friday, 28 August 2015

Make it Monday no 46


Hi all here is my take on the sketch for Make it Monday no 46. If you would like to link up then visit www.thememorynest.blogspot.co.uk


I loved the circles on the sketch, I cut out the doilies from the Simply Floral 12x12 paper pack an mixed them in with pale yellow buttons. The photograph is of my Great Grandmother Ethel and my Grandmother Irene i dont know anything else about this photo but it must have been taken around the 40's era.


I finaly found a use for the lace notelets i had lying around.


Thank you for visiting


Make it Monday no 44

I am back with my entry for Make it Monday no 44 and i have made a card with this sketch from www.thememorynest.blogspot.co.uk


I used the Forever Friends Decadent range for this one. There is a lot of gold foil and sparkles in this range.


Always add glue to self adhesive gems when sticking them onto foil coated paper as they drop back off again.


Thanks for visiting


Tuesday, 25 August 2015

Trimcraft Christmas 2015; First Edition Gilded Winter Cards


Hi all 

I am back with a few cards i have made using the new Gilded Winter paper pads


I used the Dovecraft essentials photo frames to create a layered topper to use on the card i have a tutorial here https://www.youtube.com/watch?v=-NpOWLZWb5A


                  My second card i made uses all the lovely gold and glittery bits in the paper pad.


I added a few sparkles on using the Mirabelle embellishments and glitter glue


Thank you for visiting

Friday, 21 August 2015

Docrafts Blogger Outreach program: Gorjuss Girl cards

Hi all

I am back with a sneak peak of Santoro Tweed which is the new Gorjuss Girl range released in September.


I was given one of the stamps sets to try out and i coloured with Artiste Watercolour pens.


I stamped on to an A6 card blank with pigment ink and coloured it in. I used a water pen to create a watercolour effect using the Artiste pens.


Thursday, 20 August 2015

Summer Themed Cards Using First Edition Markers


Hi all 

i have some bright summer cards to share today. I don't know where summer has gone lately i would never imagine wearing PJs in July while making Christmas projects oh wait this is England it could be snowing next week.


Here i am revisiting the Fun Fair range with its bright colours and fun images.


I think the bears are so cute

Another vintage card but this time i have used mostly yellow which doesn't get used much.


I used the First Edition Markers to colour the stamps. They come in sets of matching colours such as pinks and purples.

Wednesday, 19 August 2015

Trimcraft 'scrapbook feature: Willow A4 layout

Hi all
for this month's feature i thought i would try something different and made an A4 scrapbook page using the Santoro Willow range.


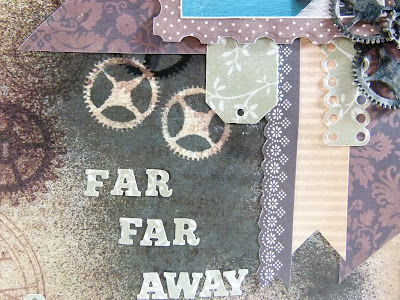
I love steampunk so when i got this range to work with i couldnt help but use some of the steampunk elements within this range


I used a mixture of dies and strips of paper that had been hand cut into different shapes to build the layers


The cogs are cut from cardboard and i used them as a mask to decorate the background


When you remove the cardboard cogs off the page you are left with an outline and you can reuse the cogs later


Thank you for looking and you can find a full tutorial on the website www.trimcraft.co.uk

Friday, 14 August 2015

The Memory Nest: Make it Monday no 45

Waving hello to the DT over at The Memory Nest. Love your sketch Crystal so i have made a layout with it. Here is the link to the blog if anyone would like to join me http://thememorynest.blogspot.co.uk/2015/08/make-it-monday-no-45.html


I used the barcode stencil mask by 13arts on the background and then used the turquoise splash ink to create the splats and flicks across the page


                         I changed the layout of the photos but stuck to the rest of the sketch


We decided to visit Stafford upon Avon while the weather was nice and went into the Butterfly farm. Here are a few snaps of the Butterfly farm and riverside


I used the Bohemian and Botanical notes paper pads for this layout. I cut the flowers out of the patterned paper from the 12x12 Bohemian pad.


I cut the butterflies out of the cover as they had glitter on them and sparkled.

Thank you for visiting