Followers

Showing posts with label christmas. Show all posts

Wednesday, 14 August 2019

It's Snome Time Merry Christmas Card

 Hello all

The Christmas makes are slowly creeping onto my blog and Instagram this week starting with the new collection called It's Snome Time designed by Helz Cuppleditch who you will be familiar with. The collection is now available on the Craft Consortium website and includes stamps, 12 x 12 papers, decoupage toppers and charms. This collection matches up really well with The Essential Craft Papers Wood Effects Papers which are now available in 6 x 6 size.


Links


 Thank you for visiting


Friday, 14 December 2018

Gecko Galz Christmas Tree Decorations

Hello all

Welcome to the Gecko Galz  25 Days of Christmas Decorations event. This year each team member will be providing you with 25 days full of festive inspiration.


This is an altered tart tin that i painted up and added lots of bits too. 


Blog http://geckogalzscrapbooking.blogspot.com/

Etsy  https://www.etsy.com/uk/shop/geckogalz

Group https://www.facebook.com/groups/654948344560159/

Thursday, 13 December 2018

The Glittery Hands Box Clear Baulble

Hello all
I have a simple make to share using the November Glittery Hands Box.


To make this simple festive decoration all you need to do i gather a selection of shiny things and a small Christmas tree.

I glued the plastic diamonds to the bottom of the clear baulble and then added sequins.

I glued one of the sentiment inside one half of the baulble and held it down while the glue set.

Next i glued down the mini tree and finished by threading twine through the top.

Wednesday, 14 November 2018

Gecko Galz Vintage Christmas Artist Trading Cards

Hi all

I am back with a set of artist trading cards which use vintage images and papers from Gecko Galz


I used the Merry and Bright papers on the ATC base and then used stamps on the background.


Then i cut up the collage sheet and place the pieces into possition before gluing down.


I added words and embellishments to finish.


Follow Gecko Galz Here

Blog http://geckogalzscrapbooking.blogspot.com/

Etsy  https://www.etsy.com/uk/shop/geckogalz

Group https://www.facebook.com/groups/654948344560159/

Follow me


https://themuseoftenebrocity.blogspot.com/

https://www.instagram.com/lifeinasnapshot2013

https://uk.pinterest.com/katie20121/pins/

https://www.facebook.com/Lifeinasnapshot2013/

https://twitter.com/Katiel27?lang=en

https://www.youtube.com/channel/UCVLQgPve17Jo8XZ_TMq2-EQ?view_as=subscriber


Thursday, 11 October 2018

Craft Consortium Little Fawn Foxy Card

Hello all

I have a card to share using the new Little Fawn collection by Craft Consortium. 


The collection has a a selection of stamps, papers and matching embellishments. 


Thank you for visiting

Monday, 8 October 2018

Craft Consortium Christmas Candle Holder

Hi all

I have a Christmas piece to share today. I went for maximum sparkle for this one. You can buy the MDF Candle Holder from the Craft Consortium website here.


Start off by assembling  the candle holder and then paint a base coat of white onto it.

Next mix pva glue and water to make a paste and add decoupage paper to the base of the candle holder.


Glue tinsel trim around the candle holes.

Paint the Christmas Tree and then start gluing gems,pearls and anything else that shimmers to the tree.


Product list


Thank you for visiting

Friday, 28 September 2018

Saturday, 1 September 2018

Saturday, 13 January 2018

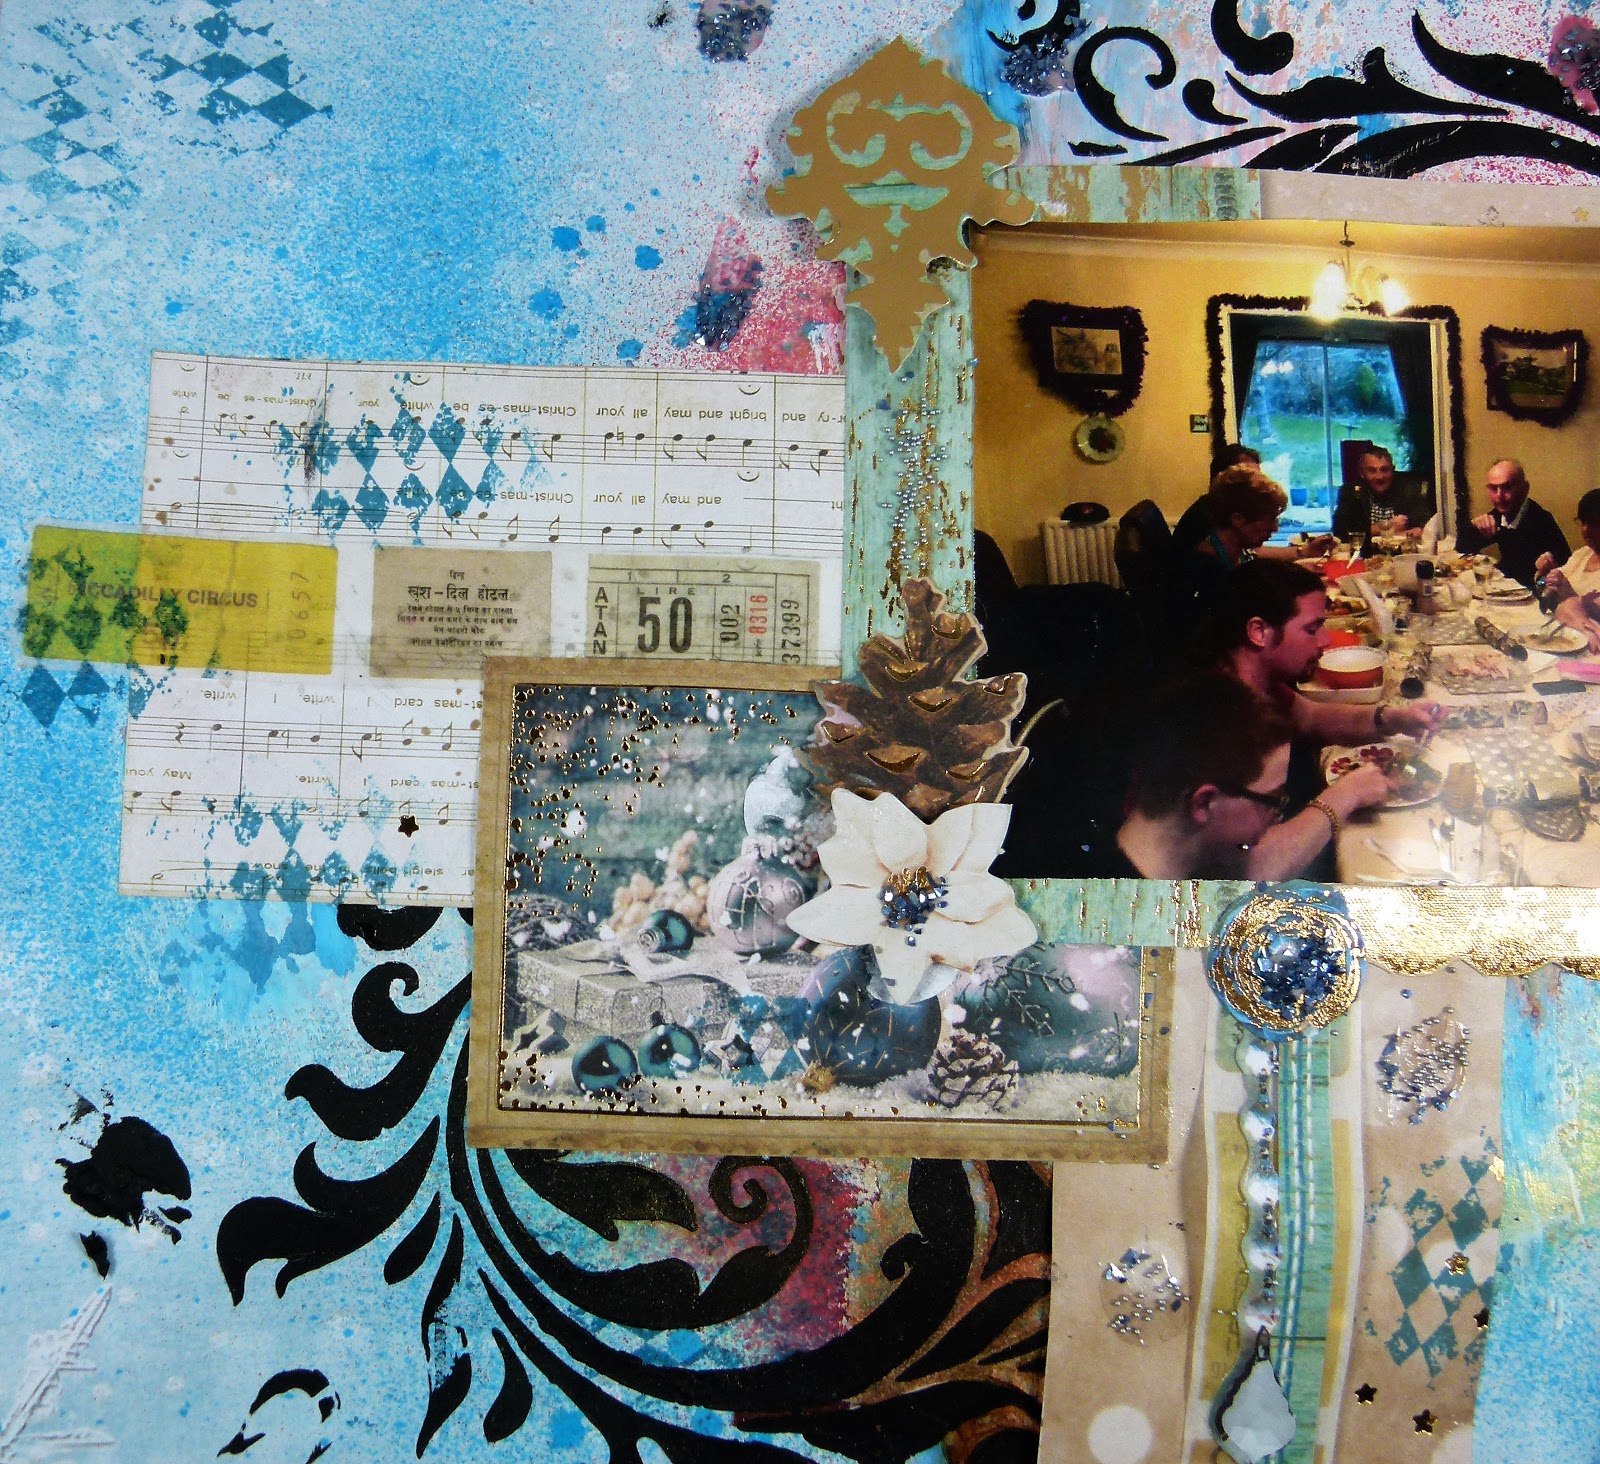
Cherish The Memory Merry Christmas 12 x 12 Christmas Layout

Hi all
I am back with a scrapbook page using  the  Sweet Winter Season Collection available at Cherish The Memory.

Products


I started off by applying a stencil mask to the base of the page and then spritzed and few inks over. I then stamped a background stamp over the page randomly.


I used one of the A6 cards from the card kit to matt the photo on and then i cut up some of the other A6 cards to use as layers.


The die cut pieces are perfect for adding layers and embellishments 


Thank you for visiting


Wednesday, 20 December 2017

How To Create A Beautiful Vintage Christmas Card

Hi all

I have used the Steampunk'd Christmas Stamp Set to create a vintage Christmas card. You can use these stamps for more traditional Christmas crafts too. 

Product list
6 x 6 Card
8 x 8 Christmas papers
Paper Poinsettia Stickers
Banner Nesting Die
Red ink pad
Wooden Frames
Marker Pens


Start off by covering a 6 x 6 card blank with patterned paper. 
Then cut out a large rectangle from green pattered paper.
For the next layer, use a banner die and cut out a sheet of matching paper, Wrap red twine around the top and adhere to card.


Glue paper to the back of the wooden frame and adhere to card.
Stamp out the Santa stamp onto white card and colour in with markers.
Cut out the Santa and adhere to the wooden frame


Decorate with paper flowers and cut a sentiment out of the patterned paper.


Thank you for visiting


Monday, 11 December 2017

Sin City Stamps Quick Makes Christmas ATCs


Hi all


I started by painting the backgrounds with Brusho powders which are like a watercolor. I then added a layer of modeling paste using a stencil mask and then applying more watercolor once the modeling paste has dries a little.


I then stamped out two Santa's onto white card stock and painted Expandit onto the beard and hat. Expandit is a medium that fluffs up like snow when heat is applied. It is so fun to play with.
I then coloured in the rest of the image with water color and skin tone markers.


I added a few words with an alphabet stamp. I tried to blend it in a bit better by coloring in letters with ink. I have various bits of art stones and micro beads which i added to the ATCs by applying blobs of clear modeling paste to the sections i wanted to sprinkle the bits over. I finished off by adding white thread to the card for extra texture.


I repeated the above steps but with the little hat instead. I used gold glitter paint on the polka dots and once it dried it looks like glitter enamel dots.


Thank you for visiting