Followers

Showing posts with label Fiskarettes Design Team. Show all posts

Thursday, 24 March 2016

Fiskarettes Guest Post: Jellyfish Layout

Hi all
I am guest designer for Fiskarettes this week and i have a layout to share. 


I used DecoArt Media Sprays on the background and used a Stencil over the top once it had dried.


I used the 2 in 1 Artisan Tag Punch for the little tabs and the Square Shape Cutting Stencil for the layers.


I layered up some ribbon and ric rac before adding a tab on the top


I decorated the page with die cuts from the new Under The Sea die set  and sequins.


Thank you for visiting and if you would like more inspiration pop over to the Fiskarettes group https://www.facebook.com/fiskarettes.uk/?fref=ts


Sunday, 31 January 2016

Fiskarettes Projects January.

 Hi all

              I am back with my final lot of projects for the Fiskarettes Design Team. It has been a short term which has gone by way too fast but i have enjoyed working with the team and the Fiskars products. Who knows maybe i will make a come back one day.


I used the Butterfly L Squeeze Punch with the new Grace Taylor Boheme Paper Pad. I then dribbled a bit of ink along the bottom of each butterfly.


I used spritzing inks on the background and then punched out a couple of butterflies and layered them up.


I decorated the centers with gold shimmer dots


i cut several strips of patterned paper up and layered them across the card. I used the Rainbow Interchangeable boarder punch on the top layer.


I used the Heart Template to create a layered topper which i finished off with a butterfly.

Thank you for visiting

Monday, 18 January 2016

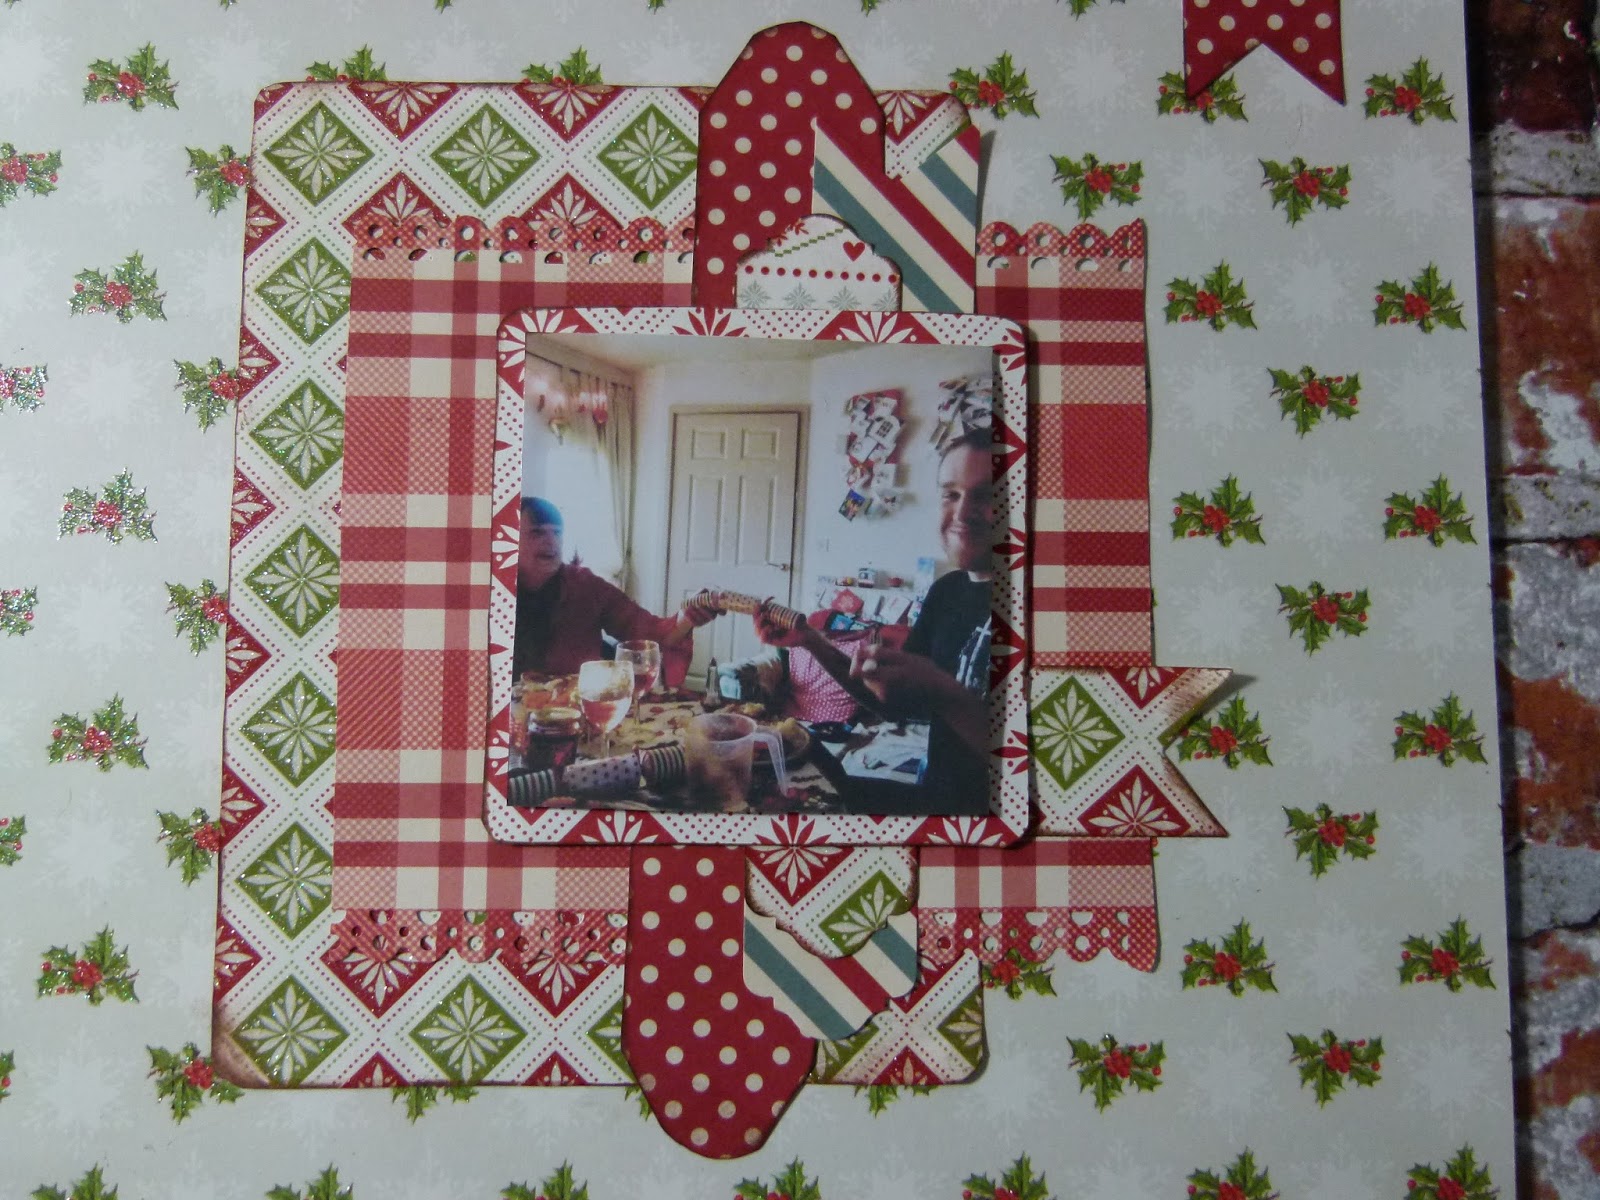
Fiskarettes Tutorial: Basic scrapbooking


                                                                        Hi all
                                I have a new tutorial for all those new to scrapbooking


1) cut out a square from the extra large shape template and mat photo onto it using 3d foam pads


2) cut out a larger square, rectangle and tags from the shape cutter templates.


3) using the interchangeable border punch and the lace border, punch along the top and bottom of the large square.


4) position your shapes over the page and once you are happy with their placement stick them down.


5) use the Banner and Artisan tag maker to punch out more tags. Layer these over the larger tags to add body to the page.


6) Decide on a title for the page and stick it to the page


7) use a banner punch out in the corner of the page to display the date of the event in the photo. 


8) finish page by adding embellishments such as gems and buttons around the page.

Thursday, 24 December 2015

Fiskarettes Design Team Xmas Day Layout With First Edition Christmas Wishes.

                                                                              Hi all
                 I am back with a few photos of my layout i used in the Fiskarettes tutorial.


Wednesday, 23 December 2015

Trimcraft Christmas 2015 North Pole card Inspiration

Hi all

How are we all doing? I know Christmas is around the corner so many of you will be busy. I am moving house too so its rather crazy this month. Here is a simple card using the North Pole Collection by Trimcraft.


I used the 3 in 1 tag maker by Fiskars to make the banner and then cut out the letters using the new First Edition Modern Alphabet Set.


Here is another idea using the same punch. This time i added different shaped flags to the bunting.


I used twine to attach the flags to the card


Thank you for visiting

Katie xx

Sunday, 20 December 2015

Trimcraft Christmas 2015 First Edition Christmas Wishes


Hi all 

I am back with a few cards i made using the First Edition Christmas Wishes Collection.


I love the traditional colours and nordic patterns in this collection.


The sentiment was made using the new First Edition Sentiments Tradional set and was cut out of white glitter cardstock.


I used the Fiskars Interchangeable Boarder Punch with the Rainbow carteridge for the trims. The topper was made using the 3 in 1 tag maker.

Wednesday, 25 November 2015

Fiskarettes Little Pudding Layout With Trimcraft North Pole Collection

                                                           Hi all

I am sharing a layout i made for the Fiskarettes Design Team using the lovely North Pole Collection by Trimcraft. Here is a link to our Facebook page where you can share your makes, win prizes and find more inspiration https://www.facebook.com/fiskarettes.uk/?fref=ts


www.whatkatiedid2.blogspot.co.uk

I focused on the new 3in 1 Tag Maker Banners and Artisan punch for this project. I started off by cutting out the label pattern on the North Pole 12x12 sheet and inked them and then layered them up. 


I used the new torn edges nesting dies from Trimcraft to mount the photos onto the page with and used 3d foam pads so i could slot strips of paper underneath as i built up the layers.


I used the Interchangeable Punch with the new Lace cartridge to add texture to some of the strips. I punched out the tags and layered them in between the layers. I cut the tags in half so i didn't need as many.


Thank you for visiting
Katie xx