Followers

Showing posts with label Leli-bot Crafts. Show all posts

Friday, 13 April 2018

Remember When Blog Hop


Hi all

We are doing a blog hop and the idea is to use something from your stash that is 10 years or more old. So i have chosen the patterned edged scissors which were one of my first craft tools.


Comment on each blog to win a prize:

Anita Scroggins - https://goo.gl/WRGz6V


I am offering a word stamp from The Blank Page Muse and something i handmade as a prize.


Cover a 6 x 6 blank with purple paper and then cut a strip from black paper.

Use the deckle edged scissors along the edge and then cut a large rectangle from grey paper. Use the torn edge scissors around the edges and ink with dark red ink.

Grue the black strip to the back of the grey piece and then stick it to the card.

Take a topper and use 3D foam tape to secure it to the edge of the card and then add a sentiment.  


Cover a blank 5 x 7 card with black paper.
Glue lace across the bottom of the card to hide where the paper joins. I used two sheets of 6 x 6 paper so i had to cover the card in two parts.
Cut out a large rectangle from purple paper and use the patterened edged scissors around the edges. Ink it in purple and stick it to the centre of the card.
Cut put a wide strip of patterened paper and use the patterened edged scissors around then glue it down the edge of the purple layer.
Add the topper to the centre and a sentiment to finish


Tuesday, 22 November 2016

Sin City Stamps Design Team Application


Hi all

This is my application for the Sin City Stamps Design Team Call.


Art Journals


Decoart white modeling paste
Decoart white gesso
Dry wall tape
Kaisercraft  Texture Stamps Edges, Film Edges,36
7 Gypsies Steampunk set
Lillli Bot Crafts Gothic Rose Stamp Set
Banana Frog Alphabet stamps
13arts Yellow green Mister
Colour Chemistry Sepia mist spray
That Craft Place Clock Stencil


DecoArt crafters acrylic island blue
Clearsnap Colour Pop Minis Kiss, Night, Fresh, Black and Ice
Susan k Weckesser Co Branded Unity A Little Bit Love Stamp Set
Julian Vance Grunge Love
Tando Creative Mini Sequin stencil
DecoArt Pixlated Stencil
Susan K Weckesser Doodles Stencil
DecoArt Black modeling paste
DecoArt white modeling paste

Mixed media card


DecoArt Scale 12 x 12 Stencil
DecoArt Media Mister Magenta
DecoArt Pixlated Stencil
DecoArt White Modeling Paste
Kaisercraft Crackle Stamp
Kasercraft Harlequin Stamp
Prima Rossibelle Paper Collection

Altered Steampunk Lamp


DecoArt Chalky Finish paint Lace 
DecoArt Chalky Finish Treasure
Oak House Studio Colour Chemistry Sea Blue
Oak House Studio Sea Life stamp set
Things to Alter MDF Anchor 4 inch 
Things to Alter MDF Cogs and Washers
One Old wooden Lamp

ATC


This one hasn't been blogged yet so here is a tutorial on how to make things look rusty


MDF ATC blank from Things to Alter
MDF cogs Things to Alter
DecoArt black and white gesso
DecoArt Metallic Lustre Turquoise, Rose Gold and Copper Kettle
DecoArt Crafters acrylic Oatmeal


Mixed Media Art Journal The Beginning


Hi all 

I have a new art journal to show you and i have included a tutorial too. I have been spending time developing my mixed media style and i am going towards bright and grungy which is going to be interesting.


I started off by applying texture using stencils and modelling paste which i applied around the edges. I then painted the whole page with white gesso and added bits of dry wall tape. You need to add more gesso over the tape as it is smooth.


Next i painted the pages over with Crafters Acrylics starting with Oatmeal and then building up the paint layers using Early Spring green and Island Blue. I blended the colours together and then spritzing misting ink over. I applied some with a brush to get darker patches of ink.


I then used the Kaisercraft Edge stamps to build up a boarder and added texture around the edges.


I used the Kaisercraft 36 stamp to build texture up starting from the top corner


I stamped the skull onto the page first as a place mark and to get the details on the page that would be lost in the next step. I stamped the skull onto white card and cut it out before adhering it to the card and added some cogs.


I highlighted the stencils by dry brushing paint over them and the dry tape.


I finished the layout off by stamping my quote out onto card first and then cutting the words out. I did this so i didn't accidentally smudge them words on the page.


Monday, 3 October 2016

The Vintage File Issue 1 Rockabilly Themed Brooch Card Get A Free Copy Of Issue 1


Hi everyone

I have some more exciting news to share!!
I have been asked to be the resident designer for The Vintage File an online magazine that is about all things vintage from crafts to cars. Here is a link to their social media
Facebook: @TheVintageFile
Twitter: @TheVintageFile

If you sign up to the news letter you get a copy of issue 1 completely free


I had a Rockabilly theme to work with and i do love the 1950s. It is the era of rock and roll as the United States became a major global influence on the world after the second world war. The idea for this card started off as a brooch made out of a MDF Shape from Things to Alter. 


The main card was made using the Red Hot Rockabilly Collection by Lelli-bot crafts. I covered a 6x6 card with polka dot paper and then added a 4 cm x 4 cm square in the top corner. I took a piece of Denim material and cut it into a pocket shape before adding stitching around it.


For the brooch i painted the MDF shape with DecoArt Crafters Acrylics and draw the lines back in with a black marker. I then punched in some holes and added the charms.


Here is my article which i will be in once a month


Thank you for visiting and comments are welcome :)


Saturday, 5 March 2016

Lelli-bot Rockabilly


Hi all just showing you my card i made using the Lellibot Crafts Rockabilly kit.


I like the rock themed toppers that come with the kit.

Thursday, 11 February 2016

Lelli-bot: Steampunk Dress card tutorial

Hi all

I am sharing the lovely Steampunk collection by Leli-bot. I used the 6x6 paper pack and the stamp set.


I made a 3d card by stamping out the dress onto stamping card and colouring it in.


I then stamped out two more but inked only the skirt part and coloured both in and layered them up.


                              There is quiet a bit on the stamp set including corners and cogs

                                                           
                                                             Thank you for visiting

Wednesday, 27 January 2016

Tutorial : Making a Steampunk Butterfly Card


Hi all

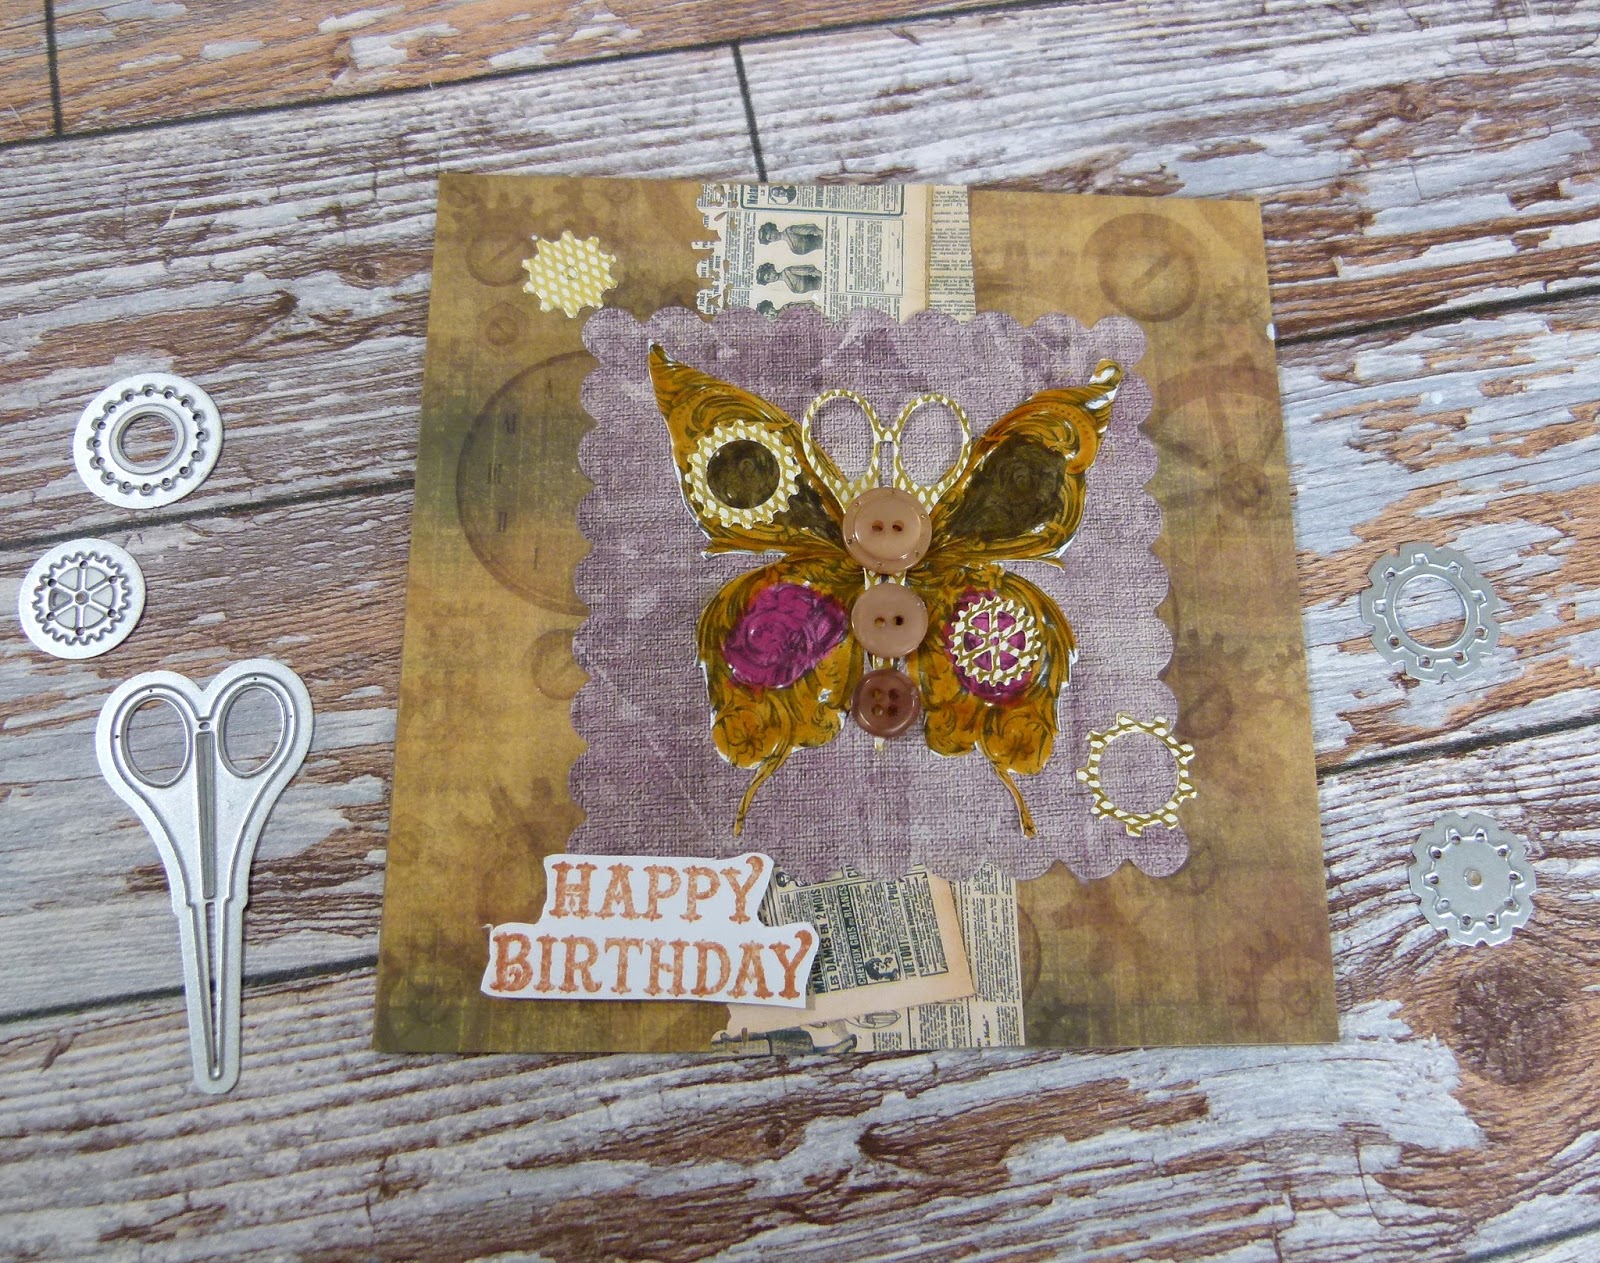
I am back with my first tutorial for Scrapmixers. I am going to show you how to create a layered steampunk card.


I used a selection of Leli-bot Steampunk papers and the butterfly stamp by Gecko Galz


First cover the card with patterned paper and then cut a strip off another sheet. Use a boarder punch to create a lacy edge.


Cut out a square using nesting dies and adhere to card.


Colour your stamp in with marker pens and adhere to centre of square


I used the First Edition Haberdashery Die Set and cut out the scissors using the gold gilded paper from the Botanical notes paper pad. I stuck this into the centre of the butterfly.


Next i die-cut some small cogs and adhered them to the butterfly wings and around the card.


Add a sentiment


Finish off the card by adding a few small buttons down the center of the butterfly. I lined them up by size so they formed the body of the butterfly.


Here is the final card.


Here are a few close ups of the topper so you can see how i put it together.


Thank you for visiting

Katie x


Saturday, 9 January 2016

Introducing Lelli-bot Crafts Gothic Rose Collection

                                                                            Hi all

I am back to share some cards i made using the lovely paper craft  collections by Lelli-bot Crafts. You may have seen these kits on Create and Craft but i was lucky enough to get them for half price in the End of year event. Here is the link to the Facebook store page https://www.facebook.com/CraftyQueensUk/?fref=ts and the Lelli-bot Facebook page https://www.facebook.com/LelliBotCrafts/?fref=ts.

The first collection i have a had a play with is the Gothic Rose Collection. i discovered  my dark side last summer so the non cute stuff appeals to me and i love to try out new things that challenge the norm because normal is boring.


I spritzed a blank card with purple Artiste Spritzing ink and left it to dry before stamping the floral corner stamps at opposite ends. I then Stamped the skull twice, Once onto the card and then onto card stock and cut it out. i did this so that i could layer up the skull and keep the ink speckles.


The roses i stamped onto card and cut out


Before leaving the card to dry, lift it up and let the ink run to give it a grungy look. Make sure you put some newspaper underneath otherwise you will be covered in ink.


Here is mu second card which i again inked a blank card and flicked black misting spray over it. I stamped the skull and flowers out onto card and cut them out.


I finished off the card with some adhesive pearls and ribbon flowers

Thank you for visiting and if any of you also blew all your Christmas money in the sale i would love to see what you make with your goodies. Feel free to leave a link to your blog or gallery page in the comments bellow.