Followers

Saturday 29 July 2017

Cherish the Memory: How To Create A Stunning Shabby Chic Wall hanging

Hi all

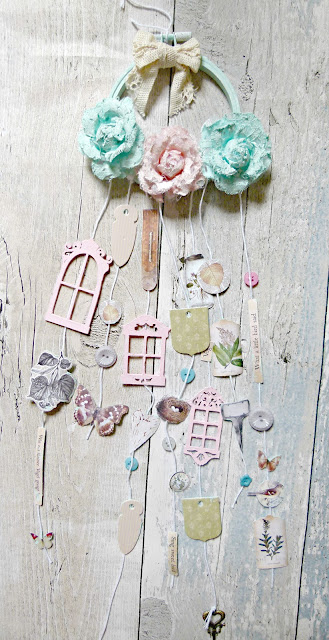
I have created some shabby chic home decor for Cherish the Memory using My Botanical Garden.

Cherish the Memory: How To Create A  Stunning Shabby Chic Wall hanging

I used a 4 inch sewing loop for the base which i painted with DecoArt Chalky Finish paint. I then popped the pieces out  of the labels sheet and glued them to lengths of twine. I used a few odds and ends to fill up the gaps.


Cherish the Memory: How To Create A  Stunning Shabby Chic Wall hanging

I painted the backs so the blended in a bit better once it was upon the wall.

Cherish the Memory: How To Create A  Stunning Shabby Chic Wall hanging

I use some large lace flowers to decorate the hoop. I added gesso to the flowers to tone down the colours a bit.

Thank you for visiting 

Thursday 27 July 2017

Canvas Corp Brands and Relics & Artifacts Match Up


6 x 6 Canvas scrapbook
Relics and Artifacts Regalis

Tattered Angels
Glimmer Glam Silver
Chalkboard Mist Paint - Seven Seas
Glimmer Glaze Paint - Night Blue
Glimmer Mist - Atlantic
Glimmer Glaze Paint - Coconut Shell
High Impact Metallic Paint - Silver


Paint front cover with Gesso

Spritz with Glimmer Mist - Atlantic
Apply stencil and more mist and paint over with Silver Glimmer Glam

Glue denim paper to book spine, apply stencil and glimmer glam
Paint Relic with Glimmer Glaze Paint - Night Blue and Coconut Shell and High Impact Metallic Paint - Silver
Cut up strips from the Architextures paper pad and adhere to cover
add cheese cloth and teal burlap
Add Relic to front
For the inside add gesso and then paint with duck egg chalky finish paint, apply stencils and add ;pieces of paper and junk.
Finish by adding a quote


Thank you for visiting


Tuesday 25 July 2017

How to Create Wedding Themed Tags With Hearty Doodles Stamps

Hi all

More makes from Janet today using my Hearty Doodles stamps avalible at Sin City Stamps.

How to Create Wedding Themed  Tags With Hearty Doodles Stamps

Cut the tag out of card and ink the surface. Cover sections of the tag with patterned paper and ink the edges.

How to Create Wedding Themed  Tags With Hearty Doodles Stamps 1

Stamp out the label from the Wings stamp set and wrap twine around it. Adhere to bottom of tag and stamp a sentiment into the middle. 
Decorate with mini gems.

How to Create Wedding Themed  Tags With Hearty Doodles Stamps 3

Stamp out a few hearts and cut them out. Adhere these along the middle of the card and add gems to them.

How to Create Wedding Themed  Tags With Hearty Doodles Stamps 4

Ink up a white doily and glue it to the top of tbe tag. Trim to fit and then thread twine through the top. Stamp out a mini heart and attatch to top of tag.

How to Create Wedding Themed  Tags With Hearty Doodles Stamps 5

Create your own  print look background by using a sentiment stamp and stamping along the background.

Stamp out a large heart and add to tag 

How to Create Wedding Themed  Tags With Hearty Doodles Stamps 6

Use a texture stamp from the Hearty Doodles set to create a pattern at tbe top of the tag. Cover the rest of thr tag with patterned paper and place half a doily in the centre of the tag.


How to Create Wedding Themed  Tags With Hearty Doodles Stamps 8

Add a row of hearts to the top and add gems to them.

Thank you for visiting


Sunday 23 July 2017

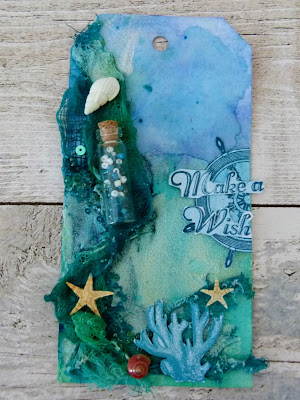
How To Create A Mixed Media Tag With Best Glue Ever


Hi all

I am a guest designer for ScraPerfect this month. ScraPerfect  Manufacture adhesives and other crafting tools, here is a link http://scraperfect.com/


Step one, Apply Brusho powder to blank tag

Take a blank tag and sprinkle Brusho powder onto the  card and use a paint brush with a little water to cover the tag with ink.

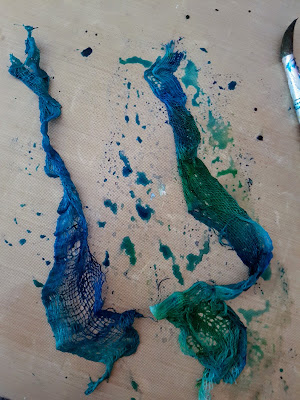
Step 2 Take Cheese cloth and dye with ink

Cut a couple of strips from cheese cloth and sprinkle Brusho powder over the top. Apply water to activate dye and leave to dry.

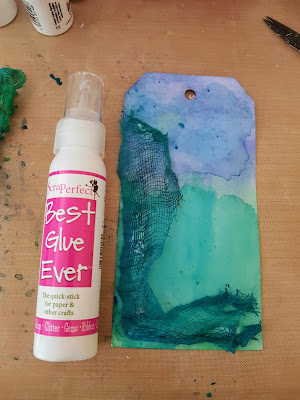
Step 3 glue cheese cloth to tag with Best Glue Ever

Add small blobs of Best Glue Ever onto the tag and adhere the cheese cloth.

step 4 apply texture sand paste

Apply DecoArt Texture Sand Paste to bast of tag and a little over the cheese cloth.

Add beads and shells using Best Glue Ever

Glue seed beads and small shells onto the tag using ScraPerfect Best Glue Ever. Once dry remove any tacky areas using the ScraPerfect Perfect Crafting Pouch.


Fill a mini glass bottle with seed beads and adhere to tag.


Finish tag by adding some seaside themes stamps to the tag .


Thank you for visiting


Saturday 22 July 2017

Cherish the Memory: How To Create A Beautiful Nature Card


Hello all

I am back with another make for Cherish the Memory. I am using the lovely My  Botanical Garden Collection by Studiolight to create this mixed media card.


I covered a blank card with patterned paper and then  cut a section out of 

SCRAPMBG03. I added the square to the center of the card and then i added a stencil mask to the background. 


I made up one of the toppers using the decoupage sheets and glued a tag from the label sheet to the back before adding it to the card.


I finished the card off by painting green ink over the stenciled area and adding a bow made from paper twine


Thank you for visiting


Wednesday 19 July 2017

How to Create a Hot Air Balloon Greeting Card

Hello everyone

Learn how to create this 3D greeting card by following the steps bellow.

Products used

Square Card Blank
Patterned 12 x 12 paper
Paint
Buttons
Tab sticker
Mist inks
Stencil


1) Cover a square blank with pattered paper and apply modeling paste with a stencil.
2) Spritz with misting ink
3) Cut out a 5 x 5 inch square of patterned paper and rough the edges before adding to card.


4) Take a Polaroid frame and cover back with pattered paper.
5) Stamp out two large hot air balloons and one smaller one.
6) Colour them in with pant and cut out.
7) Fold the two large hot air balloons into half and the stick them together at the fold. Trim off any mismatched bits and adhere to edge of frame.
8) If cutting isn't your strong point then cut off the basket and stamp that part directly onto the frame and match it up with the balloon part.


9) Place the small hot air balloon to the other side of the frame
10) Place a sentiment at the bottom of the frame.
11) Decorate with small gems
12) Place a tab at the corner of the frame and decorate with a button.


Thank you for visiting

For more inspiration please join our fan group https://www.facebook.com/groups/sincitystampsfangroup/

Monday 17 July 2017

How To Create Bright and Fun Scrapbook Pages

Hello all

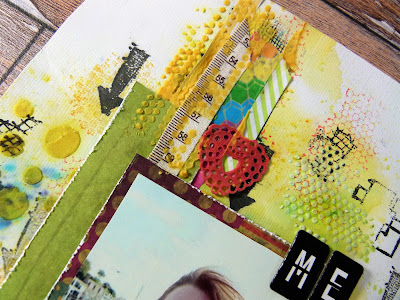
 Learn how to create bright and fun layouts with Sin City Stamps and brusho powders.


1)  Start adding colour to the background using powdered inks. Apply water before sprinkling them over the page.
2)  Use the Journaling and Hearty Doodles stamps to add a layer of texture to the background.


3) mix some of the powdered ink with modeling paste and apply a few stencils to the page.


4) Stamp a few rows of arrows  using the stamp from the journaling set.


5) Cut up a few strips off patterned paper and adhere to page,

6) Add a few strios of washi tape and trims.

7) Mount photo on to cardstock and trim to fit. 


8) Apply a little more modeling paste over the layers.

9) Decorat page with embellishments.


Thank you for visiting
For more inspiration please join our fan group https://www.facebook.com/groups/sincitystampsfangroup/