Followers

Sunday 29 November 2015

Gecko Galz Mixed Media ATCs using Gecko Galz Collage sheets


Hi all 
I am back with a few ATCs to share using the Gecko Galz collage sheets


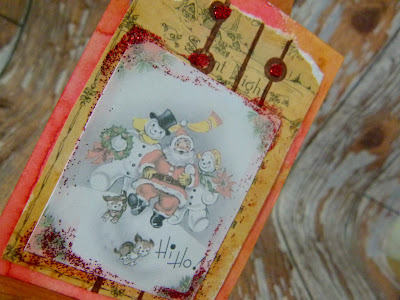
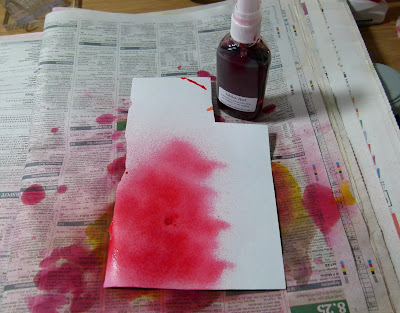
i inked the ATC blanks with Sepia and Jubilee red Inks In A Bottle before spritzing the santa bingo card with Sepia ink. i used the Altered Christmas collage sheet for this ATC


I then tore up the bingo card and stamped over it with mini texture stamps. i cut out one of the images from the collage sheet and covered it in glitter glue.


For this one i inked the music sheet from the Altered Christmas Collage Sheet and then layered up the image from the free collage sheet over the top and added glitter.


The stamp set is from Oak House Studio and is part of the new Daisies and Rainbows set

Thank you for visiting and pop over to the Gecko Galz Facebook group for a chance to win some prizes. https://www.facebook.com/groups/654948344560159/?fref=ts

Friday 27 November 2015

Paperbabes Design Team Art Doll Journal Using Mini Doll Face Stamps

                                                                          Hi all

Here is my first project for the Paperbabes Design Team. we have a new colour challenge on the paperbabe blog which you can find here http://paperbabestamps.blogspot.co.uk/  Here is a mixed media art journal page i made using a mixture of inks on the background.


I used the super smooth stamping card from That Craft Place to build up the doll using the Mini Head and Torso mixed media template. The face was created using the Mini Female Face stamp set.


I coloured her in with the First Edition Marker Pens and used Oak House Studio Garnet Acrylic ink for the hair.

Thank you for visiting.
Katie x

Wednesday 25 November 2015

Fiskarettes Little Pudding Layout With Trimcraft North Pole Collection

                                                           Hi all

I am sharing a layout i made for the Fiskarettes Design Team using the lovely North Pole Collection by Trimcraft. Here is a link to our Facebook page where you can share your makes, win prizes and find more inspiration https://www.facebook.com/fiskarettes.uk/?fref=ts


www.whatkatiedid2.blogspot.co.uk

I focused on the new 3in 1 Tag Maker Banners and Artisan punch for this project. I started off by cutting out the label pattern on the North Pole 12x12 sheet and inked them and then layered them up. 


I used the new torn edges nesting dies from Trimcraft to mount the photos onto the page with and used 3d foam pads so i could slot strips of paper underneath as i built up the layers.


I used the Interchangeable Punch with the new Lace cartridge to add texture to some of the strips. I punched out the tags and layered them in between the layers. I cut the tags in half so i didn't need as many.


Thank you for visiting
Katie xx


Trimcraft Design Team Projects Glad Tidings

Hi all

I am back with my cards i made using the Glad Tidings collection. Its been a manic week so i have been a bit quiet at the moment. 


I haven't used many dies for these cards but used mostly paper strips to keep them simple, These are the new Christmas dies.


For this card i made the frame the focus and clustered embellishments around it


Another card i made with mostly paper and used twine to add texture


I used the card blanks from the Glad Tidings collection as the base and tore strips of paper for the layers.

Thank you for visiting
Katie xx

Sunday 22 November 2015

That Craft Place Anything Goes November challenge

                                                                                Hi all
I am back with an altered tea pot which really appealed to me as i am a huge tea drinker.If you would like to join the challenge then here is the link to follow http://thatcraftplaceblog.blogspot.co.uk/ /it is mixed media and Anything goes so dont be shy.


I have used the MDF teapot plaque from the That Craft Place shop and gave it a coat of pink paint and DecoArt crackle paint and then a coat of light pink paint. Once dry i used the mini square stencil mask to apply texture paste to the base of the plaque and then spritzed with Magenta DecoArt Media mister.


I then adheres a selection of paper flowers to the plaque and then spritzed them with misters.


Thank you for visiting

That Craft Place Natter &Chatter That Craft Place Etsy Shop blog
That Craft Place Challenge Blog

Saturday 21 November 2015

Susan K Weckesser Inc DT: My Garden Angel Art Journal Page


Hi all 
I am back with an art journal page and this month the blog theme is all about searching around in your backyard. So i decided this little Angel blessing was fitting for the theme


I began making the background by stamping a flower border using the Love Ya Whole Bunches stamp set. I then used Doodle Stencil to add the daisies onto the background with texture paste. Next i spritzed the page with a mixture of green mist sprays from 13arts.


I love the  Gnomey stamp because he is so versatile and could even be coloured and used as a Santa but today he is my little garden angel watching over the flowers.


There are lots of details with this stamp set and i love the little lady birds. The stamp set is called What's Up Gnomey and is one of my favourites.


Thank you for visiting 
Katie xx

Thursday 19 November 2015

Fiskarettes Design Team: Heart Shaker Card Using The Shape Cutter

Hi all 

I am back with my first tutorial for the Fiskars Design Team. I will be showing you how to use the Shape Cutter to create this shaker card. You can find more inspiration on our Facebook group here https://www.facebook.com/fiskarettes.uk/?fref=ts


1) Spritz ink onto watercolour paper and use the small heart punch to punch out hearts
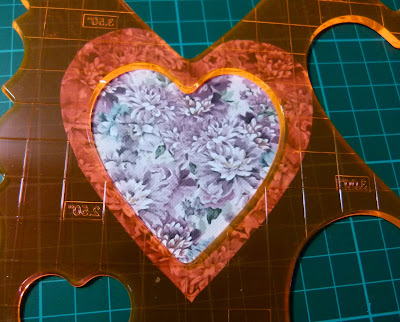


2) Using the Heart Shape Template cut out the 4 inch heart with the shape cutter. This will be the shaker box base.


3) Using craft foam cut out the 4 inch heart again and then place the template back over the heart and using the 3.5 inch heart, cut around it to create a frame.


4) Cut out the 4 inch heart again from acetate, If it is too thick for the shape cutter blade then draw around the template and cut with scissors.


5) Take a sheet of patterned paper and cut out the 4 inch heart and then position the template over the cut out and cut out a 3 inch  heart, over the top to make another frame.


6) Glue the foam frame to the base and then fill with the punched out hearts.


7) Glue the acetate over the top to seal the box.


8) Cover the uneven edges with the heart frame cut out of the patterned paper

9) Now you have a shaker box topper.


                    Here are a few more pictures of the finished card


I hope you found this tutorial helpful and thank you for your comments


Wednesday 18 November 2015

Paperbabe New Product Release Mini Female Doll Face Stamp Set and Mini Hair Templates

                                                                Hi all
I am back to show off the new stamp set from Paperbabe Stamps. These will be available in the Etsy store from the 20th November .https://www.etsy.com/shop/PaperbabeStamps
                         

This is the mini  Wavy bunches template which i used to create a wavy layered hair do for my doll. The head and base are the mini doll template which does fit onto a 5x7 card blank.


I stamped the face out onto smooth card before adding colour and sticking the face together. The eye stamp is slit into different layers so you can use any colour combination you like. There are more projects using the new releases avalible on the blog here http://paperbabestamps.blogspot.co.uk/

Thursday 12 November 2015

Oak House Studio Design Team : Mixed Media Layout Family


Hi all

I am back with my latest layout for Oak House Studio. 


I started off  by applying texture paste to the page and the i spritzed over it with French Lavender.  I then used stamped around the centre of the page using the circle  grid stamp and the A Stitch In Time stamp set . I then flicked Garnet Acrylic Ink over the page.


I used the First Edition Mulberry Kissed Pad to create the layers. I used lace trims to add texture and mixed them in with paper flowers which i coloured  using Paris Pink, Vintage Burgundy and French Lavender Inks In A Bottle.


                                  I clustered the flowers around the photo and added gems.


Thank you for visiting and you can see more projects on the Oak House Studio blog  http://www.oakhousestudio.blogspot.co.uk/

Wednesday 11 November 2015

Trimcraft Scrapbook Freature November: Creating A Scrapbook Layout Without Photos

Hi all

I have a new layout to share today using the new Glad Tidings Collection. I decided to make something a bit different and have go for a no photos theme. The full tutorial is available here http://www.trimcraft.co.uk/articles/scrapbook-tutorial-building-layouts-without-photos


I used the cardstock stickers to add extra layers and as embelishments


These are the new Christmas dies and can be used as solid shapes or you can cut out all the little bits and create different patterns


Thank you for visiting
Katie xx