Followers

Showing posts with label Trimcaft. Show all posts

Sunday, 18 December 2016

Trimcraft Christmas Magic and Sparkle Layered Merry Christmas Card


Hi all

I am starting to roll out the festive makes and i am starting off with the  Dovecraft Magic and Sparkle collection by Trimcraft. I love the sparkly bits on this pad and the reindeer which really feel like Christmas is on the way. I have most of my Christmas shopping done already because i have to be organised this year. Have you started yours?


I used a silver 6 x 6 card blank from the Dovecraft Basics range as it works really well with this collection. I then trimmed one of the 6 x 6 papers down to around 4 x 4 inches and glued it down.


From there i cut up more scraps of paper from the pad and began building up layers


I Took one of the Christmas Basics Wooden frames and added crackle to it for a rustic feel.


I wanted to add lots of texture so i added lace flowers and frosted berries.


The Reindeer is cut from the packaging so nothing goes to waste.

Thank you for visiting

Thursday, 17 November 2016

Trimcraft Christmas First Edition A Christmas Story


Hi all 

I have a couple of Christmas cards i made up using the First Edition A Christmas Story paper pad.


I added one of the Gold doilies from the Dovecraft Basics collection and just built up from there.


The little stick on poinsettias are part of the Winter Blooms collection and are made of mulberry paper. 


Same paper collection but this time i painted up a mdf word and used it as a sentiment.


I wanted to give it a rich feel so i added red and green gems from the Dovecraft Basics collection


Thank you for visiting


Wednesday, 17 August 2016

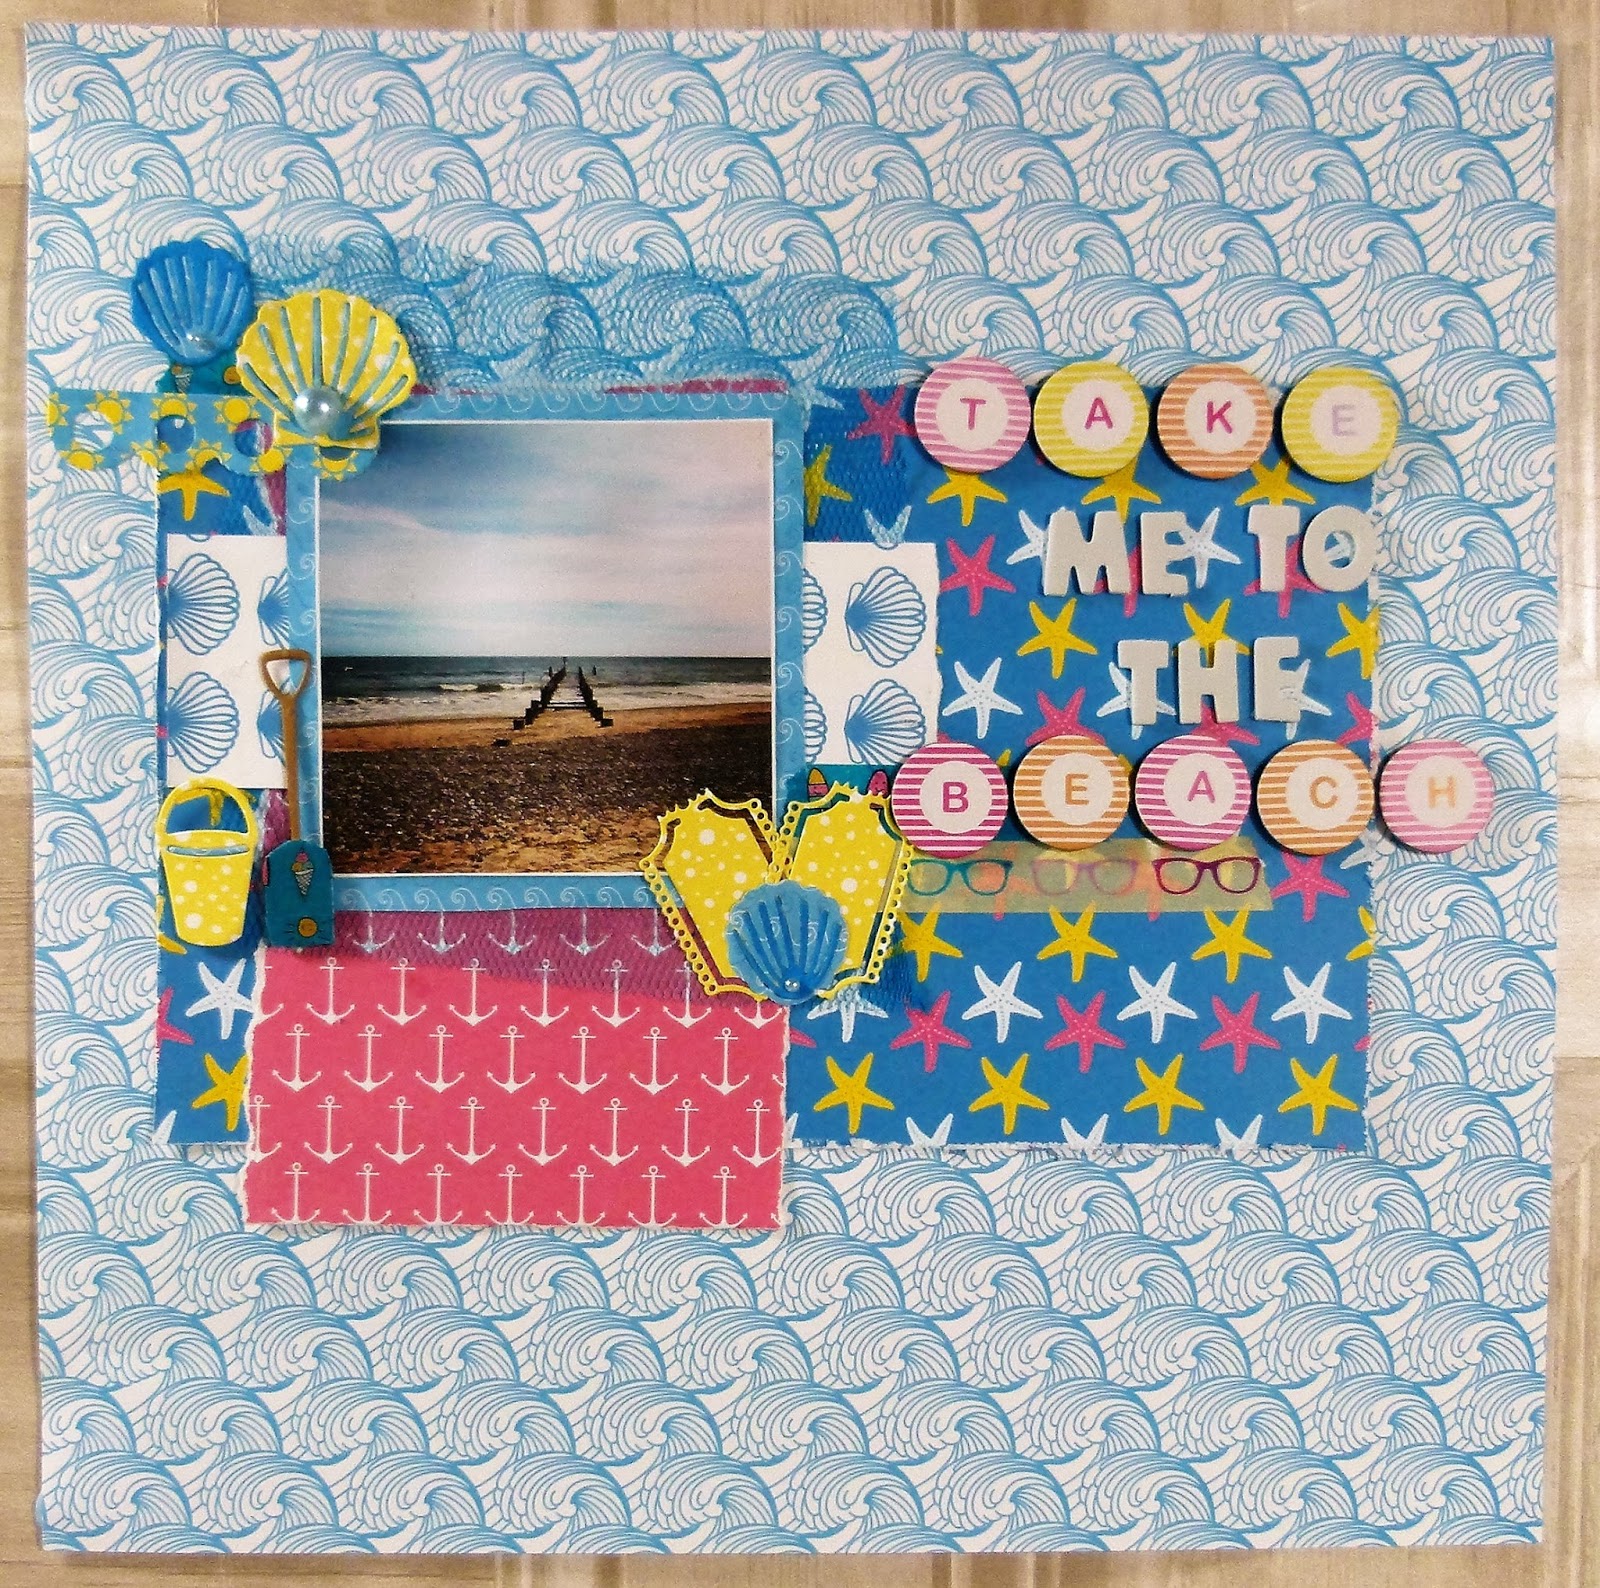
Trimcraft Simply Creative Life's a Beach Take Me To The Beach Scrapbook Page


Hi all

I have a bright Seaside layout for you. The page was inspired by my need to get to a beach any beach and soon. I am counting  down to my holiday so crafting with this collect brought back a few memories.


Take a 12x12 sheet and cut another 12x12 sheet into a 24 cm by 14 cm rectangle and adhere to center of page.
Cut another rectangle 16 cm by 10 cm and tear down the edges, rough it up a bit more using scissors.
Adhere this down the page by the edge of the large rectangle
Mat the photo onto patterned paper and trim around it to leave a boarder
Glue a bit of netting over the layers
Cut a 4cm by 15 cm strip and place  over the net
Add a few strips of summer themed washi tape along the middle of the page.


Decorate around the photo with die-cut shells, tickets and bucket and spade
I used washi tape to add a bright pattern to the spade


           Finish off by adding the title with a mixture of Simply Creative Alphabet stickers.


Thursday, 23 June 2016

Trimcraft Mirabelle Card Inspiration


Hi all 

I am back with a selection of cards i made using the new Mirabelle Collection. 


For this card i used the Lost Song stamp to create a card topper which i coloured in using the First Edition Marker Pens


The layers are created from paper scraps which i have trimmed and layered up. I then added buttons and ribbon


I used the A4 decoupage pad for the topper and  used simple layers to create this card.


For this card i wanted to experiment with circles so i cut out a few in different sizes and cut a few of the centers out. I then layered them over each other.


I used the All For Love stamp set and i cut it out. The heart i cut out s and then glued to the hand using beading elastic so it dangles.


Thank you for visiting


Saturday, 28 May 2016

Trimcraft Simply Creative Flower Girl Cards

Hi all

i am just showing off a few cards i made with the pink and girly Flower Girl paper pads from the Simply Creative Collection


I used the Princess die set from First Edition on this card as the two work well together.


A couple of ways the bunting from the Birthday die set can be used


Thank you for visiting


Monday, 25 April 2016

Trimcraft Back to Basics Goody Bags

                                                     Hi all

I am back to share a few cards i made up using the new Back to Basics Goody Bags. The Bags contain everything needed to make up cards or small layouts (watch this space).


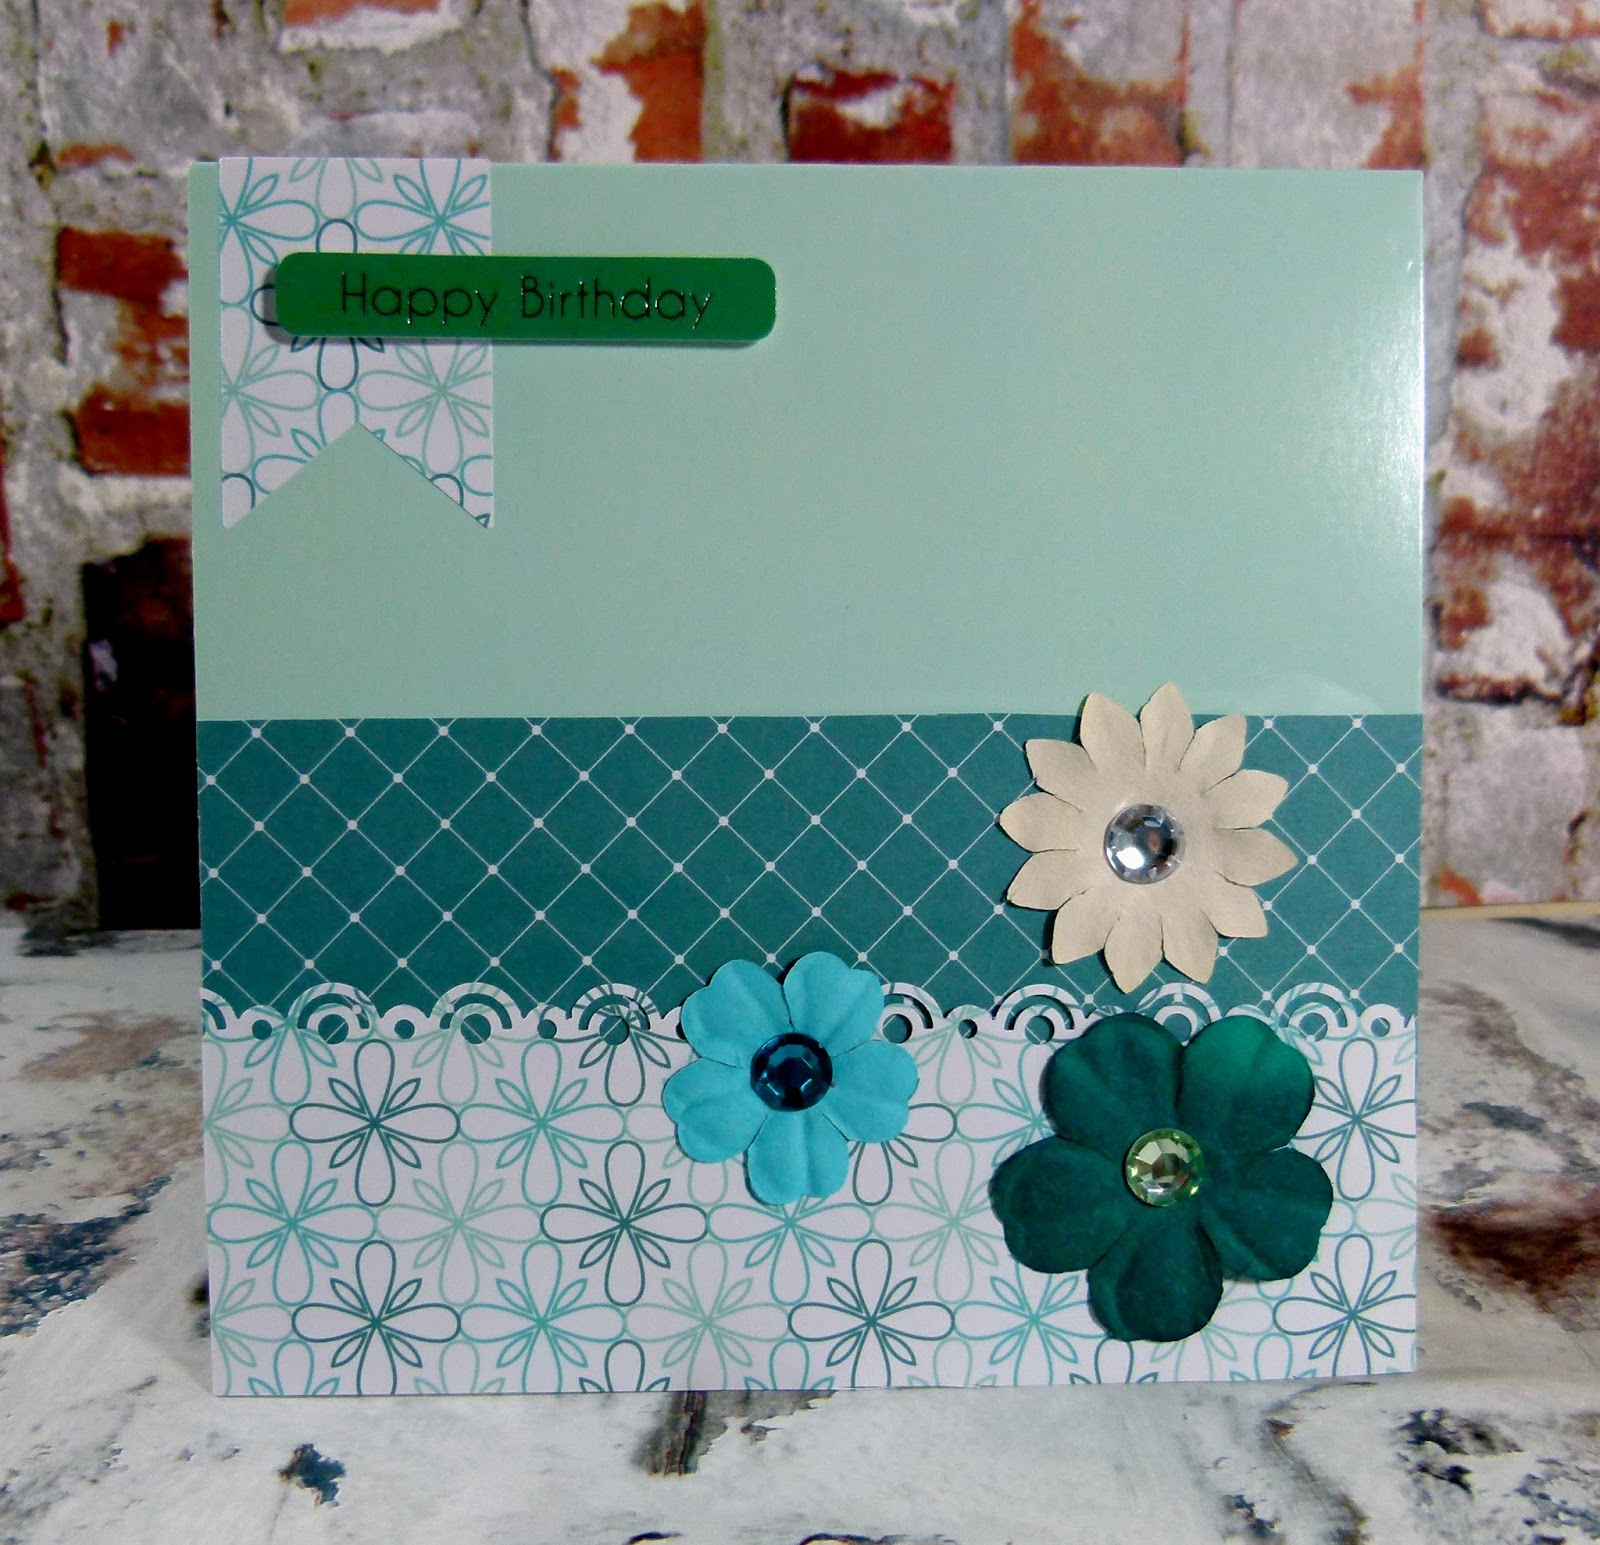
I used the Teal and Neutral goody bags for this card and alternated between teal and cream.


This is the Monochrome collection which is one of my favorites. The paper flowers and toppers are included with the kits.


I used the Fiskars interchangeable boarders to create the lace effect.


This one is all Teal and i made thei quick card using the flowers and gems that came with the kit.

Thank you for visiting


Saturday, 16 April 2016

Introducing First Edition Pick n Mix by Trimcraft

Hi all

I have some makes to share using the lovely and bright First Edition Pick n Mix collection.


For this card i covered half the card in the starburst pattern and then the bottom with rainbow stripes. Next i cut a flag from the glitter stars paper and cut out a large circle and trimmed off one edge before layering it all together. The flowers and gems are from the Simply Creative Collection.


This bright card is quick to make. I covered a 6x6 blank with yellow paper and cut out two strips off patterned paper at different widths. I don't measure my layers i sort of rough cut them by eye. Next i cut out the square parenthesis using a die and stuck it to the centre. I cut out the sentiment using pink paper and the Varsity Die Set. I finished the card off by using the Fiskars 2 in 1 Flag and Artisan punch to create the tabs.

7

I decided to play with the Cupcake  Die set and made this sugary sweet card. Doesn't the background remind you of sprinkles?

Wednesday, 23 March 2016

Trimcraft Simply Creative Decoupage Mini Bird Houses


Hi all

I am back with these cute little bird houses i bought from The Works for a £1 each. I painted them with DecoArt Americana Chalk Finish Paint and used the new Simply Creative Decoupage sheets to decorate the front.


I painted them with a coat of Chalky Finish paint and then coated the roof with Weathered Wood Medium. 


I used Americana Chalky Finish Refreshing to paint the bird house with and then used the  Dragonfly Bloom Papers on the front.


I painted this one with Innocent Americana Chalky Finish paint and then coated the roof with Weathered Wood Medium before painting over the top with Smitten Chalky Finish paint. I used Pink Ditsy Papers on the front and finished off with a bit of lace.


I painted the bird house with Serene Chalky Finish paint and coated the roof with Weathered Wood Medium. I then used Refreshing as the second coat. I used the Wild Flower Decoupage papers on the front and finish with a bow.


Thank you for visiting

Friday, 5 February 2016

Trimcraft: Introducing First Edition Love Story

Hi all

I am back with some love themed projects using the new First Edition Love Story Paper pads


I made this basic layout by cutting out rectangles and layering them up. I then cut out the tags from the 12x12 and made them into the title


The paper range has a lovely shabby chic feel to it and looks lovely mixed with ribbons. The wooden buttons from the Serendipity Collection work so well with this pad.


My favorite papers are the wood effect ones as the match up with anything. I used the Dovecraft Essentials mini stamps to create the wood look scrabble tiles.


Wednesday, 25 November 2015

Fiskarettes Little Pudding Layout With Trimcraft North Pole Collection

                                                           Hi all

I am sharing a layout i made for the Fiskarettes Design Team using the lovely North Pole Collection by Trimcraft. Here is a link to our Facebook page where you can share your makes, win prizes and find more inspiration https://www.facebook.com/fiskarettes.uk/?fref=ts


www.whatkatiedid2.blogspot.co.uk

I focused on the new 3in 1 Tag Maker Banners and Artisan punch for this project. I started off by cutting out the label pattern on the North Pole 12x12 sheet and inked them and then layered them up. 


I used the new torn edges nesting dies from Trimcraft to mount the photos onto the page with and used 3d foam pads so i could slot strips of paper underneath as i built up the layers.


I used the Interchangeable Punch with the new Lace cartridge to add texture to some of the strips. I punched out the tags and layered them in between the layers. I cut the tags in half so i didn't need as many.


Thank you for visiting
Katie xx


Thursday, 19 November 2015

Fiskarettes Design Team: Heart Shaker Card Using The Shape Cutter

Hi all 

I am back with my first tutorial for the Fiskars Design Team. I will be showing you how to use the Shape Cutter to create this shaker card. You can find more inspiration on our Facebook group here https://www.facebook.com/fiskarettes.uk/?fref=ts


1) Spritz ink onto watercolour paper and use the small heart punch to punch out hearts


2) Using the Heart Shape Template cut out the 4 inch heart with the shape cutter. This will be the shaker box base.


3) Using craft foam cut out the 4 inch heart again and then place the template back over the heart and using the 3.5 inch heart, cut around it to create a frame.


4) Cut out the 4 inch heart again from acetate, If it is too thick for the shape cutter blade then draw around the template and cut with scissors.


5) Take a sheet of patterned paper and cut out the 4 inch heart and then position the template over the cut out and cut out a 3 inch  heart, over the top to make another frame.


6) Glue the foam frame to the base and then fill with the punched out hearts.


7) Glue the acetate over the top to seal the box.


8) Cover the uneven edges with the heart frame cut out of the patterned paper

9) Now you have a shaker box topper.


                    Here are a few more pictures of the finished card


I hope you found this tutorial helpful and thank you for your comments