Followers

Sunday 27 September 2015

That Craft Place Anything Goes September Challenge.

Hi all

I am back with another project for That Craft Place and this time i have an altered 6x6 album. I  needed somewhere safe to keep all my ATCs from the swaps.


I used the 6x6 cogs stencil mask to create a 3d background and then painted the whole cover back and front in DecoArt Crackle Paint. Then i spritzed DecoArt Purple and Magenta misters over the cover and blended the colours with a sponge dabber.


I used assorted paper flowers from various Trimcraft ranges and dyed some white flowers with misters.


I added a few pearls and sparkles to the cover.


The 6x6 album comes with the word create and cogs to decorate it but i will use the cogs later.


For the inside i used plastic cd sleeves as the ATC pockets wouldn't fit inside the album.

Thank you for visiting

Saturday 26 September 2015

Mixed Media Tutorial: How to make a textured background using tissue paper

Hi all

I am back with a mixed media tutorial and I am going to show you how to create the background from my Paradise layout.  Here is a link to the layout http://whatkatiedid2.blogspot.co.uk/2015/09/mixed-media-layout-paradise-using.html


I started my page off by choosing the photo first as it gives you an idea of what colours to work with. I chose this beautiful water scene and began choosing all my blue toned papers and inks.


  Take a couple of sheets of tissue paper and cut them into strips, Don't worry about being neat as it adds texture to the final page. For adhering the strips to the page i used watered down pva glue and then build up the layers as you would with paper mache. I added around three layers but it depends on the thickness of the material.


I then used a mixture of white paint with water for a primer and then give the whole thing two coats and left it to dry. You could also use a heat tool but i would recommend spritzing the back of the page with water as you dry it to keep the page from curling up and then repeat on the front of the page.


       Here is a close up of of the first layer and as you can see it is primed and ready to cover in ink.


I used a honeycomb die cut from the Xcut Beekeeping set to make a stencil mask which i cut out of using thick kraft card. I then applied my texture paste randomly over the die-cut shape and dried it off with a heat gun. 

I have also found that with sturdy steel dies you can apply texture paste directly over the die itself using a spatular.


 I then cut up the mask as being made of card it soon goes limp but it makes an excellent background texture.


 I used the punch outs from the die to add another layer of texture and then cut up cream coloured lace and stuck that to the background as well. 


I chose Three mist sprays and covered the whole page before lifting it up and letting the ink run. I then sprayed it again and used a paint brush to paint over the whole page mixing the colours and covering the textures.


I then took a few texture stamps and stamped them on the background at random. I use border stamps in between layers to add texture.


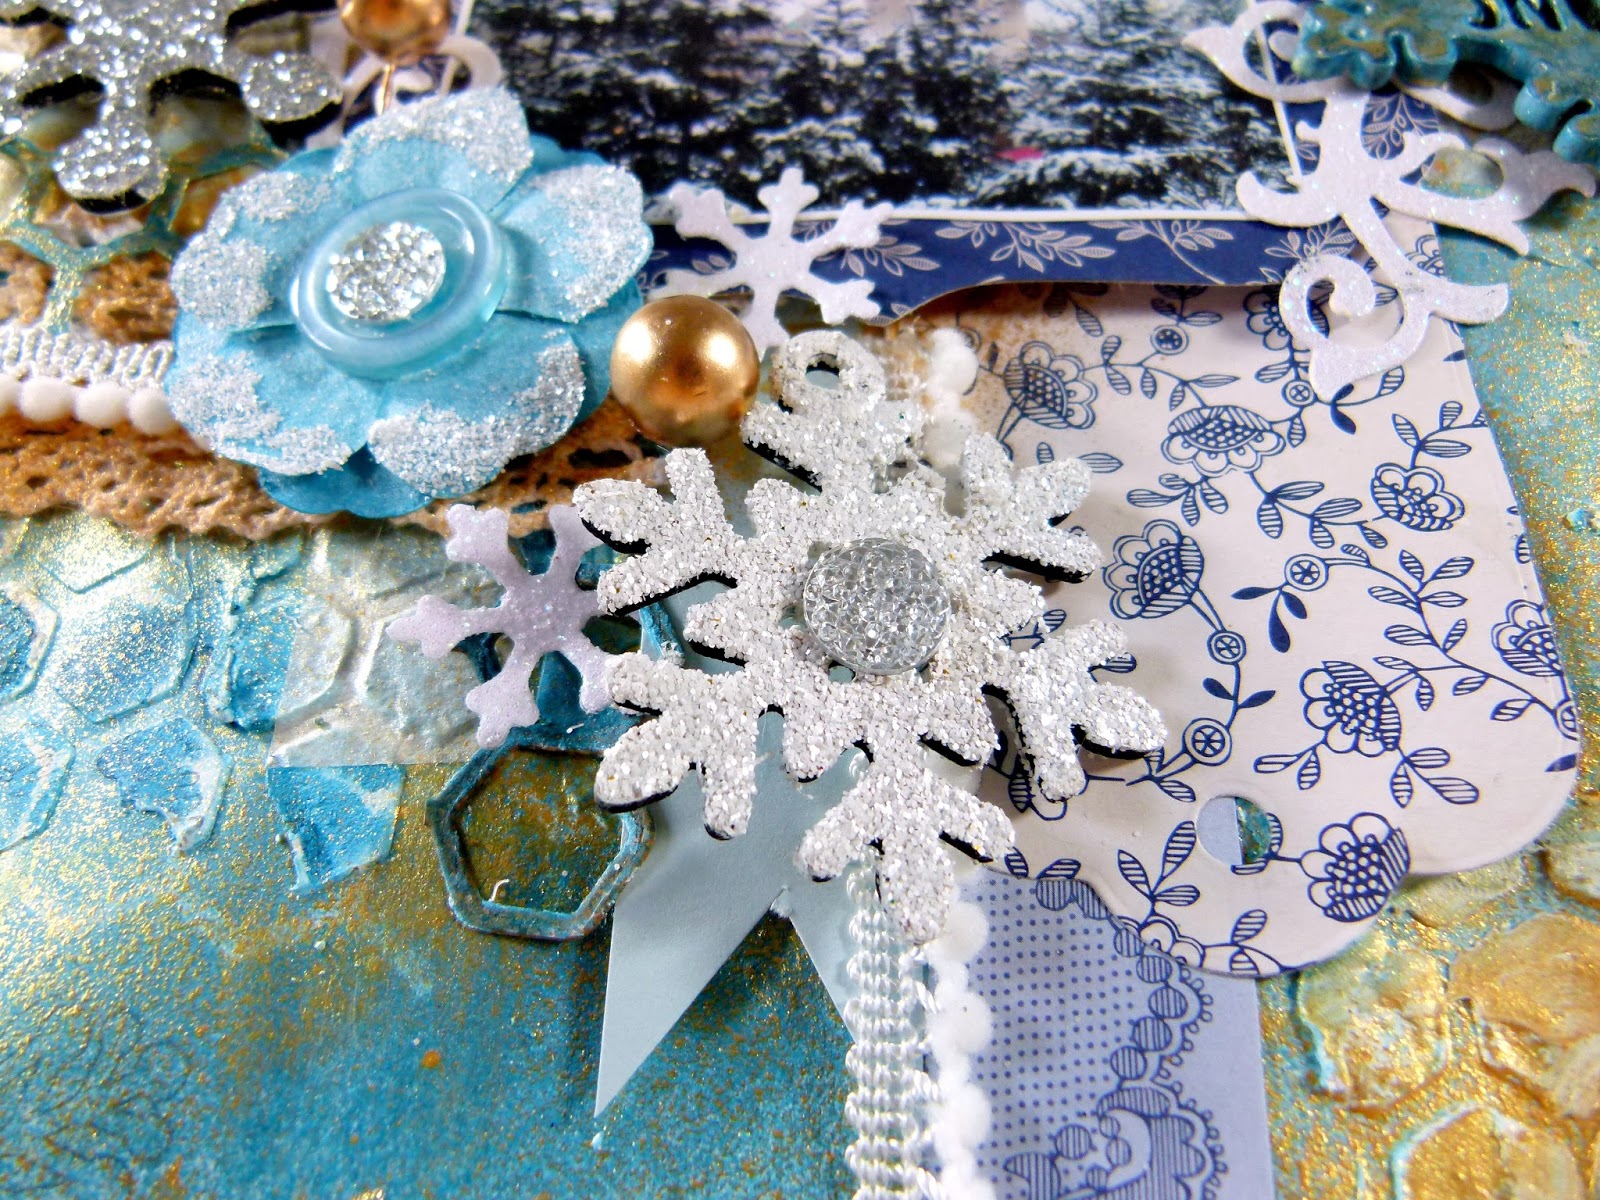
Here are some detail shots so you can get an idea of how the layers build up. I added my pattern paper layers after this and began turning it into a layout but you could also use this tutorial to create a canvas or art journal.


                            Thank you for looking and let me know how you get on xx

Friday 25 September 2015

Mixed media layout Paradise using Docrafts products


Hi all 

I have a new layout to share today and its my favorite so far. I have been experimenting with textures and will have a tutorial for you tomorrow.


This picture was taken on Weymouth Harbor and the man rowing the boat has been running this service for at least 25 years. I love this picture because it is so peaceful to look at.


 I used a lot of layers on this one and all i did was cut up strips of Capsule collection Eau De Nil and Parisienne Blue. i added wooden flags and wrapped jute around the photo.


These cogs are easy to make, cut them out of kraft paper and cover the whole cog in glue stick.next pore your metallic embossing powder over it and apply heat. You can mix the powders with black or copper embossing powder to get a rusty or oily effect when you heat them.


here i have taken 3 white mulberry flowers and glued them together before spritzing them with ink and dabbing the edges with an ink pad once dry.

Thanks for visiting and pop over to my tutorial to learn how to make the background

Wednesday 23 September 2015

Docrafts Christmas 2015 Create Christmas: Let it snow 12x12 Scrapbook layout

Hi all 

I am back with a new layout made using the new Create Christmas range.


I used the flourish and honeycomb dies as stencils and appled texture paste to them to create a textured background. I then spritzed it with Artiste  Gold and Ocean Blue misters. I used tissue paper strips to build up a textured layer.


I used a Square Parenthesis nesting die to mount the photo on and cut various die shapes out for the layers. The snowflake is from the wooden 


This is one of the wooden sentiments that i have painted with white acrylic paint and spritzed with inks.


I used the glitter paper pack to die-cut the leaves and flourishes to add a lovely icy sparkle to the page.


I used the fine glitter to coat the flowers and wooden snowflakes

Thank you for visiting and you can read my full tutorial here


Saturday 19 September 2015

Trimcraft Scrapbook Feature: Using Photo Frames With Your Instagram Photos


Hi all

Here is a layout i made for the Trimcraft website here is a link to the tutorial http://www.trimcraft.co.uk/articles/how-to-scrapbook-your-instagram-photos . The idea is to make a layout that can be used for Instagram style photos and i found the photo frames worked well as you can write on to them.


I have a tutorial on how to make these topper here https://www.youtube.com/watch?v=-NpOWLZWb5A


I just roughly cut the squares of patterned paper and then layered them up at an angle. I used the Leyton 12x12 pad for this page as it is double sided so you don't need to cut as much up.


You can read my full step by step guide here www.trimcraft.co.uk

Thursday 17 September 2015

Creativity Mag Make ; Forever Friends Decadent card


Hi all

I am just popping in to show you the card i made for this months Creativity Magazine. I had a sketch to follow this time.


Lots of foil prints with this range and a lot of bling


i love these self adhesive gems they sparkle a lot


The decoupage sheets have lots of toppers on them

Thursday 10 September 2015

That Craft Place Steampunk Digi stamps


Hi all 
I am back with a few steampunk themed cards i made using the digi stamps from That Craft Place.


I love airships and enjoyed colouring this image. the backing papers are also available in the That Craft Place Etsy shop.  I used the cogs stencil over the top part of the card, coated it with texture paste and spritzed it with Vintage Sepia misting spray.


Here is a closer look at the digi stamp


Here is my next card, the image would be great for a masculine card and can be adapted to suit any design.


Thank you for visiting


That Craft Place Etsy

Friday 4 September 2015

Trimcraft DecoMache and MDF letters

Hi 

I have been making things for the craft room again, one of these days i will actually get around to putting them on the wall. I am planning a few more inspiring words to match these but i need time to catch up as i have a few very busy months ahead. I am on holiday for a few weeks so you will have a quiet few weeks until i get back and then its Christmas and Halloween non stop until end of October followed by more Christmas projects and a lot of gorgeous new product releases from Trimcraft which are non Christmas so you will be getting a break in between.


This is simple to make once you workout how to thread the twine through so the letters are hang the right way. I gave all the letters a coat of DecoArt White Chalk paint and then a couple of layers of First Edition Deco Mache papers which go a long way on this sized project.


I just lutted my stash and stuck lots of buttons and things all over the letters but i kept some of them plain so it wasn't overbearing. The plain letters got a coat of white DecoArt crackle paint and then inked around the edges.


More bling with adhesive pearls and gems which i added a dab of glue to so that they didnt drop off.


Thank you for visiting and i will try to visit you all but my internet access will be random.

Thursday 3 September 2015

Scrap Around the World September mood board

Hi all

Just sharing my entry for the months Scrap Around The World mood board you can join in here http://scraparoundtheworld.blogspot.co.uk/p/about-us.html


I used the Love is in the air 12x12 sheet for the background and a mixture of First Edition pads for the layers. I loved the mixture of blue and sepia from the mood board and used that as my inspiration.


Here are a few close ups of the page. The flowers are Papermania Paper Posies  that i have dyed with spritzing inks.


Love the pearl Ayeeda Misting sprays by 13arts as they have a rich shimmer to them

Tuesday 1 September 2015

A Step in the Dark September

           
Hi all

I am back with my first Creepmas card using the Christmas Goth stamp by SLS Lines who is our sponsor for the month and here is my card.


I had a pack of Victorian Christmas paper left from last year and its sludgy tones work well with the darker Christmas theme


I got the custom stamp from www.stampingallday.co.uk custom stamps start from £5 each. She does a few alternative ones as well.

Thanks for visiting