Followers

Showing posts with label Challenge. Show all posts

Friday, 1 February 2019

Gecko Galz Customer Challenge February Moonlight & Magic ATCs

Hello all
I am back with another make for the Gecko Galz February customer challenge which is Moonlight and Magic, So we will be seeing a lot of magical creations this month. The winner will receive $25 to spend in shop.


Products


The backgrounds are created by using a texture stamp as the first layer and then by adding a stencil mask over the top. Once it has all set i then painted over the top with Prima Watercolours.
I cut out the images from the toppers so they would fit the ATC and finished by adding the words.


Thank you for visiting

Monday, 15 October 2018

Bleeding Art October Challenge Blingy Skulls

Hi all

we have a new mixed media challenge starting up in October. It is a bit different to other mixed media challenges as we want to see your Canvases, Shrines, assemblages, anything free standing, anything that can be hung on the wall or that uses recycled items. I am sure you creative lot will have other ideas to share too.

Here is my first project for the October challenge and yes like a giddy child i have jumped straight into Halloween with these mixed media skulls.


I tried three different types of medium on each skull. This one is texture crackle paste and it dries like cracked stone so very lovely. I then painted it and covered it in as many gems as i could. I thought blinging up one side looked more edgy, well i saw this on Pinterest and had a go but it looks nothing like the original idea.


Skull number two was covered in cheesecloth you know that stuff 19th century mediums liked to regurgitate and pretend were ghosts. Anyway stuck to a skull and painted over with acrylic paint gives the project a nice texture.


I added a few beads first but it look bland so i added micro beads using heavy gel medium, It needed something else so i added a pile more pearl beads down the front to give it a full bling look. I added flowers to the other eye socket, i think it looks less creepy without a gaping hole for an eye but that is just me.


Skull number three was covered in texture sand paste which when dries looks like a stone surface. I painted it orange and then added bling to a chip board spider. 


Thank you for visiting and please join us.


Sunday, 15 July 2018

Craft's Dreamy July Challenge


Hi all

I am a guest designer for the Crafts Dreamy Challenge this month. You can join us here and use this month's mood board to inspire your projects.


I used mist sprays on the background and then i layered up some texture stamps.

I then sprayed ink on to plain card and once it had dried, i then stamped over the images and cut them out.


Thank you for visiting

The Blank Page Muse Surf Board 
The Blank Page Muse Tall Beach Umbrella
The Blank Page Muse Background Grunge Set

Wednesday, 20 June 2018

#THESTENCILFIEDJOURNAL Prompt No2

Hello all

I am back with Prompt 2 of the stencified journal challenge. I was waiting for my page to be worn by the weather.

I used The Musical Notes Mandala Stencil 


Before being left outside 


I had to wait for it to rain a bit as we have had a dry summer so far.


As you can see the rain has took a lot of the colour out and left this subtle wash of colour in the center.

Thank you for visiting and i will have prompt 3 up later this week.


Sunday, 10 June 2018

The Blank Page Muse Stamps Beach Themed Mixed Media Canvas

Hi all 

This months project for The Blank Page Muse Stamps is going to the beach. It's one of my favourite themes so i have made a canvas using the Nautical stamp sets. Scroll down to learn how to create this project.

Join the challenge here


Get 15% off if you  order off The Blank Page Muse website. Valid until the end of August with this code
Links at bottom of post.

Summer2018Katie


Product list
A4 Blank Canvas
Rust Paste
Blue Ink
Shells
Heavy gel medium
Mdf frame (Samantha K)
Mdf net shape (Samantha K)
Glass sand (Artful Days)


Tutorial


Cover the canvas with gesso and texture paste. 
Then spray with sea green and blue mist sprays
Apply a stencil to the base using modeling paste.
Dye a few strips of cheese cloth with sea green ink and once dry glue them to the canvas.


paint a frame with rust paste and then dry brush with blue paint.


Cut out a circle from patterned paper using a die and then stamp the octopus in the middle/


Glue the frame to the topper and adhere to canvas. Use a mould to make the mermaid tail, pint it and add a starfish.


Stamp out more sea creatures using different coloured ink pads and cut them out.


Glue the MDF shapes down and then add the sea creatures over the top.


Apply heavy gel medium around the canvas and sprinkle over with glass sand.


Add gems and mini shells around the canvas.


Add chunky layers of glass sand.
 Add pearls and shells to the edges.


The Blank Page Muse Shop http://blankpagemuse.com/


Sunday, 29 April 2018

ScraPerfect Planner Clips Months Of The Year

Hi all

To celebrate Earth Day the team are making their own clips. Pop in each day for new inspiration.


The Challenge


Come join our party and enter the "challenge"!
In honor of the first Earth Day celebrated on Arbor Day in 1970, check out this Earth-Friendly Project and use your paper scraps. Make a beautiful, almost-free gift for yourself or your friends, and receive a coupon code from us!
HOW TO GET YOUR COUPON 1-2-3:
1. "FOLLOW US BY EMAIL" on our blog. Be inspired by our design team's videos, tutorials, and creative ideas featuring a whole array of Altered Paperclip Tags.
2. Try it! Make an Altered Paper Clip Tag and upload it to your blog, FB Page, Instagram, Pinterest or other social media site. Copy the URL from the address bar.
CAUTION: These tags are an addicting but healthy way to use up SCRAPS!
3. UPLOAD your Tag. Watch your email for the FREE S/H code (U.S only) or $5 off (International)
Fine Print: Uploading your tag is giving permission to be added to our contact list. We NEVER share your info. Un-subscribe at any time.
HOW TO WIN FREE PRODUCT :
Simply leave a comment below or on any Design Team related post to let us know which product you want to win. Closes 5/31/18
**See ScraPerfect's blog posts from April 19-April 30 for ideas, tutorials, and different creative takes on this Earth Day Inspired ALTERED PAPER CLIP TAGS!


Here is the shop link so you can check them out just click the icons


I forgot to add in the video that i used gloss enamel on the tops of the clips to make the tops more robust. I painted the clip part and used a matte medium to seal it but whether the paint will stay on is another thing.

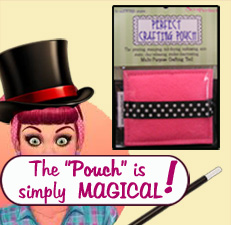
The Crafting pouch is good for untacking the glue and the Embellie Gellie makes picking up little bits easier.


I created these planner clips to mark the months out in my planner book.  
Here is a tutorial video


And here are some close ups.


Visit the ScraPerfect Blog throughout the month for more chances to win prizes.


Friday, 9 March 2018

The Blank Page Muse March Challenge Spring Butterflies ATCs

Hi All

I am back with a new challenge and tutorial for The Blank Page Muse Team. All links and challenge rules are posted below and on the team blog.


Visit us on the 10th of each month and the crazy creative Muse Team will have loads of inspiration to share, each with projects following a theme. Each project will have a link to the Muse's blog for more details. Come back throughout the month as we share more fun and creative ways to play with your rubber stamps!


Start off by coating the blank ATCs with gesso and then adding layers of different inks. Allow each layer to dry before adding another colour to prevent it going muddy.


Next stamp a few background stamps onto the ATCs


Take a sheet of white card and stamp out a few butterflies from the Make A Wish stamp set. Colour them in using inks to create a watercolor look. 


Apply crackle paint onto the ATCs and then add another layer of ink once it has set.


Add dry wall tape to this ATC and then glue down the butterflies.


This one is similar but with resin flowers and buttons.


The last ATC i added burlap and thread.
Thank you for visiting

Product list

Crackle paint
Green, Yellow, Orange, Blue, Violet Inks
Blank ATCS
Gesso
Burlap scraps
Thread
Dry wall tape


Challenge Rules:
  • The Challenge runs from the 10th of the month to the 5th of the following month, midnight Pacific time.
  • Create a new project following the theme in the post on the 10th. Come back here and add it via the Inlinkz linky tool. Please make sure the link is to your specific project post.
  • You can add 2 new projects as long as they are new and linked to separate posts on your blog or public Facebook page.
  • Project(s) must have physical stamps clearly used. The stamps don't have to be ours but we'd love it if they were!
  • Tag us @blankpagemuse on Facebook or #blankpagemuse on Instagram with your project and you will get an extra entry to the random drawing.
  • PRIZES! Yes we will have ONE prize! If we have at least 10 unique people link up that follow the theme, there will be a random drawing for a $10 Blank Page Muse Gift Certificate. If we get to 20 unique players there will be a random drawing for a $20 Blank Page Muse Gift Certificate. 
  • The Winner will be posted here on the blog on the 9th of the month before the next challenge is posted


Links


Wednesday, 10 January 2018

Angel of Hopes and Dreams Card The Blank Page Muse Stamps January Challenge

Hi all

We are doing things a bit differently  over on The Blank Page Muse  blog this year. We are going to start doing challenges and this month the theme is sparkles, Turquoise and Silver.  Here is the link to the challenge https://blankpagemuse.blogspot.co.uk/2018/01/turquoise-silver-and-sparkle-brand-new.html?m=1


Product list

White Card
Black Archive safe ink
Blue ink
Marker pens
Art stones
Cheese Cloth
Turquoise ink
Turquoise paint


Stamp the art doll and wings out onto white card.


Colour them in using marker pens and decorate the doll with art stones.


Cut the pieces out and glue the wings onto the back of the art doll.


Paint a blank card with Turquoise and then apply a stencil mask over the top. Spray with turquoise ink and leave to dry.


Dye a few strips of cheese cloth with Turquoise ink and dry them off before gluing them to the card base. Apply a few thick blobs of modeling paste to the edges of the card and sprinkle over with art stones and glitter. Allow to set and spray with ink.


Glue the art doll to the center of the card and then create a sentiment using a label maker.

We have a fan group for more inspiration https://www.facebook.com/groups/sincitystampsfangroup/

Thank you for visiting