Followers

Showing posts with label MDF. Show all posts

Monday, 12 November 2018

Craft Consortium MDF Christmas Bauble & Stencil Kit

Hi all
I  have another set of Christmas decorations to share using  the new MDF kits by Craft Consortium.
i used


Paint the mdf with acrylic paint and once dry add cackle glaze and leave to set.


Paint over with gold and then once it has dried, wipe it off with a baby wipe to reveal the cracks .


Apply the stencil using texture paste and once dry use the Pearl Glue to draw around the stencil and then colour it in.

Monday, 8 October 2018

Craft Consortium Christmas Candle Holder

Hi all

I have a Christmas piece to share today. I went for maximum sparkle for this one. You can buy the MDF Candle Holder from the Craft Consortium website here.


Start off by assembling  the candle holder and then paint a base coat of white onto it.

Next mix pva glue and water to make a paste and add decoupage paper to the base of the candle holder.


Glue tinsel trim around the candle holes.

Paint the Christmas Tree and then start gluing gems,pearls and anything else that shimmers to the tree.


Product list


Thank you for visiting

Friday, 10 August 2018

Artful Days Mermaid Journal Cover


Hi all
I have altered a MDF Book cover by SamanthaK using products available at Artful Days


Product links


Paint the mdf book cover white and let it dry. Then paint it turquoise and let it dry before applying a stencil mask. I use modeling paste and only used part of the stencil to give it a distressed look. 


Dye some cheese cloth with blue and green ink and dry it off with a heat gun.  Glue it down the book and then apply heavy gel medium to the cover. Sprinkle on microbeads,drew drops and mermaid beads.


Take the resin pieces and paint them turquoise, Next apply texture paste over them and once this has set, paint with quinedone gold fluid acrylic. 


Paint part of the book cover with yellow-green acrylic paint and apply more texture paste around the edges. Add more quinacridone gold over the top to create a rusty look. 


One the back of the book i covered it in a stencil mask and  sprinkle over Cathedral Pines Magicals and apply water to spread the colour. Then apply yellow-green acrylic paint mixed with a little water. The final layer is texture paste and quinacridone gold acrylic paint.


Sunday, 1 July 2018

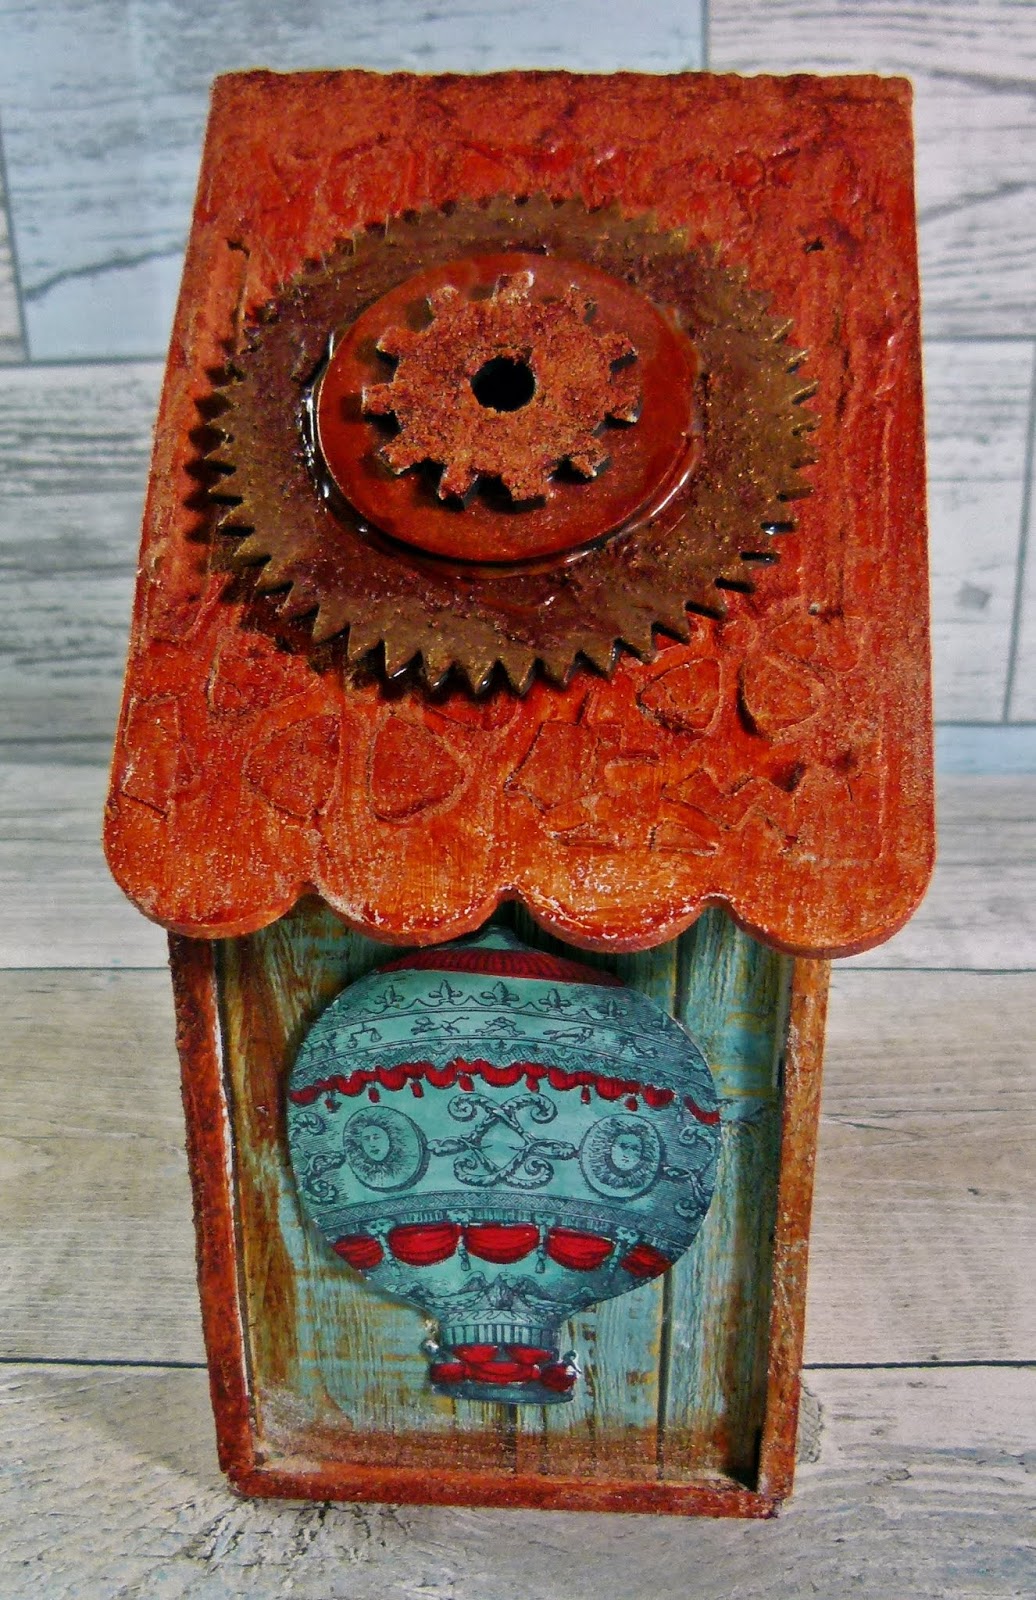
Craft Consortium Altered MDF Steampunk Birdhouse


Start off by giving the mdf pieces an under coat of gesso.
Next apply the decoupage papers with thinned out PVA glue.

Once it has dried, paint on texture sand paste and mix it with powdered cinnamon.
Omce this has set, paint over with red oxide paint. You can mix it with a little water to create different shades of rust.
The roof wast covered in a stencil mask first and once the modeling paste had set. It was then panted with quinacione gold acrylic paint.

The birdhouse was decorated with giant mdf cogs that have been painted with metallic paint and rust paste.

Stack up the cogs to create different looks

Saturday, 16 June 2018

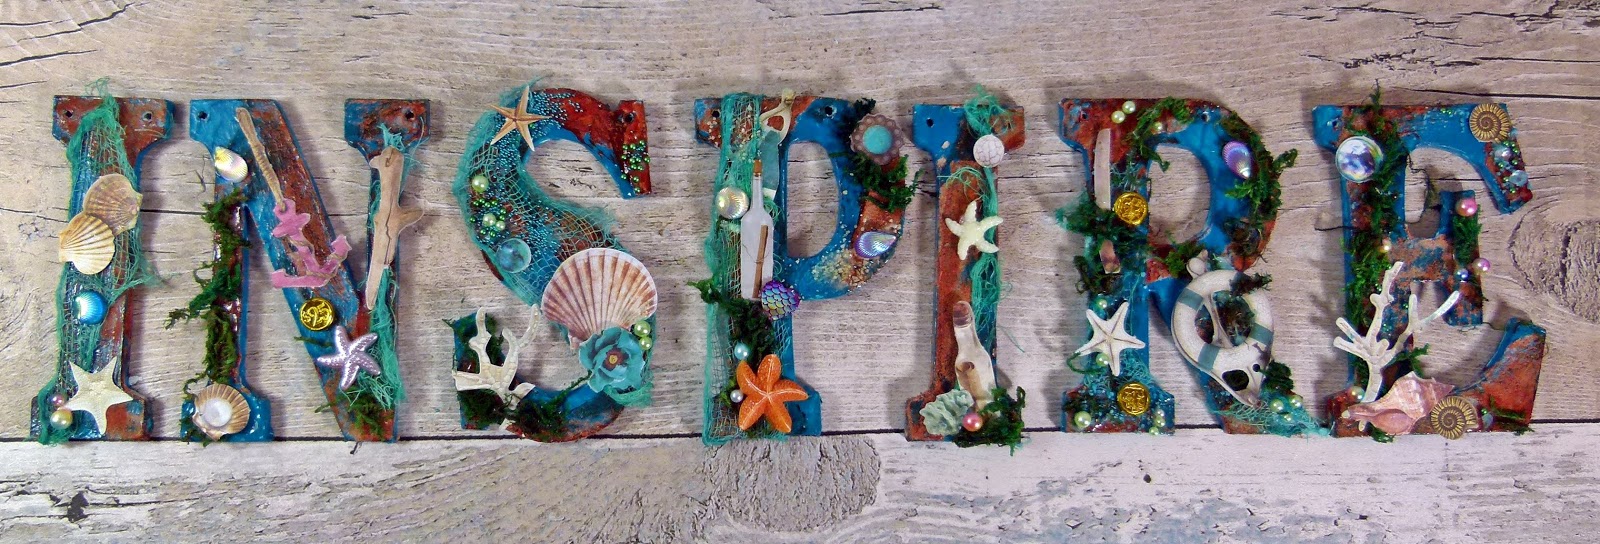
Cherish The Memory Inspire Seaside Themed Altered Letters

Hello

I have a new make to share using the Summer Feelings paper pads available at Cherish The Memory.
https://www.etsy.com/uk/listing/614685279/studiolight-summer-feelings-card-making?ref=shop_home_active_20


I started off by painting each letter with white paint as an under coat and once that had dries i then painted over the top with DecoArt Premium Acrylic Turquoise. Then i applied DecoArt Texture Sand Paste and let it set.


I painted on Quinacidone Gold Fluid acrylic to get the rust. I wasn't sure to go steampunk on these or not so i met in the middle and went for a water worn look.


Next dye some cheese cloth. 
I used blue and light green to get this colour, This stuff is great as it gets disstressed when you heat dry it so you get this worn net look.


I used heavy gel medium to paste down the cloth and then i started decorationg the letters using the die cuts from the Summer Feeling Die Cut pad.


I also added gems and beads to the letters.


I used fake moss to create this underwater look. I was thinking about the things you find in the rockpools  after the tide has gone in.


Product List
Studio Light Summer Feelings A4 Die-cut Pad
Studio Light Romantic Summer A4 Die-cut Pad
Unbranded MDF Letters
DecoArt Heavy Gel Medium
DecoArt Premium Acrylic Turqoise
DecoArt Fluid Acrylic Quinacidone Gold
DecoArt Texture Sand Paste
Imitation Beads
Fake Moss
Cheese Cloth
Colour Chemistry WaterFall and Bramley Apple (Discontinued)
Resin Starfish, Shell flatbacks and palstic coins.
Micro beads 
Artful Days Glass Sand Yellow and Blue.

Thank you for visiting

Monday, 16 April 2018

Altered Nautical Clock

 Hello Crafty friends

I have some texture porn for you today but don't google that phrase because you might find something that can't be unseen. 


And here is is my very rusty nautical clock using the blank MDF clock kits from Samantha K.

I painted the whole thing with navy blue paint as you do and let that dry.


Then i mixed brown and orange acrylic paint together to make a rusty colour. i added orange to the brown and mixed it until i got the right colour. I dabbed it on with a brush and sprinkled on cinnamon powder and then dabbed more paint onto until  i got this crusty layer. Then i dry brushed over the top with bronze paint.


I painted the centre with crackle paste and then used turquoise ink over the top.


i then dyed some cheese clothe and glued that down. Then i added the shells because you can't do nautical without shells.  Remember to leave room for the clock hands so they can move around.

Thank you for visiting  


Thursday, 5 April 2018

Canvas Corp Brands Mixed Media Steampunk Angel Heart

Hello all

I have a new project using the  High Impact Paints and Glimmer Glaze by Tattered Angels


Paint mdf heart with white gesso and then apply a stencil mask around the edges using modeling paste and leave to set.


Glue down a strip of burlap and paint over with rust paste, Next dry brush with Gold High Impact paint and allow to set

Take a chipboard clock and paint with rust past.


Dry brush over the clock with night sky Glimmer Glaze and glue to base.

Take the clay angel wings and face and paint with Gold High Impact paint


Glue the wings and head to the centre of the clock and once set, Dry brush with rust paste and night sky glimmer glaze

Apply adhesive to the project and sprinkle on glass sand and micro beads for texture


Thank you for visiting

Links


Sunday, 18 February 2018

New Product Range Craft Consortium MDF Altered Storage Box

Hi all

I have an exciting new product range from Craft Consortium to share today. Yep they now do MDF products and you know i love working with MDF. As seen on Hochanda i present to you the Storage Box. This is huge and can hold an A4 stamp set or maybe cards if you want to keep them all organised.

Product list

MDF Storage Box With Dividers https://www.craftconsortium.com/product-page/craft-consortium-3d-mdf-storage-box-with-dividers

Decoupage White Wood https://www.craftconsortium.com/product-page/white-wood-decoupage-papers-set

Decoupage Old Newspaper https://www.craftconsortium.com/product-page/old-news-decoupage-papers-set

Tell The Bees Clear Stamp Set https://www.craftconsortium.com/product-page/tell-the-bees-clear-stamp-set

Kori Kumi Floral Die  https://www.craftconsortium.com/product-page/santoro-kori-kumi-floral-die-collection

Kori Kumi Sequins https://www.craftconsortium.com/product-page/santoro-kori-kumi-floral-sequins

DecoArt Gold Metallic Lustre


I started off by painting each piece with white gesso and leaving it to dry and then i gave it a coat of cream chalky finish paint. 


I then covered each piece in pva glue that had been watered down with a little water. I used the White Wood Decoupage papers and covered each piece. Once it had dried i used the hineycombe stamp from the Tell The Bees Collection to stamp across the sides using black ink. I then cut out the flowers from white card and coloured them with brusho powders. 


I then sanded back any rough and uneven edges and rubbed on some  gold metallic lustre. I then glued the flowers onto the sides of the box and filled in the gaps with sequins.


I covered the inserts with the Old Paper Decoupage papers and glued resin flowers on to the tabs to finish.

Thank you for visiting


Friday, 1 December 2017

How To Decorate A MDF Advent Calendar With Best Glue Ever


Hi all

I am up on the Scraperfect blog today with an altered Advent calendar using Best Glue Ever.


Start off by coating the mdf with gesso or white paint. This is so the next paint layer doesn't soak into the wood.


Once the first layer has dried ,apply the top coat of paint. I choose traditional colours.


I used a number die cut set and used brown craft foam. I then used Best Glue Ever to adhere them to the draws.


I then gathered up a selection of small embelishments and gems and used Best Glue Ever to adhere them to the draws.


I added small gems and pearls to the Christmas trees by adding small blobs of glue. I used the fine tipped cap which makes it easier to  add glue to small pieces.