Followers

Showing posts with label Seaside. Show all posts

Saturday, 16 June 2018

Cherish The Memory Inspire Seaside Themed Altered Letters

Hello

I have a new make to share using the Summer Feelings paper pads available at Cherish The Memory.
https://www.etsy.com/uk/listing/614685279/studiolight-summer-feelings-card-making?ref=shop_home_active_20
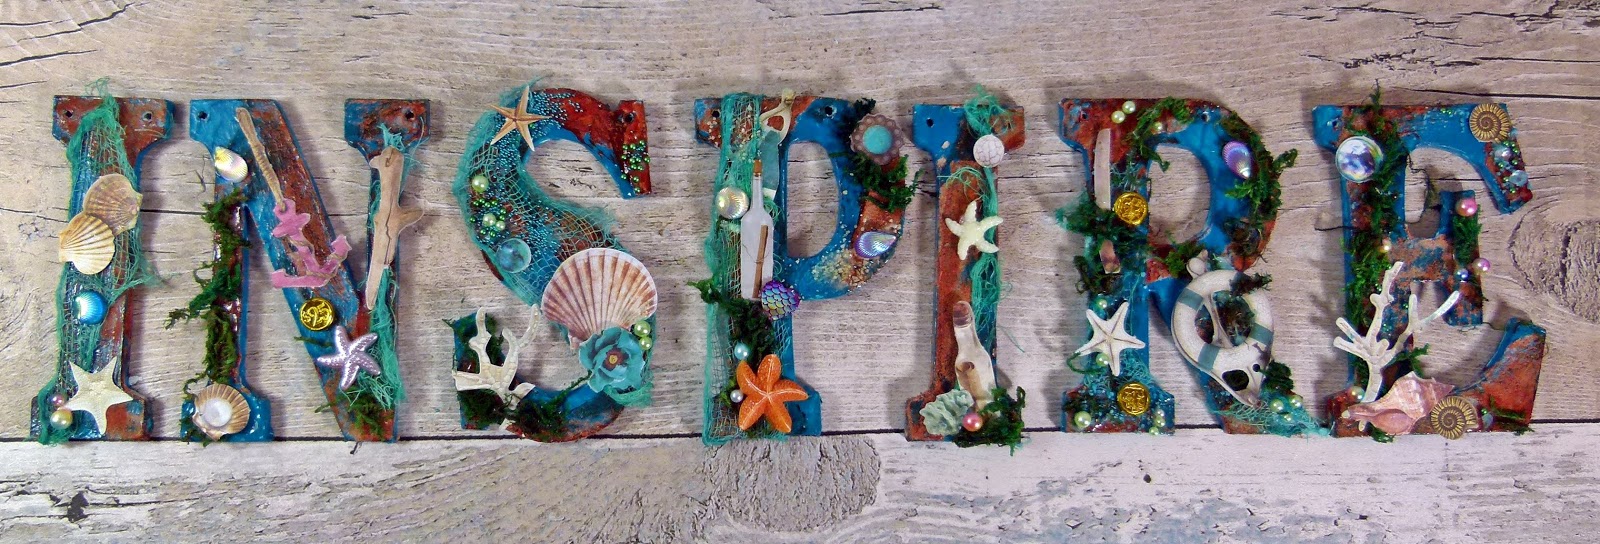


I started off by painting each letter with white paint as an under coat and once that had dries i then painted over the top with DecoArt Premium Acrylic Turquoise. Then i applied DecoArt Texture Sand Paste and let it set.


I painted on Quinacidone Gold Fluid acrylic to get the rust. I wasn't sure to go steampunk on these or not so i met in the middle and went for a water worn look.


Next dye some cheese cloth. 
I used blue and light green to get this colour, This stuff is great as it gets disstressed when you heat dry it so you get this worn net look.


I used heavy gel medium to paste down the cloth and then i started decorationg the letters using the die cuts from the Summer Feeling Die Cut pad.


I also added gems and beads to the letters.


I used fake moss to create this underwater look. I was thinking about the things you find in the rockpools  after the tide has gone in.


Product List
Studio Light Summer Feelings A4 Die-cut Pad
Studio Light Romantic Summer A4 Die-cut Pad
Unbranded MDF Letters
DecoArt Heavy Gel Medium
DecoArt Premium Acrylic Turqoise
DecoArt Fluid Acrylic Quinacidone Gold
DecoArt Texture Sand Paste
Imitation Beads
Fake Moss
Cheese Cloth
Colour Chemistry WaterFall and Bramley Apple (Discontinued)
Resin Starfish, Shell flatbacks and palstic coins.
Micro beads 
Artful Days Glass Sand Yellow and Blue.

Thank you for visiting

Tuesday, 28 March 2017

How To Create A Tranquil Nautical Card With City Stamps


Learn how to create this tranquil greeting card using Sin City Stamps.

Gelli Plate with paint on


Pour a few colours of acrylic paint on to a Gelli plate and place your paper over the top to create the first layer

Close up of shell stamp

stamp one of the shells from the Nautical set using blue ink onto the plate and then place the paper back over the top.

Close up of painted page

Once the sheet is dry, cut out a 5 x 5 square.

Close up of stencil

Add a stenciling over the top of the paper 


Close up of 7 Gypsies Marina papers

Cover a 6 x6 card blank with patterned paper and then place the 5 x 5 printed sheet into the center.

Close up of stamp

Stamp out the bottle stamp onto smooth card and color in using watercolors. Thread a charm through some jute twine and wrap it around the neck of the bottle and hold in place with tape.


Close up of card front


Adhere the bottle into the center of the card using 3D foam tape

Cut two strips of washi tape and place them in the corners of the card. Cut out two thin strips of blue hessian and adhere these over the top. If you don't own any blue Hessian you can dye some with ink.

Close up of washi tape


Decorate the card with some flowers and shells

Finish with a sentiment

Thank you for visiting


Tuesday, 21 March 2017

The Robin's Nest Nautical Wreath Tutorial

Hi all

I have a nautical wreath to share using card stock from The Robins Nest. You can find all the products here http://www.shop.robinsnest-scrap.net/


Products used


I painted a 8x8 mdf circle with white gesso and then light blue paint. I added crackle medium as the next layer and then i painted it over the top with dark blue to create the worn look.


I created several rosettes using a die cut and glued them around the base. I then stuck shells and flowers in between the rosettes.


I cut a strip of hessian and dyed it blue with spritzing ink and once it had dried i tied it into a bow.


The centre piece was painted with texture paste and then light blue paint. I wrapped blue jute around the anchor and glued tiny shells to the edge.


I finished off the wreath by adding tiny starfish and pearls.

Thursday, 29 September 2016

Artful Days August Kit Hello Sunshine Mixed Media Canvas

Hi all

I am back from my week holiday to Great Yarmouth which went way too fast but you know what they say when you are having fun. The weather was warm and sunny until the last day so its been a fab break and now i need to work off all that ice cream. Anyway I bought my first Artful Days Theme box last month but i have only just found time to sit down and make something with it. My Father in law was taken ill at the end of August so i have fell behind a bit but i have some of my October makes ready.

Here is a reveal video of the August box which i threw together and here is a link to the website http://www.artfuldays.co.uk/ The October Goodie Box is Steampunk so guess what i will be making next.


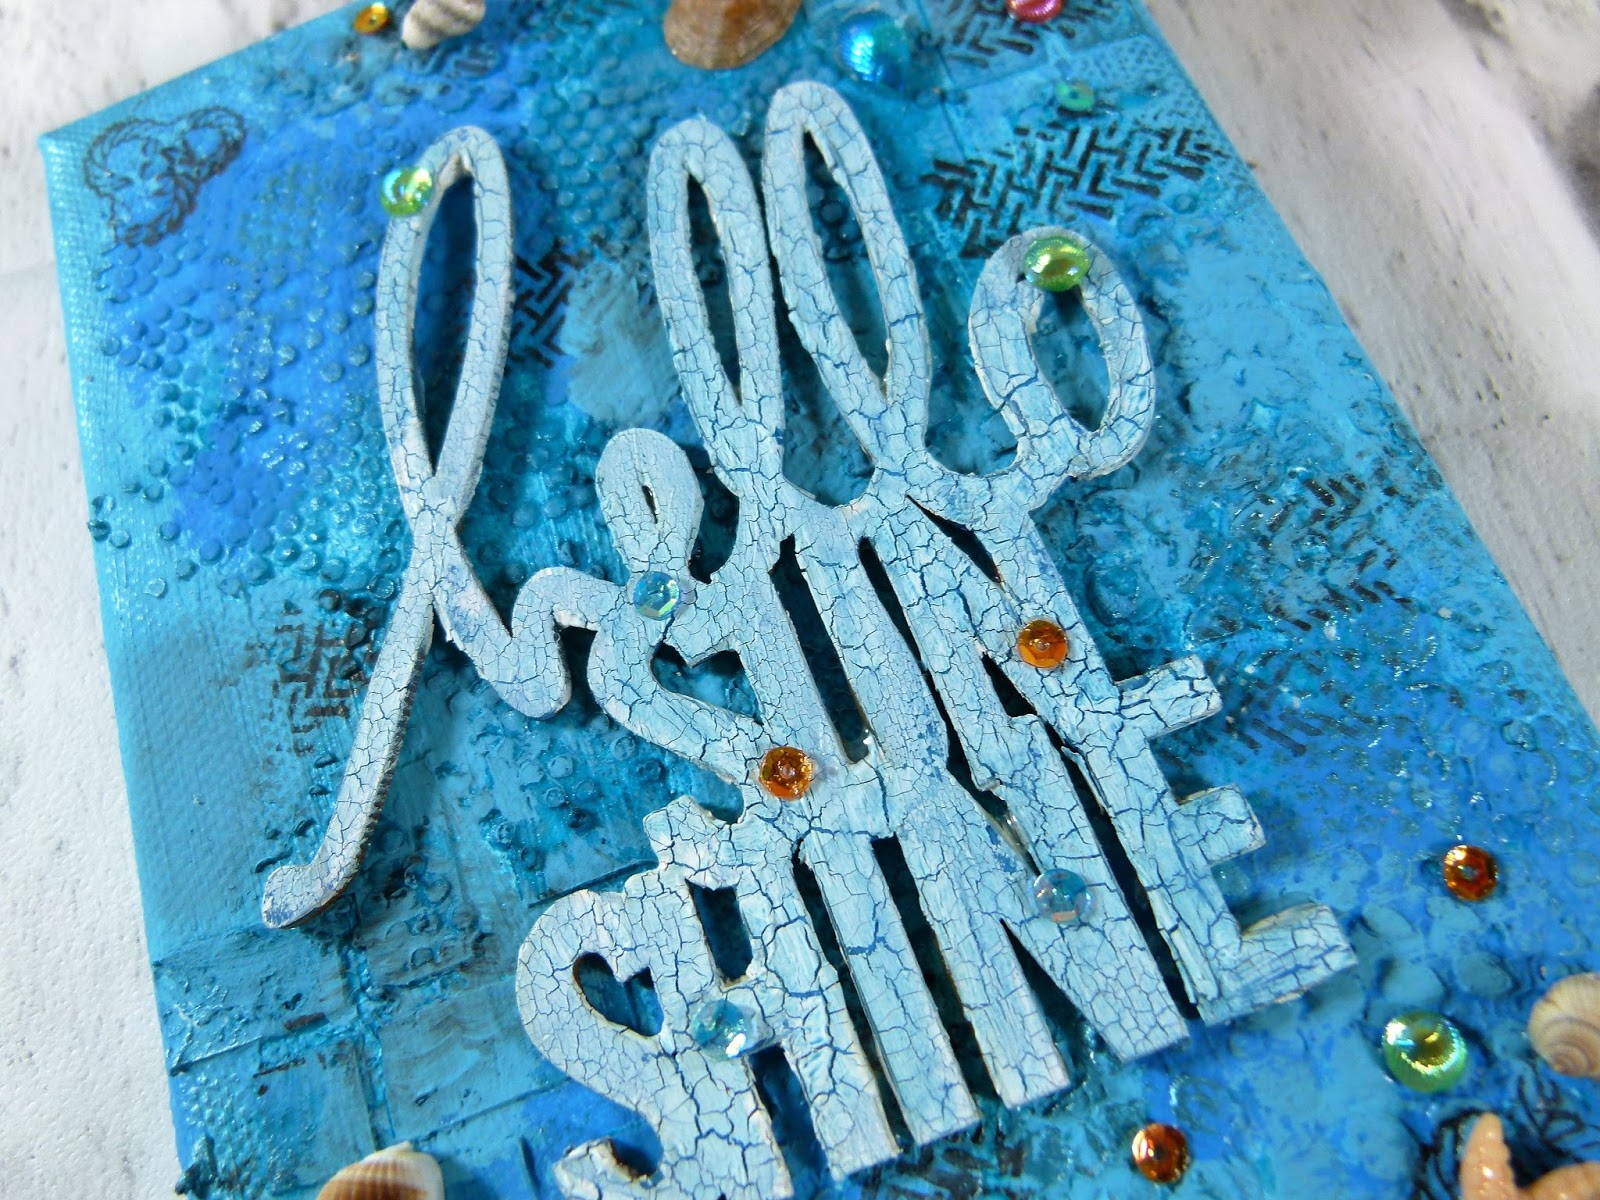
I made a mini canvas using the kit 


I first covered the canvas with gesso and let it dry before adding textures to it using stencils. I then painted it with DecoArt Crafters Acrylic and used texture stamps over the top.


I used the MDF sentiment as the focus for the canvas which i painted with dark blue paint first before adding weathered Wood Crackle Medium and then a layer of White crackle pain. Leave each layer to dry completely before adding the next layer. I finished off the letters using Patina Antiquating cream and glued sequins around the letters.


I added Sequins, gems and shells around the canvas. I love the little starfish cabs which glimmer in the light.


The kit comes with a lot of embellishments and papers so you have plenty to play with.


Thank you for visiting


Saturday, 3 September 2016

Trimcraft Simply Creative Life's a Beach Altered Frame

Hi all

I love all things nautical so i made myself a seaside themed frame using the Simply Creative Life's A Beach paper pad. The frame i got from Poundland so it is a cheap gift for someone.


I just glued a few flowers and shells around the frame using a hot glue gun and this time i didn't burn myself.


The bunting was created using a bit of jute twine and the small bunting die from the Dovecraft Cutting /dies Collection. 


Thank you for visiting and you can see more on my Trimcraft gallery http://www.trimcraft.co.uk/projects/author/katiel

Wednesday, 31 August 2016

Things To Alter Seaside Layout With 12 x 12 MDF Blank Circle


Hi all 

This is my last official post as design team member for Things to Alter. It was decided that the challenge blog wasn't getting enough entries and it was taking a lot of Jac's time to organize so for the time being she is focusing on running the online shop.  I wanted to say a huge thank you to all the guest team that i have worked with over the last few month. I really enjoyed seeing all your creations. 


I used the 12x12 Circle as the base because it is great for holding wet mediums.  I painted the base in gesso and used the DecoArt Stencil to add the first layer and then used Turquoise Color Burst powders to add a vibrant blue color.


The frame is the Geoclusters Bubble Frame and i added a couple of the seaside shapes.


I used Craft Consortium Gypsy Gypsy with Kaisercraft collectibles for the layers and added a bit of trim.


the picture is of my Nan and i am not sure where which seaside location she is but it might be Skegness.


                                                            Thank you for visiting

Thursday, 11 August 2016

Trimcraft Simply Creative Life's A Beach Cards and Tutorials


Hi all 

I am back with more seaside themed cards and i had a lot of fun creating these.  So here are a selection off different cards and how to make them bellow.

Flip Flop Pop Up Card


  1. Take a 6x6 card and glue patterned paper to the outside and inside of the card.
  2. Fold the front of the card in on itself 
  3. Draw and cut out two flip flops and decorate
  4.  adhere to the folded up part
  5. Add a sentiment to the base

Beach Hut Pop Up Card


  1. Take a 6 x 6 card and glue patterned paper to the outside and inside of the card.
  2. Fold the front of the card in on itself 
  3. Cut out a 4 cm x 4 cm square and then  a 3 cm x 3 cm square and cut it in half
  4. Place the triangle on top of the square to create a basic house shape.
  5. cut a tiny square about 1.5 cm x 1.5 cm for the window and a small rectangle about 2 cm x 4 cm for the door.
  6. Cut out the bunting using scraps of paper and the Mini Bunting Die Set and glue the flags to some twine before adding to the top of the beach hut roof.
  7.  Adhere to the folded up part
  8. Add a sentiment to the base

Beach Ball Card

  1. Using a large circle nesting die, Place the die over the edge of a 6 x 6 card blank and hold into place with washi tape before cutting out.If you do not own a die cutting machine you can use something round like a saucer to get the same effect.
  2. Using the Dovecraft Bunting die, Cut out 8 flags using the larger sized one.
  3. Find the center of the card and glue the flags down next to each other. Leave a small gap between each flag so that the look roughly equal.
  4. Bunch out a small circle from patterned paper or add a button to the center
  5. Cut two sentiments out of craft foam, from different colors and layer them together so that the darker color shows underneath.


Birthday Card


Cover a 6x6 card blank in patterned paper and place the next layer across the card at an angle and trim to fit.

Cut out a 10 cm by 15 cm rectangle and rough the edges with a pair of scissors.

Stick a strip of washi tape across the center of card

Cut out a circle and place in the center

Cut out two smaller circles and place either side of the large circle.

Cut out a few shells and place them inside the small circles

Add a sentiment to large circle.


Thank you for visiting and you can see more projects here http://www.trimcraft.co.uk/users/katiel

Wednesday, 20 May 2015

Tando Creative May Challenge


Hi all
I am sharing a new mixed media layout today. I am entering this one into the Tando Creative May Challenge.  www.tando-creative.blogspot.co.uk

  
I used the Harlequin and sequin waste masks on this project. I wanted a very textured layout that reminded me of all the things found when the tide goes out. Like the little crabs and limpets stuck to the rocks. 


These cute place markers are from the Happy Scatter Etsy shop, i love them and i want more.


I really do love being on the beach its so peaceful and the salty water and fresh air is invigorating.


I experimented with texture by adding seed beads to the page. I was trying to recreate the rough rocks you find when the tide goes out.

                       
                      And here are some beach photos to keep you going until the next holiday. I can still                             smell the salty air, i think i miss it already.


This is Weymouth which i have just come back from, i love this beach with its fine sand and shallow water.

 This one is Bognor regis while stunning to photograph its not so kind on the feet


Exmouth is one of our regular destinations its strange because the sand is light and fine here but less then a mile up the road the sand is a red colour, The red sand gives the place a surreal feeling and i love it.

Thank you for visiting and i will be back with more photos and projects soon