Followers

Showing posts with label artiste Spritzing inks. Show all posts

Saturday, 26 September 2015

Mixed Media Tutorial: How to make a textured background using tissue paper

Hi all

I am back with a mixed media tutorial and I am going to show you how to create the background from my Paradise layout.  Here is a link to the layout http://whatkatiedid2.blogspot.co.uk/2015/09/mixed-media-layout-paradise-using.html


I started my page off by choosing the photo first as it gives you an idea of what colours to work with. I chose this beautiful water scene and began choosing all my blue toned papers and inks.


  Take a couple of sheets of tissue paper and cut them into strips, Don't worry about being neat as it adds texture to the final page. For adhering the strips to the page i used watered down pva glue and then build up the layers as you would with paper mache. I added around three layers but it depends on the thickness of the material.


I then used a mixture of white paint with water for a primer and then give the whole thing two coats and left it to dry. You could also use a heat tool but i would recommend spritzing the back of the page with water as you dry it to keep the page from curling up and then repeat on the front of the page.


       Here is a close up of of the first layer and as you can see it is primed and ready to cover in ink.


I used a honeycomb die cut from the Xcut Beekeeping set to make a stencil mask which i cut out of using thick kraft card. I then applied my texture paste randomly over the die-cut shape and dried it off with a heat gun. 

I have also found that with sturdy steel dies you can apply texture paste directly over the die itself using a spatular.


 I then cut up the mask as being made of card it soon goes limp but it makes an excellent background texture.


 I used the punch outs from the die to add another layer of texture and then cut up cream coloured lace and stuck that to the background as well. 


I chose Three mist sprays and covered the whole page before lifting it up and letting the ink run. I then sprayed it again and used a paint brush to paint over the whole page mixing the colours and covering the textures.


I then took a few texture stamps and stamped them on the background at random. I use border stamps in between layers to add texture.


Here are some detail shots so you can get an idea of how the layers build up. I added my pattern paper layers after this and began turning it into a layout but you could also use this tutorial to create a canvas or art journal.


                            Thank you for looking and let me know how you get on xx

Sunday, 9 August 2015

Creativity Magazine Issue 61: 3 Ways With Spritzing Inks


Hi all 

I can share my makes for Crativity Magazine issue 61 now.


Its always a great feeling to see my makes published


Here is my layout which i had to use the Artiste Spritzing inks on. I use them on everything so i had to think up a few different ways of using them. So i spritzed them onto the page and added water so i could paint with them and created a watercolour background.


I let some of the ink drip down the page


I have a thing for neon and have added it to everything but don't worry because now Christmas crafting has started it will be glitter that is added to everything instead and maybe neon.

Thank you for stopping by


Saturday, 18 April 2015

Free The Chevron Collection digital download and a project to share

I am busy on the blog today and catching up with all the projects i want to share. Here is an older project i made with the Chevron collection that is available for free on the Docrafts website


i added splashes of spritzing inks over the card before adding the layers. i used Cardinal Red, Midnight and Mint green.


i have cut out the large chevrons and mounted them onto acetate so that they float above the layers. The stamps are free with creativity mag and they are one of my favourite sets.


The sentiment is from the Graffiti collection which is also free to download and print.

I coloured the hearts in with the Artiste Water colour pens which are really easy to use even for a complete novice like me.

Thank you for visiting

Wednesday, 4 February 2015

Victorian Valentines

hi all 
I'm back with more Valentines cards, this time we are going vintage.
i am lucky to have the opportunity to design with the lovely Victorian Valentines range.

I like to add texture to my projects and for this one i reused some packaging i received with an order.


This one is my favorite and it made it into the Docrafts news letter so they loved it too. i was trying to mimic the old style of valentines cards which were shaped instead of the more symmetric style we are familiar with today.
                                     
                                           I was experimenting with the spritzing inks on this card

                                                          Thanks for looking

Sunday, 4 January 2015

Docrafts Blogger Outreach Programe: Introducing Papermania Little Meow range


Today i will be introducing one of the new ranges released this month. The Little Meow range is cute and purrfect for cat lovers but is also versatile as there are patterns that can be used for all occasions. This range has matching embellishments and comes in both A5 and A4 paper packs. i will also be sharing with you a mixed media tutorial as well.


I had to do a kitten layout to match the cute papers.

The paper ranges i used for this project are The Little Meow A4 paper pack (PMA 160180) and Capsule Collection French Lavender 12x12 pack (PMA 160232)


Take a 12x12 paper for the background and then paint with gesso or watered down white acrylic paint. Dry with a heat gun before spritzing with inks. blend the inks together with a paint brush before it dries adding water where needed. i used Artiste acrylic paint  Blush (DOA 763219) and White (DOA 763260) for the base coats and Artiste Spritzing inks Cardinal Red ( DOA 550603) Violet ( DOA 550611) and Gold (DOA 550602)

Tip:  The gold and white sprays are best used as a base coat if you spray these over your project first and then spray over with another colour once dry. You will then get a lovely glittery shimmer and it will bring out the colours more.


Once the background is dry, take a selection of stamps and inks and then stamp around the page at random. stamp a few in embossing ink and use embossing powder to add texture.
i used Artiste Watermark (DOA 550500), Metallic Berry(DOA 55121) , Black (DOA 550105) ink pads and seafoam embossing powder (PMA 4021010)

Tip: remove any excess powder off using a make up sponge or, brush a bit off to create a distressed look.

 
I used Tilly daydream Ribbons (TIL 907104) and Bird Print (PMA 907122) 
you can still get these online. 

Tip: Try pressing the stamps down using your fingers instead of an acrylic stamping block as this gives you a faded effect.


Next cut out a selection of die cut shapes and place the layers together. once you are happy with the way your layers are laid out then staple together to hold in place.  before sticking down your layers to the background stamp a few more images around the focal centre of your layout and flick a few drops of spritzing ink around it. I used double sided craft tape by Stick it to stick down the layers.

i used Xcut Tags nesting dies (XCU 503926), Rectangle nesting dies (XCU 503409) , Rectangle Parentheses (XCU 503044) and Rectangle Parentheses 2 (XCU 503045)

Tip: you can crumple up some of the layers and then ink them before sticking them down to add texture.


Stick your photo in the centre of your layers using Stick it 3d foam pads. Then take a length of thread or twine and loosely wrap it around the photo to create a rough frame. stick it into place using the Stick it glue pen. i love these pens as they are so accurate when sticking down small embellishments.
here are the codes for the adhesives i used  Double sided tape (STI 7101) Glue pen (STI 463100) and 3d foam pads (STI 4000).


                      Finish of your project with a selection of embellishments and buttons.

                   Thank you for visiting.

Tuesday, 20 May 2014

TMN May Challenge Leslies' Sketch


The first sketch for May and this week the challenge is to use the phrase and sketch to inspire some creativity. link your projects up at The Memory Nest www.thememorynest.blogspot.co.uk.


I had a lot of fun with this challenge and used the rainbow colour theme as the focal point of the layout. I created layers of colour using the Artiste Spritzing inks with various textured stamps. I used a black and white photo as it really pops out amongst all the colours.

I started by dabbing ink on to the page and blowing on it so it spread down the page like branches. I tried to combine the colours so that they blend from one colour to the next like a rainbow.

 once the ink had dried I dug out my stamp box and sorted out a few that had different textures and just filled in the gaps with them. the butterfly stamp is from Kaisercrafts and is called botanicals. I love there stamps as they are so detailed.
 I used a few masks to fill in the larger spaces, the masks I used are Punchinello and Harlequin  from Tando creative.
 the Tim holts typeset alphabet dies have become my new favourite. I just used the card that was left over when I popped the die-cut letter out, I found it was a great way to make up words with out having to constantly use more card.
 the frame I made from a 6x6 pad of Papermania Happy Days cardstock. I used a boarder punch to punch a pattern across the bottom and to use as a marker so I could trim the card to the correct size.
 if you don't own any stamps with textures on you could use patterned washi tape instead.

Monday, 5 May 2014

A Beginners guide to Misting Sprays


                   A Beginners Guide to Misting Sprays

The Artiste Spritzing inks come in a wide range of colours and are very versatile. In this workshop I am going to teach you some of the basics and teach you a few techniques for your projects.

Before you start using these inks, cover your workspace well with newspaper but don’t worry if you spill some or get a bit of spray over something as these inks are washable and will clean off with soap and water.

To use the inks first you must shake the bottle well, its ok to give these a good shake as the nozzle doesn’t clog up like other brands of spritzing inks. Hold the bottle at a slight angle and then spritz,

There are 12 colours to choses from  Gold (DOA 550602) , White (DOA 550601), Black Night (DOA 550609) , Cardinal Red (DOA 550603), Ocean Blue (DOA 550607) , Electric Blue (DOA 550605),  Goldstone (DOA 550612), Hematite (DOA550608), Mint (DOA550610), Forest Green (DOA550606) , Violet (DOA 550611) , Aubergine (DOA550604). for more info visit www.docrafts.com and enter the product codes in to the search bar.


You will get a different effect depending on how far from your project you hold the bottle. If you hold it close to your project you will get a thick covering of colour like this:


If you hold it further away you will get a soft misty effect like the photo below. Have fun and try out different effects by altering the distance between your project and the bottle of spritzing ink.


now we have the basics lets learn some techniques


Technique 1 : Dripped ink


                                   Unscrew the cap and draw a line of ink across your project.

      Tilt your card or page up slightly to let some of the ink run down and then blow on it to branch it out.
  Leave it to dry for up to 30 minutes or use a heat gun to speed things up.  To prevent warping spritz some water on the  opposite side as the warping is caused by the moisture being removed from the ink too quickly.  You could also place two sheets of scrap paper over your project and place a heavy object like a book over it while it dries.

                           Technique 2 : Stencil effects


                               1) Select your card blank and place your chosen die into position.


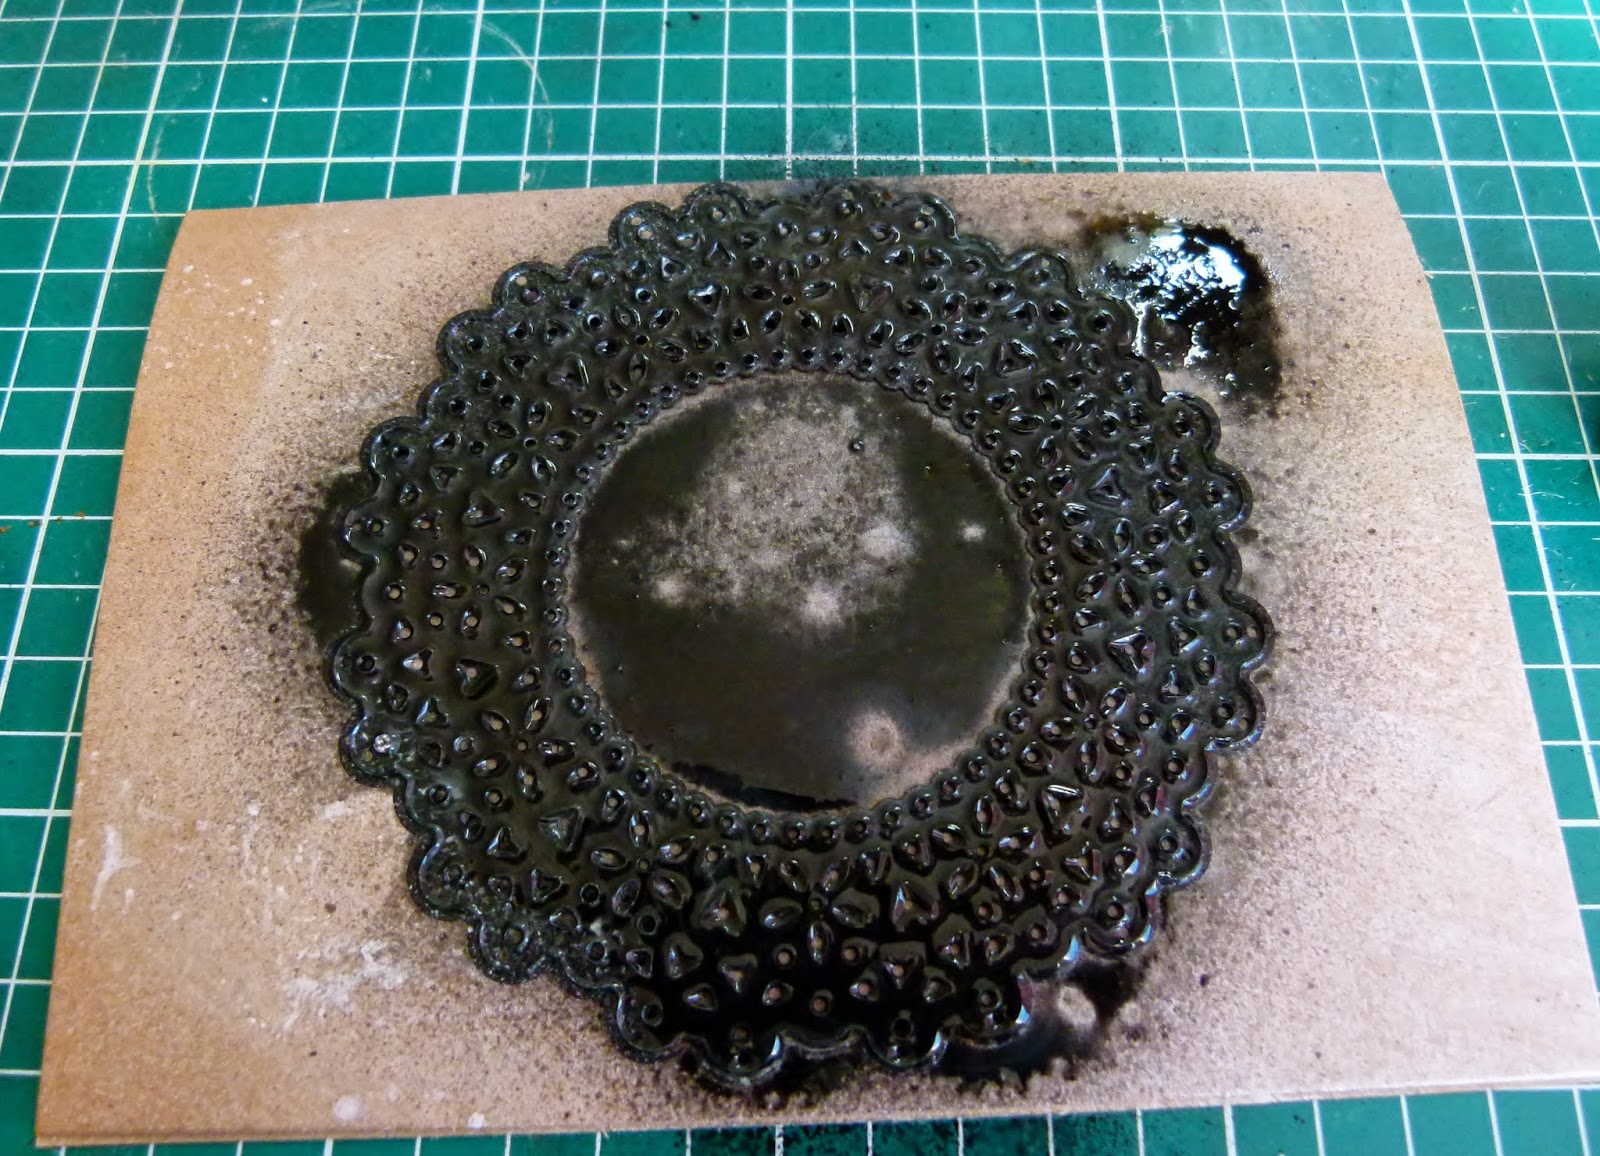
2) Spritz Artiste Spritzing inks all over the die ensuring that its held down as firm as possible.


                         3) Carefully remove the die and dab off excess ink with a paper towel.


4) it should look like this, don't worry if its not perfect as you can cover up any blotches with embellishments.

For more project ideas visit www.docrafts.com