Followers

Showing posts with label beginners guide. Show all posts

Saturday, 4 April 2015

How to create square photos using photo editing software

Hi everyone
This week i am going to begin with a mini series on how to edit and print 4 x 4 square photos. I will keep it simple i promise.


To get a larger view of the photos just click on them and you will get a pop up with a bigger image. Don't worry they wont try to sell you anything.


Step 1) go into the folder where your photos are kept and double click on them so that photo editing software launches. I have used Windows Live Photo Gallery for this tutorial but there are many free programs such as Picasa and Pic Monkey you can try.


 Step 2 ) Next click on the crop button and then go to proportion and click on the custom option, then go to the bottom of the list and choose Square.


Step 3) using the cursor adjust the area and position of the square by dragging the little boxes in the corners. to move the whole box click and hold the centre of the highlighted square. The arrow will change to a  cross shape, just click and drag it into place.


Lastly click the crop button once you are happy with the final image and save to your photo folder.


I hope this helps and i will be back with a tutorial on how to print these photos off with a home printer.

Saturday, 4 October 2014

A Beginers guide to using the Xcut Xpress.


I love it when products are simple to use without the need for a PHD to work out what goes where. The Xpress die-cutting machine by Xcut is one of those products.  This month I will be reviewing the new die-cutting machine and also covering the basics for those of you who haven't used one before.

The Xpress comes with a base plate, cutting plate and a metal shim.
to change the height of the rollers, you turn the dial until you can fit your pates and material through the rollers with enough tension for the die to cut through your material.
What makes the Xpress standout from the other brands of die-cutting machines, is its adjustable rollers.  With the Xpress there is no fumbling around trying to work out which combination of shims to use or the need to buy special add-ons  to get your dies to cut correctly.  All you do is turn the dial on the top until your die and plates fit through the rollers. It also means that it is compatible with all brands of die-cutter and allows you to cut through material such as felt and foam.  The adjustable rollers mean that you no longer have to worry about jamming the roller or snapping the handle off if you try to push too much material through the rollers.

you can emboss full A4 sheets of card and paper and the XPress  is compatible with most A4 embossing folders and die-cuts

                with the XPress  you can cut multiple dies at once


The Xpress  can fit up to A4 sized  paper  through its rollers, this makes it easier to use when cutting multiple dies as you don’t need to cut the paper to fit the dies. The new extra-large dies make matting and layering easier and neater when creating scrapbook layouts and the A4 embossing folder means that you can add an embossed pattern to any sized card without worrying about buying the correct size of embossing folder leaving a consistent finish. There have been times where I have had to cover a card over with paper because the embossing folder was too small for the card.


I can hear you saying ‘this must be huge’.right? There is no need to panic, the Xpress  machine folds up into a neat carry case which can be stored away and is easy to transport to craft groups, crafts shows and even the caravan.  It is a little heavy thought so I wouldn’t  try and take it on the plane. It is also rather stylish with its black and white design meaning it wont stick out like a sore thumb and will appeal to the elusive male crafter.
 
The handle is very easy to turn and very strong so there is no need to worry about accidently snapping the mechanism.


Tips

You can use the a4 embossing folders to add texture to your scrapbook pages. Why not rub ink over the embossed pattern to add a touch of mixed media to your layout.

The new box die means that you can make a batch of gift boxes for a wedding or party quickly and cheaply. Better still you can personalize  them and make them special.

Why not use the extra-large nesting dies to create uniquely shaped cards.

Keep your Xpress machine clean by using  a micro fiber cloth to clear away dust .
if you would like to treat yourself to one then visit www.docrafts.com to find your local Creativity store. The product code is (XCU 268300 )

If your metal dies are moving about too much or you need to cut out something intricate then why not use the magnetic sheet that comes with the Xcut dies.

Monday, 30 June 2014

Heat Embossing mini tutorial: Creating Glossy Accents

                                  Technique glossy accents

Through out the year I will be posting a few mini tutorials teaching you some basic techniques and today we are following on from the beginners guide to heat embossing.

    
first of all you need to stamp out your image using pigment ink or watermark ink. The Artiste watermark ink is like the versa mark in from Wow embossing and I like to use this type of ink because it is sticky and holds the powder well.


cover it over with clear embossing powder


                                           tap off the excess and then heat with your heat tool, it is always a good idea to have a tray as you don't waste as much powder and these aren't cheap.


rub the image over with a watermark ink pad and coat in clear embossing ink before heating it up. repeat until you have a thick glossy coating.

Monday, 5 May 2014

A Beginners guide to Misting Sprays


                   A Beginners Guide to Misting Sprays

The Artiste Spritzing inks come in a wide range of colours and are very versatile. In this workshop I am going to teach you some of the basics and teach you a few techniques for your projects.

Before you start using these inks, cover your workspace well with newspaper but don’t worry if you spill some or get a bit of spray over something as these inks are washable and will clean off with soap and water.

To use the inks first you must shake the bottle well, its ok to give these a good shake as the nozzle doesn’t clog up like other brands of spritzing inks. Hold the bottle at a slight angle and then spritz,

There are 12 colours to choses from  Gold (DOA 550602) , White (DOA 550601), Black Night (DOA 550609) , Cardinal Red (DOA 550603), Ocean Blue (DOA 550607) , Electric Blue (DOA 550605),  Goldstone (DOA 550612), Hematite (DOA550608), Mint (DOA550610), Forest Green (DOA550606) , Violet (DOA 550611) , Aubergine (DOA550604). for more info visit www.docrafts.com and enter the product codes in to the search bar.


You will get a different effect depending on how far from your project you hold the bottle. If you hold it close to your project you will get a thick covering of colour like this:


If you hold it further away you will get a soft misty effect like the photo below. Have fun and try out different effects by altering the distance between your project and the bottle of spritzing ink.


now we have the basics lets learn some techniques


Technique 1 : Dripped ink


                                   Unscrew the cap and draw a line of ink across your project.

      Tilt your card or page up slightly to let some of the ink run down and then blow on it to branch it out.
  Leave it to dry for up to 30 minutes or use a heat gun to speed things up.  To prevent warping spritz some water on the  opposite side as the warping is caused by the moisture being removed from the ink too quickly.  You could also place two sheets of scrap paper over your project and place a heavy object like a book over it while it dries.

                           Technique 2 : Stencil effects


                               1) Select your card blank and place your chosen die into position.


2) Spritz Artiste Spritzing inks all over the die ensuring that its held down as firm as possible.


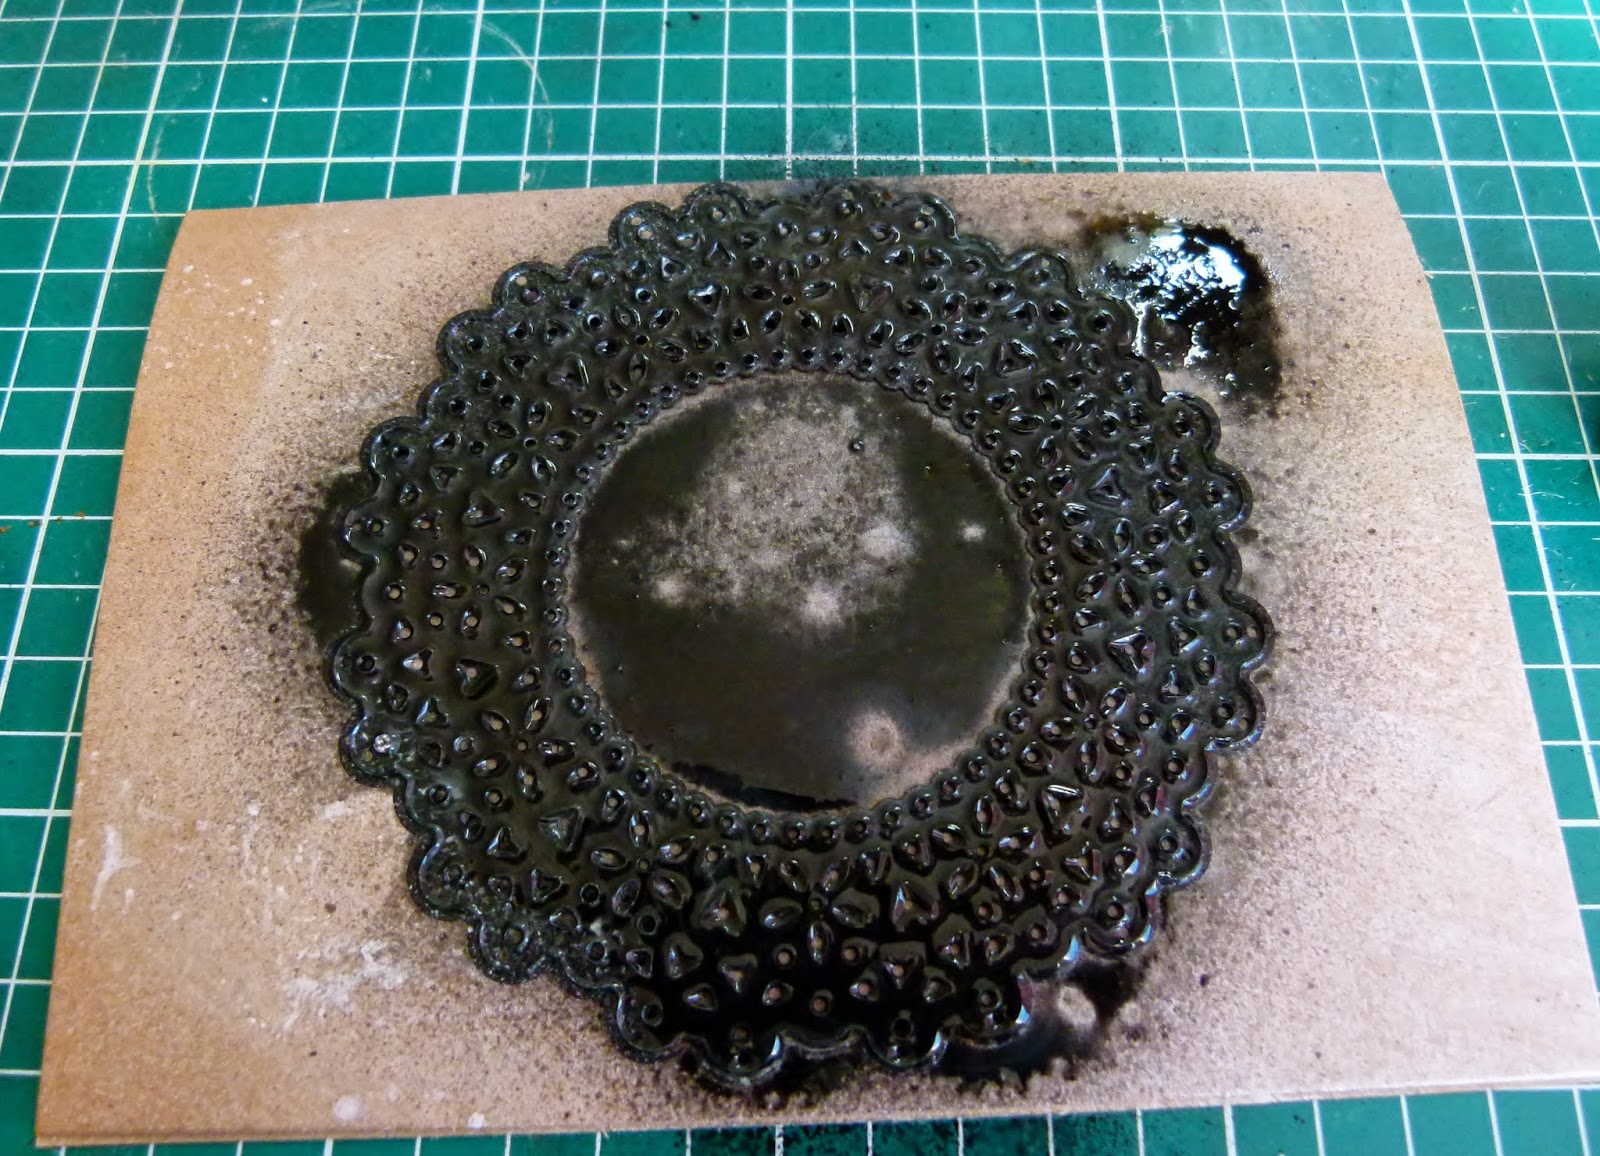
                         3) Carefully remove the die and dab off excess ink with a paper towel.


4) it should look like this, don't worry if its not perfect as you can cover up any blotches with embellishments.

For more project ideas visit www.docrafts.com

Thursday, 27 March 2014

A beginners guide to using clear stamps with die-cuts

Today I am going to share with you the first part of a series of beginners guides which I hope you will find helpful. I know I use a lot of Docrafts products but a lot of the tips and hints will apply to any brand.

 Today my tutorial will be  on how to  line you stamps up with the matching dies. Its a new trend hitting the craft industry at the moment with companies such as Papermania and Sizzix having there own products. I prefer the Papermania ones because they are cheaper and still provide the same quality as the other brands but its up to you to decide.

 For this tutorial I have used the Papermania Butterfly Stamps ( PMA  907322) that match the Xcut A5 Buteerflies die-set (XCU 503196). '


 1) This may seem obvious but carefully peal the stamp off the plastic backing. I say carefully because when using stamps with intricate parts on its easy to tear them. Place the clear stamp on to a acrylic block or CD case. Any smooth and clear surface will work but the acrylic blocks have a better grip.


2) Ink the stamp by dabbing the ink pad on to the stamp making sure you get an even coverage of ink.  doing this way reduces the risk of the stamp falling in to the ink pad creating a mess. I've had this happen to me once when I tried to stamp using the lid of an ink pad.


3) carefully place the die-cut shape over the matching stamp but do not press down until you are happy its in the correct position. once I position press the die down all over using your fingers so that the ink covers the die evenly.


4) your finished item should look like this, you can then use embossing powder to gloss over the details or decorate with adhesive gems. the possibilities are endless.

A quick tip on maintaining your stamps
as you use your clear stamps some staining may happen and I know there are a load of expensive cleaning products available for keeping them clean. but I just use alcohol free baby wipes to clean mine after use. for a deeper clean I use warm  water and washing up liquid and give them a rub down. always let them air dry otherwise the clingy bit on the back wont be as effective.

if you have any questions or feedback  then drop us a comment.
 My next tutorial will be for the end of April on how to use misting sprays.