Followers

Showing posts with label techniques. Show all posts

Sunday, 12 November 2017

Vlog Weathered Wood Updated Tutorial

Hi all

Here is my first video with my own voice on it !!

Videos scare the crap out of me so i was nervous while filming and i do mutter a bit or is that the madness setting in?  I am still working on the angle  as some of the shots are out of view of the camera but i did not swear or end up with the cat walking across the desk so a massive bonus.

I am going to invest in a better tripod as buying new filming equipment is going to cost and i dont have the funds to buy a better camera or a web cam that will let me zoom out. Bloody webcams from China!! i will look into getting a Logitech one later though. So for now i will have to make do with carefully positioned Blu tack and my project disappearing off camera.


Thank you for visiting

Thursday, 1 June 2017

How To Create Grungy Textures Using Aztec Eco Metallic Lustre

Hello all

Today i am going to show you how to create the grungy textures you have been seeing on some of my projects.


I used the Aztec Metallic Lustre paints with wall tape which you can pick up in any DIY store.


Place the tape onto a non stick surface and put a blob of your chosen colour over the top.


Next just cover the whole section of tape with the paint and leave it to dry. It will take a few hours and it can be sped up by using a heat tool. 


Once dry you can carefully peel off the tape and cut it up ready to be used on you projects.


Thursday, 26 June 2014

A Beginner's guide to heat embossing

Today I am going to teach you the basics of using heat embossing on your projects.

First of all you can heat emboss on anything that will hold high temperatures such as wood, acetate and card. if you are not sure if you can heat emboss on something then test a small area of the material first.


lets look at some of the equipment you will need.

 To heat emboss you will need a heat tool not a hairdryer as the force of the air coming out of the hairdryer will blow the power off the project and not infuse the embossing powder, also a hairdryer does not concentrate the heat in one area which leaves an uneven effect,trust me I tried doing it the DIY way then had to buy a heat tool which you can buy from around £15.

You will need to use a ink to hold the powder on to the project, use pigment inks as these are sticky and slow drying. If you use a normal ink pad then the powder will only stick to part of the image or dry before you can heat the powder. You can use any coloured pigment ink or use a clear embossing ink which is invisible until you pour the powder over it.

Then there is the main product, the embossing powders of which there are many different colours and brands and it's up to you to find ones you like. In this tutorial I have used the Papermania embossing powders.

If you use a tray such as the Anita's clear away tray, then you can capture any spilled powder and pour it back into the tub. You can use a piece of folded up card but eventually this gets messy as powder and ink will stick to it. A selection of different sized acrylic stamping blocks will allow you to use  a block that fits your stamp correctly and this allows you to apply a even amount of pressure on the stamp.

Now on to your first technique which is very basic.

                               
                 1) Take your stamp and ink it with clear embossing ink. You can't see this ink so you need to dab it all over the stamp to make sure you have covered it completely.


2) Place your stamp into position and hold the block still with one hand and apply pressure by pressing down all over the stamp with the other. By using this method you stop the block from rocking and causing the image to smudge.


3) Place the project over a tray and pour the embossing powder over the stamped area. You should see your image appear as the powder is poured off it.


4) Give it a firm tap against the base of the tray to remove any excess powder.

5) Place the project onto a flat surface that is heatproof and then heat the powder with a heat tool.  As you move the heat gun over the powder It should change colour and turn shiny.


6 ) You can leave the embossed image as it is or  you can spritz it with spritzing ink and then dab off the excess ink with a paper towel.


Thank you for visiting and please leave a comment if this tutorial was helpful or if you have any questions


Monday, 5 May 2014

A Beginners guide to Misting Sprays


                   A Beginners Guide to Misting Sprays

The Artiste Spritzing inks come in a wide range of colours and are very versatile. In this workshop I am going to teach you some of the basics and teach you a few techniques for your projects.

Before you start using these inks, cover your workspace well with newspaper but don’t worry if you spill some or get a bit of spray over something as these inks are washable and will clean off with soap and water.

To use the inks first you must shake the bottle well, its ok to give these a good shake as the nozzle doesn’t clog up like other brands of spritzing inks. Hold the bottle at a slight angle and then spritz,

There are 12 colours to choses from  Gold (DOA 550602) , White (DOA 550601), Black Night (DOA 550609) , Cardinal Red (DOA 550603), Ocean Blue (DOA 550607) , Electric Blue (DOA 550605),  Goldstone (DOA 550612), Hematite (DOA550608), Mint (DOA550610), Forest Green (DOA550606) , Violet (DOA 550611) , Aubergine (DOA550604). for more info visit www.docrafts.com and enter the product codes in to the search bar.


You will get a different effect depending on how far from your project you hold the bottle. If you hold it close to your project you will get a thick covering of colour like this:


If you hold it further away you will get a soft misty effect like the photo below. Have fun and try out different effects by altering the distance between your project and the bottle of spritzing ink.


now we have the basics lets learn some techniques


Technique 1 : Dripped ink


                                   Unscrew the cap and draw a line of ink across your project.

      Tilt your card or page up slightly to let some of the ink run down and then blow on it to branch it out.
  Leave it to dry for up to 30 minutes or use a heat gun to speed things up.  To prevent warping spritz some water on the  opposite side as the warping is caused by the moisture being removed from the ink too quickly.  You could also place two sheets of scrap paper over your project and place a heavy object like a book over it while it dries.

                           Technique 2 : Stencil effects


                               1) Select your card blank and place your chosen die into position.


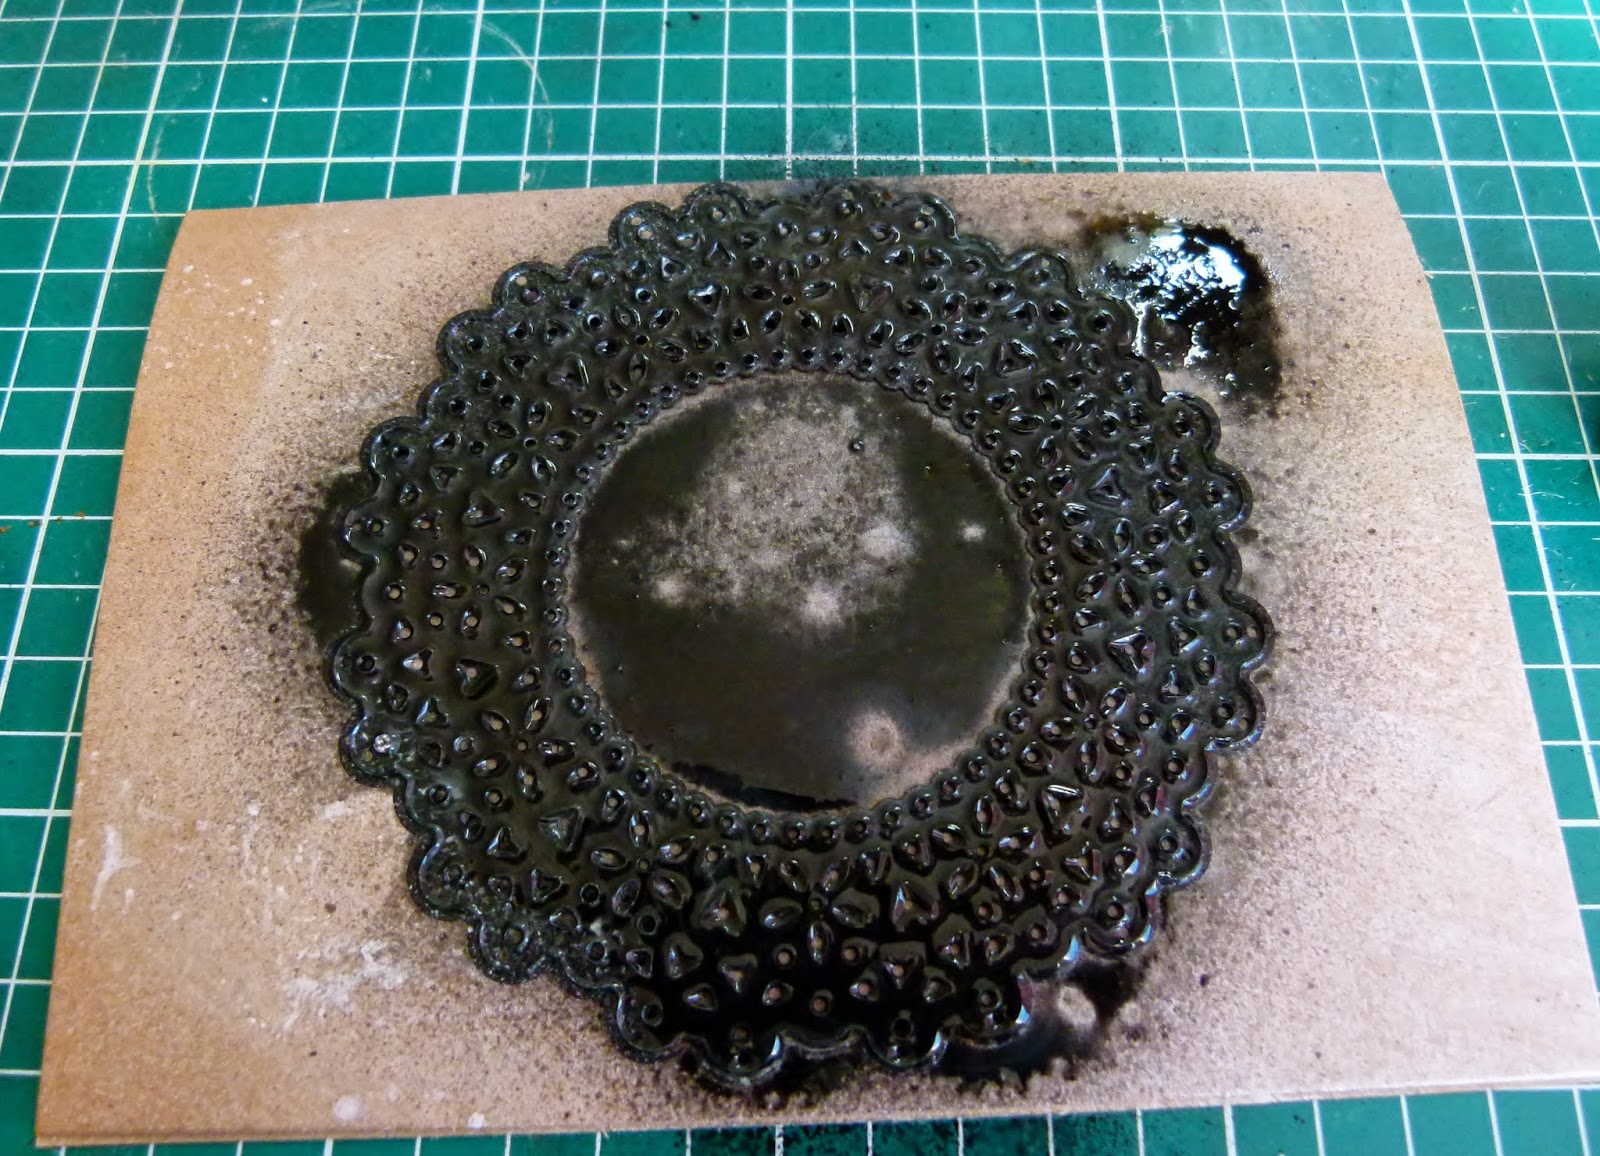
2) Spritz Artiste Spritzing inks all over the die ensuring that its held down as firm as possible.


                         3) Carefully remove the die and dab off excess ink with a paper towel.


4) it should look like this, don't worry if its not perfect as you can cover up any blotches with embellishments.

For more project ideas visit www.docrafts.com