Followers

Monday, 8 January 2018

Colourcraft Winter Wonderland Altered Birdhouse With Expand It

Hi all 

I am back up on the blog today with a very snowy altered birdhouse.


Glue the birdhouse together and then paint with gesso or cheap white acrylic paint. Unless you want  to stamp onto the surface it is easier to glue the item together and then paint it. It you paint the parts before gluing it together then the parts might not snap together correctly.


Mix white gesso with Turquoise Brusho Crystal Powder and paint over the birdhouse. Next use a crackle paint  over the top to get the cracks. I then used Pear Aztec Eco Metallic Luster as the final layer to give it an icy shimmer.


Take a palette knife and spread Expand it over the top generously . I then sprinkled on some glass glitter but anything fine and sparkly will work too. I then heated it with the heat gun and watched the snow form.


I then painted more Pearl Eco Metallic luster over the top.


The icicles are created by using a hot glue gun and squeezing the glue onto a non stick surface. It can then be peeled off and glued to the edge of the roof.

Thank you for visiting.


Saturday, 6 January 2018

How To Create An Amazing Art Journal Page Using Brusho Powders

Hi all

I have an art journal tutorial on the blog today. I am going to teach you how to create this amazing journal using Brusho Crystal Powders.


Start off by taking a blank journal page and stamping around the corners of the page with a selection of texture stamps. Use archival ink to stop it washing away when you add your wet mediums later.


Next add a little water to a palette and add your Brusho Powders.


Apply clear Soft Form Relief Paste to the edge of the page using a stencil. once it has set you can  start painting over the Brusho ink. I  mixed Turquoise, Blue and purple.


Take some white thread and dye it using the Brusho Powder and then glue it to the page. Next take the flower stamps and stamp them out onto white card. Colour in the flowers with Brusho Powder and cut them out


Place the flowers onto the page and adhere using 3D foam to add dimension.

Thank you for visiting


Wednesday, 3 January 2018

Magenta Style Dragonfly Inspirational Greeting Card

Hi all

I am back with a new project for you using Magenta Stamps


I used a tall card and applied the stencil down the center using modeling paste. I then used green and grey mist sprays over the top. Next i added some white thread to the card and glued it in place.


I used the Dragonfly and bug stamp on white card. I then used watercolours to colour the dragonfly in and then cut it out before adding to the page.


I stamped out the Work Of Art Stamp int to card and then spritzed it with ink before cutting it out and gluing it to the centre of the card.


Thank you for visiting


Tuesday, 2 January 2018

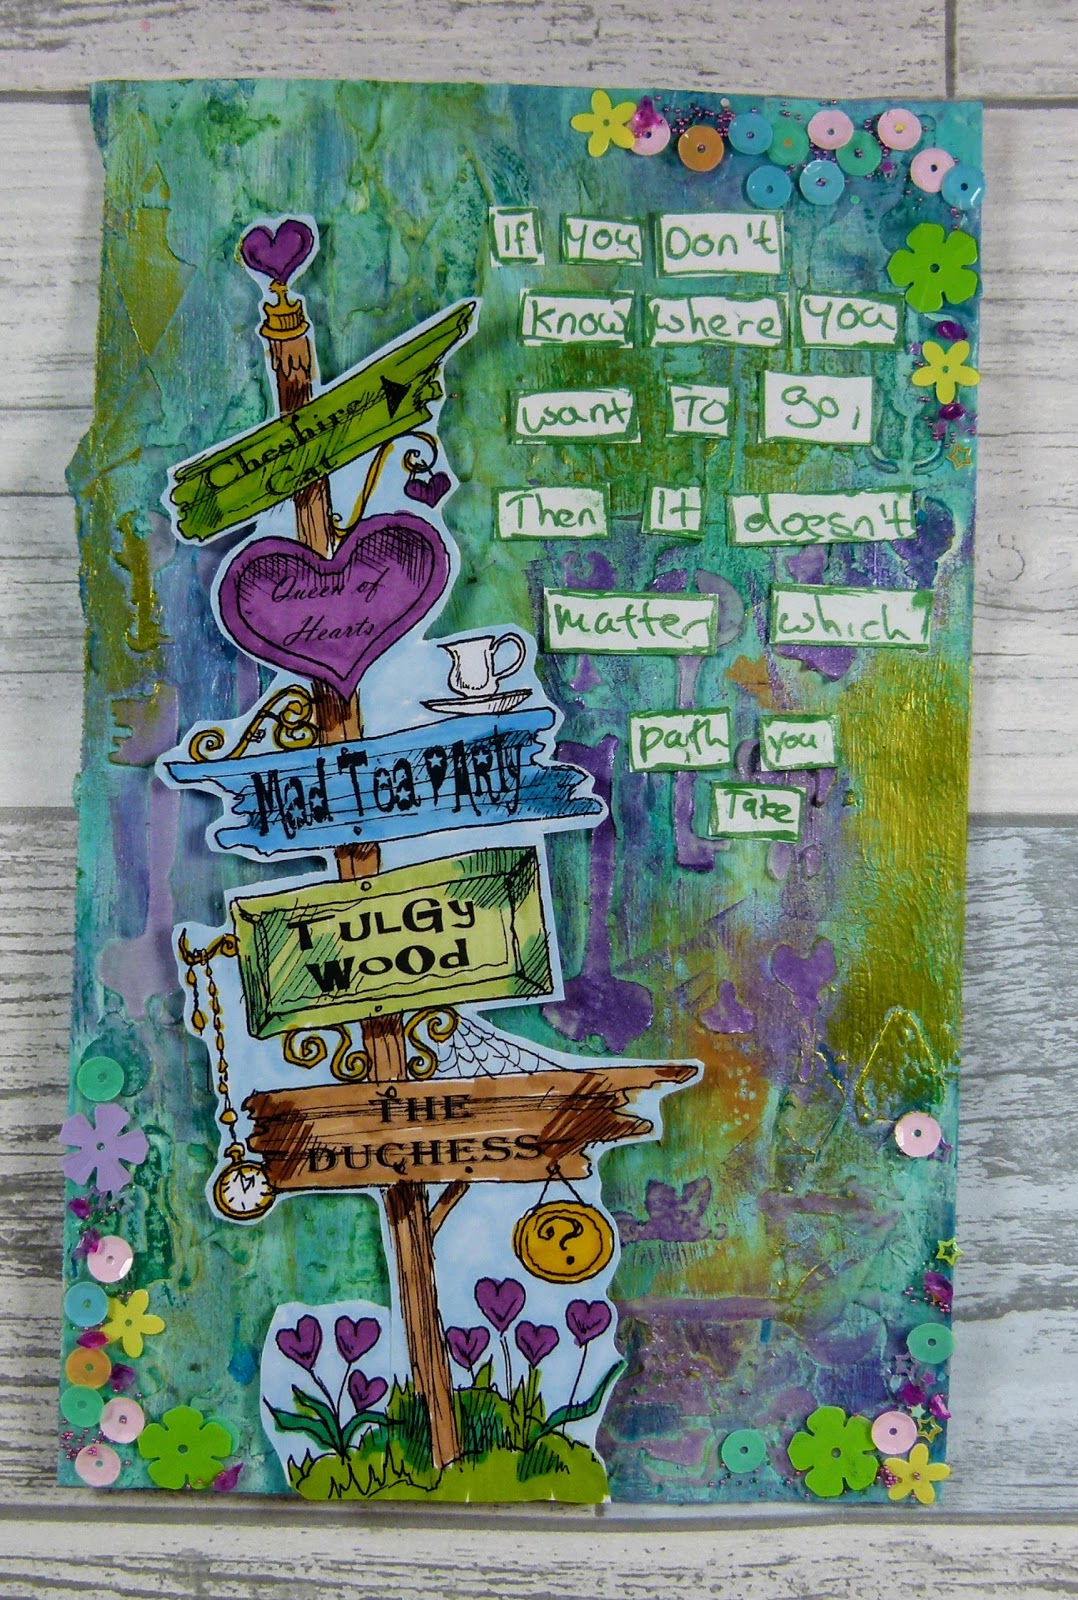
Choose A Path Art Journal Page Final Rick St Dennis EDT Project

Hi all

The New Year often brings change and my term with the Rick St Dennis EDT has come to an end. I have my last official project to share but i have a few ideas for this set so i will share those later.

I used the Wonderland Elements set available here  https://www.zibbet.com/rick1949/wonderland-elements-set-one-fpr-bonnie-irvine-digi-sheet-set


The background was created using different paints and then stencil masks for texture. I then highlighted the textured areas with Metallic Luster.


The quote i hand wrote onto card and cut them out.


Thank you for visiting


Monday, 1 January 2018

Mixed Media Cards with Oak House Studio

Hi all

I am just sharing the cards i made for Making Cards Magazine at the beginning of the year. I used Oak House Studio Stamps but unfortunately the business has stopped trading now. I thought i would finish off my miscellaneous blog posts while we are stuck between 2017 and 2018. I just hope next year isn't as shite as the last one. 


The card backgrounds were made using a Gelli Plate and acrylic paints. I really must use this fabby tool more often.


Maybe i will come out my shell a bit next year
Thank you for visiting


Thursday, 21 December 2017

Craft Consortium Winter Woodland Merry and Bright Card


Hi all 

Here is my last Christmas make of the year at least until June and the we start it all again. I would like to take the opportunity to wish you all a Merry Christmas and Happy New Year. Right i am off to polish off the wine and hope Santa hasn't put me on the naughty list ;) 


Cover a square card blank with patterned  paper and trim to fit.

Cut a large strip from matching paper and adhere to the centre of the card. Ink over the top with brown spritzing ink.

Cut out a small rectangle and adhere over the edge of the strip

Take a mdf shape and paint with black acrylic paint. Let this dry and then apply crackle paste over the top and allow to set.

Once dry thread two acorn charms through some twine and then tie around the top of the mdf shape before adding to the card.


Good Luck with the last minute Xmas shopping and i will be back after Christmas with more inspiration.
thank you for dropping in.

Wednesday, 20 December 2017

How To Create A Beautiful Vintage Christmas Card

Hi all

I have used the Steampunk'd Christmas Stamp Set to create a vintage Christmas card. You can use these stamps for more traditional Christmas crafts too. 

Product list
6 x 6 Card
8 x 8 Christmas papers
Paper Poinsettia Stickers
Banner Nesting Die
Red ink pad
Wooden Frames
Marker Pens


Start off by covering a 6 x 6 card blank with patterned paper. 
Then cut out a large rectangle from green pattered paper.
For the next layer, use a banner die and cut out a sheet of matching paper, Wrap red twine around the top and adhere to card.


Glue paper to the back of the wooden frame and adhere to card.
Stamp out the Santa stamp onto white card and colour in with markers.
Cut out the Santa and adhere to the wooden frame


Decorate with paper flowers and cut a sentiment out of the patterned paper.


Thank you for visiting


Tuesday, 19 December 2017

How To Create a Floral Bird House Card

 Hi all
I  have a card to share on the blog today. I used the foils with Best Glue ever to create a birdhouse themed card.

Products

MDF Birdhouse
Acrylic paint
Lace
Resin flowers
Paper


Cover a 5 x 7 card blank with patterned paper and then cover half the card with floral print paper. Tear a strip of light pink paper and adhere across the card. Cut two flags from the patterned paper and layer them together before adhering to the card.
Add a sentiment


Paint the mdf birdhouse i teal and then use Best Glue Ever to adhere a strip of lace across the bottom and a large resin flower on the side.


Apply Best Glue Ever to the roof and window pieces and allow it to go tacky. Next take a small piece of purple foil and rub it onto the pieces with your finger. If you get a few patches just repeat the steps until it is covered. Glue the pieces together and then adhere to the card.

Thank you for visiting


Monday, 18 December 2017

Wildflower Yikes Mixed Media Tag

Hi all

Here is an easy mixed media tag made using Monique's  Wildflower Yikes Stamps.

Product list
Large tag die cutter
white card
Black archival ink
Tyveck Material
Metallic paints


Start off with a large blank tag and using a blending tool, Apply light orange ink across the top and bottom of the tag. Next use purple ink and apply it across the middle and blend a little into the orange.


Stamp the boarder stamp around the edges of the tag and then stamp the wildflowers into the corners of the tag. You can layer up the tentacles to  create larger flowers.


Stamp out Yikes into the center of the tag.


Cut out cogs from Tyveck material and paint with metallic paints. 
Tyveck can be bought as sheets or you can buy disposable overalls and cut that up.
Create a flower by Placeng a metal brand though the center of the cogs and melt with a heat tool.

Thank you for visiting


Sunday, 17 December 2017

Winter Woodland Layout Mr Robin


Hi all

I have another layout made using the Winter Woodland Collection by Craft Consortium.


Start off by applying gesso to a 12 x 12 sheet of paper. Use a pallet knife to drag the gesso across the page.

Once dry apply a stencil mask over the top using modeling paste and allow to set.

Spritz are with a couple of green mist sprays and allow to dry

Cut up the Winter Woodland papers into squares and strips and position them onto the page before gluing down.


 Just play around with the paper layers until you are happy with the final look.

Mount your photograph onto card and trim to fit layout.


Using the robin stamps from the Winter Woodland Collection, Stamp out the little birds onto card and then color in with watercolor paints. Let them dry and then cut them out before adding to the page.

Add a few holly leaves and use the enamel dots from the Kori Kumi collection to add the berries.

Finish off by adding a title using alphabet stickers.

Thank you for visiting


Saturday, 16 December 2017

Live Love Laugh 12 x 12 Scrapbook Layout With Gummiapan

                                                                     Hi all

I have a mixed media layout to share with you today. I wanted to show how you can use your Gummiapan stamps and dies on scrapbook layouts.


Products used
Click on the links to buy

Live Love Laugh http://bit.ly/2fVnd5s

Coffee Stain http://bit.ly/2fUSmpD

Film Negative http://bit.ly/2ycVrfi

Worn Chessboard http://bit.ly/2gfYYlb

Butterfly Monarch Large http://bit.ly/2ybgZsM

Integrated Rectangles http://bit.ly/2AvP4BI

Doodled circle die http://bit.ly/2gfd0Uf

Chevron Line http://bit.ly/2gMeOnW

Chevron Line http://bit.ly/2gMeOnW


Once you have chosen your photo and papers. Take a palette knife and smooth gesso onto the background page. Next spritz the area with sea green ink and then stamp some texture around the page using blue ink.


Cut up your papers and layer them onto the page. Add bits of trim and washi tapes to add more texture and apply stencils using modeling paste. Then cover the lot in gesso. paint over the top with green and blue inks and allow some to drip down the page.


Cut out a circle and the interlinked rectangles out of card. Paint with gesso and then ink before adding them over the top of the first layer


Add more stamps around the page using Black and dark blue ink. mount the photo onto plain paper and then stamp around the frame with a butterfly stamp.  Add a few clusters of flowers and paint ink over the top so they match the page.


Create embellishments using modeling paste and a silicone mold, This takes between 24 and 48 hours to fully set so i make these in advance.

Thank you for visiting