Followers

Friday, 31 March 2017

Art Therapy Journal Tutorial with DecoArt and Sin City Stamps

Hello Crafty Friends

I am back with a step by step tutorial on  how to create this bright Art Journal page with
 Sin City Stamps and DecoArt Neon acrylic paints.


Product list

Sin City Stamps Art Journaling Stamps

Dry Wall Tape

DecoArt Neon Acrylic paint in Pink, Orange , Green and Yellow

DecoArt White Gesso

DecoArt Black Modeling paste

Docrafts Newsprint washi tape

DecoArt Andy Skinner Halftone Stencil

DecoArt Andy Skinner Old Film Stencil

Dovecraft Neon 3D Pearls Blue and Green


                Paint the page with green neon paint and then yellow. Next paint over with white gesso and leave to dry


Paint neon orange paint over the top and then another layer of gesso.


 Paint neon pink in the middle and splash over some blue paint and leave to dry.


 Using the random letters stamp from the journaling set, Stamp around the page.


 Use bubble wrap and add paint to it before pressing it onto the page.


Use a stencil to add modeling paste to the page and let it set.


 Add more paint over the stencil


Tear up strips of washi tape and add them to the page before covering them over with a little gesso.


Add a stencil using black modeling paste and let it dry before going over it with gesso.


Add more paint and then another stencil using black modeling paste.


Use the texture stamps from the journaling stamp set to build up more texture.


Cut up pieces of dry wall tape and paint over with gesso. Stamp out the note pad stamp onto card and cut out. Add texture stamps around the edges and then stamp the word Art at the top. Finish by adding the rest of the words using a label maker.
                             
Thank you for visiting

Tuesday, 28 March 2017

How To Create A Tranquil Nautical Card With City Stamps


Learn how to create this tranquil greeting card using Sin City Stamps.

Gelli Plate with paint on


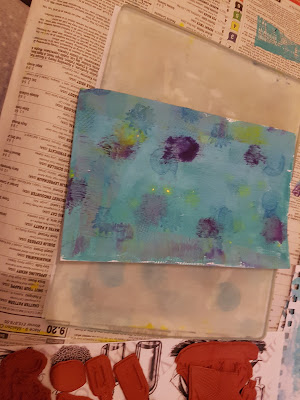
Pour a few colours of acrylic paint on to a Gelli plate and place your paper over the top to create the first layer

Close up of shell stamp

stamp one of the shells from the Nautical set using blue ink onto the plate and then place the paper back over the top.

Close up of painted page

Once the sheet is dry, cut out a 5 x 5 square.

Close up of stencil

Add a stenciling over the top of the paper 


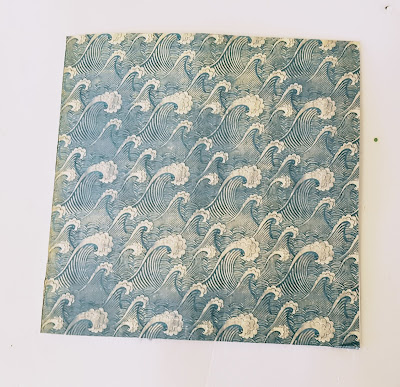
Close up of 7 Gypsies Marina papers

Cover a 6 x6 card blank with patterned paper and then place the 5 x 5 printed sheet into the center.

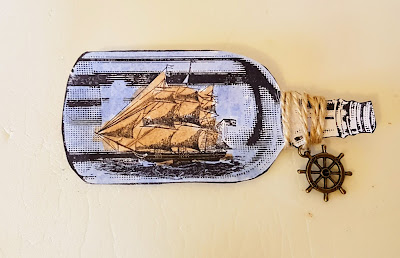
Close up of stamp

Stamp out the bottle stamp onto smooth card and color in using watercolors. Thread a charm through some jute twine and wrap it around the neck of the bottle and hold in place with tape.


Close up of card front


Adhere the bottle into the center of the card using 3D foam tape

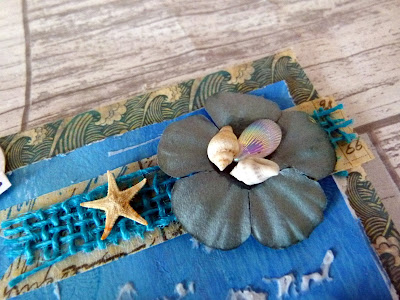
Cut two strips of washi tape and place them in the corners of the card. Cut out two thin strips of blue hessian and adhere these over the top. If you don't own any blue Hessian you can dye some with ink.

Close up of washi tape


Decorate the card with some flowers and shells

Finish with a sentiment

Thank you for visiting


Sunday, 26 March 2017

Shabby Chic Sewing Card With Oak House Studio Stamps

Hi all

I have a shabby chic card to share with you using bits from my stash. I started going through my stash and just making the odd extra project here and there for the blog. It is nice to just play about and create something with out rules.


I used digital papers from the Gecko Galz for the paper layers. I then cut some burlap and material and layered it up.


I added stitching and i cut out the button card from the Madam Payrud's paper pack i had lying around. I sewed the buttons into place and adhered the whole thing to the card base.


I added more faux stitching using the A Stitch In Time stamp set. Unfortunately Oak House Studio are closing so they will be dearly missed. 


Thank you for visiting
Please feel free to leave links to your blogs or pages in the comments. I always love seeing what you create.


Thursday, 23 March 2017

Sin City Stamps Blog Hop Day of The Dead

Hello crafty friends

It is our first Sin City Stamps blog hop and we are focusing on the Day of the Dead stamps.

The premise of this blog hop is for you to meet our in house Inspiration team members along with a few guest members, discover more ways to create with these stamps and possibly win a set for yourself!

No matter where you have started, To qualify to win your own Day of the Dead Sugar Skulls stamp set, (we are giving away 3!) we ask that you visit each of the blogs participating, leave a nice comment and then come back to the Sin City Blog and let us know which blog projects you liked the most and why. 

The blog hop will end on the 27th and the 3 winners will be announced on the Sin City blog and on our FB Fan Group on March 28th. 

Blog Hop Participants:

No matter where you have started, To qualify to win your own Day of the Dead Sugar Skulls stamp set, (we are giving away 3!) we ask that you visit each of the blogs participating, leave a nice comment and then come back to the Sin City Blog and let us know which blog projects you liked the most and why. 
The blog hop will end on the 27th and the 3 winners will be announced on the Sin City blog and on our FB Fan Group on March 28th. 

Blog Hop Participants:


Main- Sin City Stamps http://sincity-stamps.blogspot.com/2017/03/day-of-dead-sugar-skull-stamps-blog-hop.html

 Michelle Frae Cummings http://faeriedustdreams-michelle.blogspot.com/2017/03/sugar-skull-day-of-dead-blog-hop.html 

Chris Olson Pozzi http://ole682000.blogspot.com/2017/03/sin-city-stamps-blog-hop-day-of-dead.html

Irit Shalom http://iritshalom.blogspot.com/2017/03/day-of-dead-sugar-sculls-blog-hop-with.html

Shilpa Nagaonkar http://nagaonkarshilpa.blogspot.com/2017/03/blog-hop-with-sincity-stamps.html

Sharon Rogers http://sharonshowcase.blogspot.com/2017/03/sin-city-stamps-sugar-skull-blog-hop.html

Jenn Gary DuBell http://yvonnebijouxcrafts.blogspot.com/2017/03/welcome-to-sin-city-stamps-blog-hop-we.html 

Monique van Dijk http://phoebekattebeest.blogspot.com/2017/03/sincity-sugar-skull-bloghop.html

Adam Karle http://sincity-stamps.blogspot.com/2017/03/sugar-sugar.html 

Kim Johnny http://tangledbluerose.blogspot.com/2017/03/sin-city-stamps-sugar-skull-blog-hop.html

Granne http://aavamaki.blogspot.com/.../sin-city-blog-hop-sugar

Anne http://dreamindarkness.blogspot.com/2017/03/bouncing-skulls.html


WINNERS HAVE BEEN ANNOUNCED


Products used 
Andy Skinner Stencil Bubbles
DecoArt Media Mister Shimmer Yellow
Tim  holtz Mixed Media Die Set
Crafters Acrylic Gold, Orange and Yellow


How to

1) Using a Gelli plate add a few blobs of Orange, Yellow and Red acrylic paint to the surface and blend with a brayer tool.

2) Place the blank tag onto the paint and pat down on it to transfer the paint.

3) Using a stencil mask apply crackle paste over the tag.

4) Spritz over the top with yellow misting ink

5) Stamp out the sugar skull and flowers onto white card and colour them in.

6) Cut out the skull and flowers and position onto the tag before gluing down.

7)  Add enamel dots to the flower centres.

8) Add some ric rac to the top of the tag to finish.

Tuesday, 21 March 2017

The Robin's Nest Nautical Wreath Tutorial

Hi all

I have a nautical wreath to share using card stock from The Robins Nest. You can find all the products here http://www.shop.robinsnest-scrap.net/


Products used


I painted a 8x8 mdf circle with white gesso and then light blue paint. I added crackle medium as the next layer and then i painted it over the top with dark blue to create the worn look.


I created several rosettes using a die cut and glued them around the base. I then stuck shells and flowers in between the rosettes.


I cut a strip of hessian and dyed it blue with spritzing ink and once it had dried i tied it into a bow.


The centre piece was painted with texture paste and then light blue paint. I wrapped blue jute around the anchor and glued tiny shells to the edge.


I finished off the wreath by adding tiny starfish and pearls.

Thursday, 16 March 2017

Sin City Stamps The Butterfly Garden Scrapbook Page


                                                                                 Hi all

I have a new scrapbook page to share using Sin City Stamps. The full tutorial is available on the team blog which you can find here http://sincity-stamps.blogspot.co.uk/2017/03/the-butterfly-garden-scrapbook-page.html?spref=fb&m=1


Thank you for visiting

Tuesday, 7 March 2017

Mischief Circus Introducing The Renew Kit by Marta Van Eck

Hello crafty friends

Today i am introducing the latest kit by Marta Van Eck for Mischief Circus. It is called Renew and is bright with gorgeous textures. You can find the kit here http://www.mischiefcircus.com/shop/manufacturers.php?manufacturerid=25


Products used

Simon Days Butterfly die
Mini Stencil Tando Creative
Clearly Besotted Word Die Hello
Dovecraft Cutting Die  Butterfly
Papermania Twine

How to make

1) Cover a  6 X 6 square card blank with the Renew patterned paper.  

2) Add a stencil to the base

3) Using the banner die set, cut out the largest shape and the one a bit smaller and glue to top of card.

4 Take a length of twine and fix the end to the back of the card with tape. Wrap around the top of the card.

5)  Cut out a large butterfly from the patterned paper and glue to corner and glue a resin flower to the middle.

6) Cut out a small butterfly and cut in half. Adhere inside the small banner and finish with a sentiment.

Thank you for visiting 


How To Create A Cute Button Easter Card With Whisker Graphics

 Hello crafty friends

I have a new tutorial showing you how to create this easy button card.


Products used

Papermania Button Pack Pastels
Xcut Egg Nesting Die
Fiskars Boarder Punch Lace
 First Edition Pretty Poesy 6x6 Paper Pad


1) Cut out the egg shape from cream card stock.


2) Glue Green Apple Divine Twine around the edges.


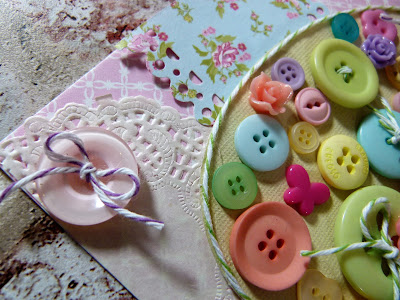
3) Thread twine through the button holes.


4) Tie some small bows from the twine and adhere to buttons.


5) Glue a mixture of buttons and resin charms inside the egg. 
Fill as many gaps as you can.


6) Adhere a sheet of 6 x6 paper to a square card blank.
7)  Cut on of the 6x6 sheets in to half and use a boarder punch to create a frilly edge.
8) cut a small doily into half and adhere to the top and bottom corner of card.


9) Finish off with a few buttons and a sentiment.


Thank you for visiting.